HOCO RCS (H) Mobile App Guide
The HOCO RCS (H) mobile app gives you everything you need to browse housing layouts, join societies, book plots, and manage your account — right from your phone.
Available on:
- Android: Google Play Store
- iOS: Apple App Store
Search for "HOCO RCS (H)" or "HOCO RCS Housing".
Getting Started
Installing the App
- Open the Play Store (Android) or App Store (iOS)
- Search for HOCO RCS (H)
- Tap Install / Get
- Open the app once installed
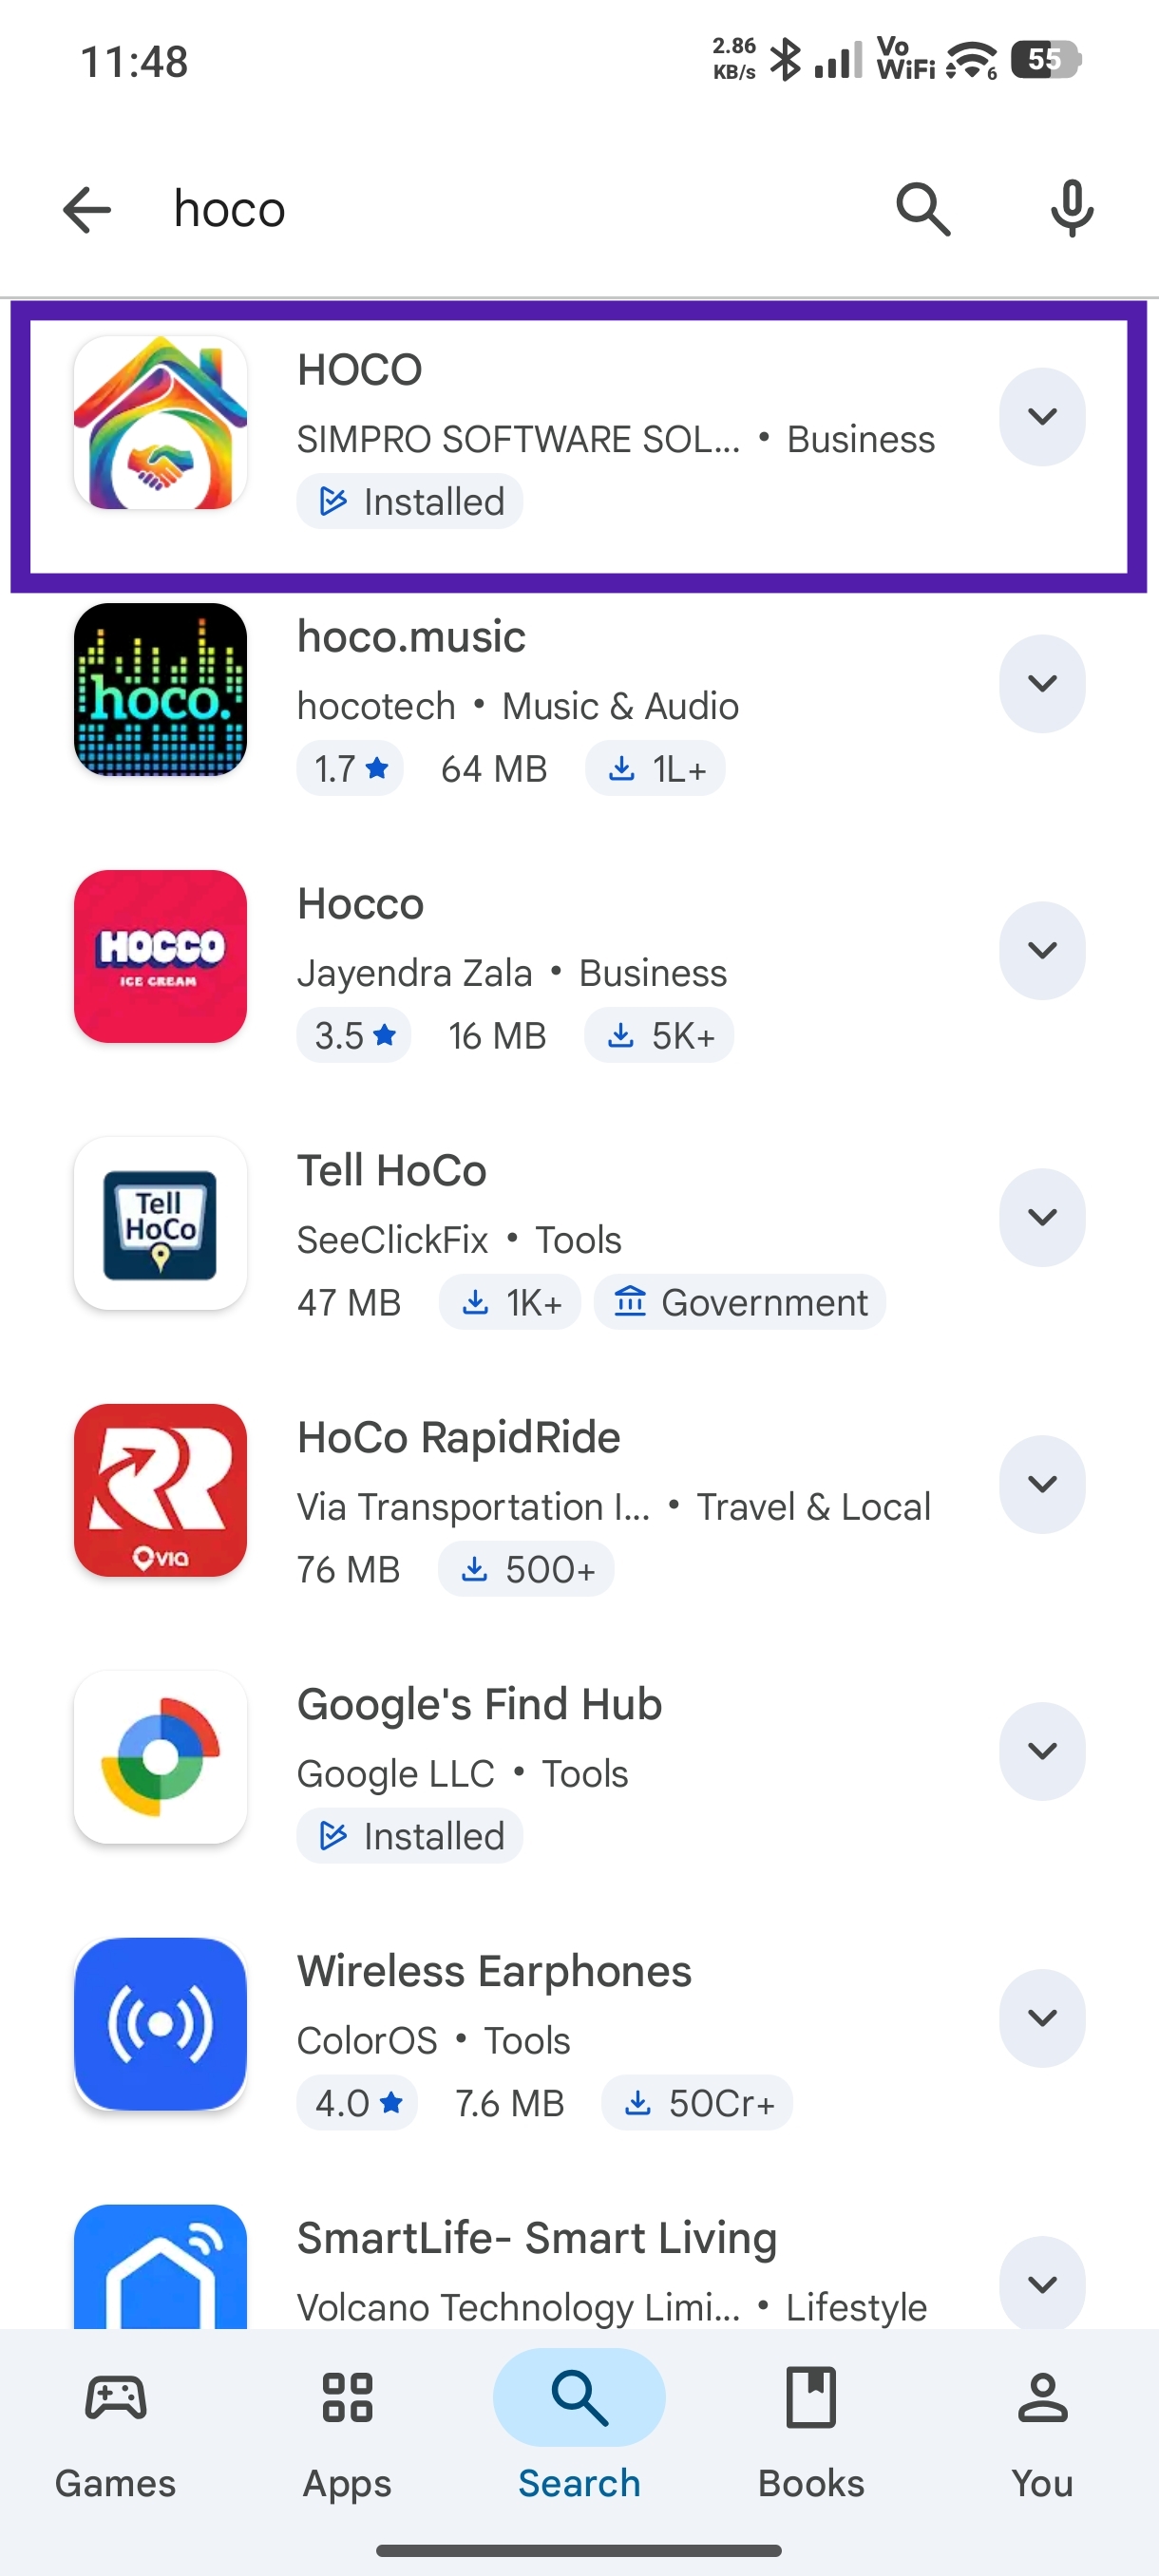
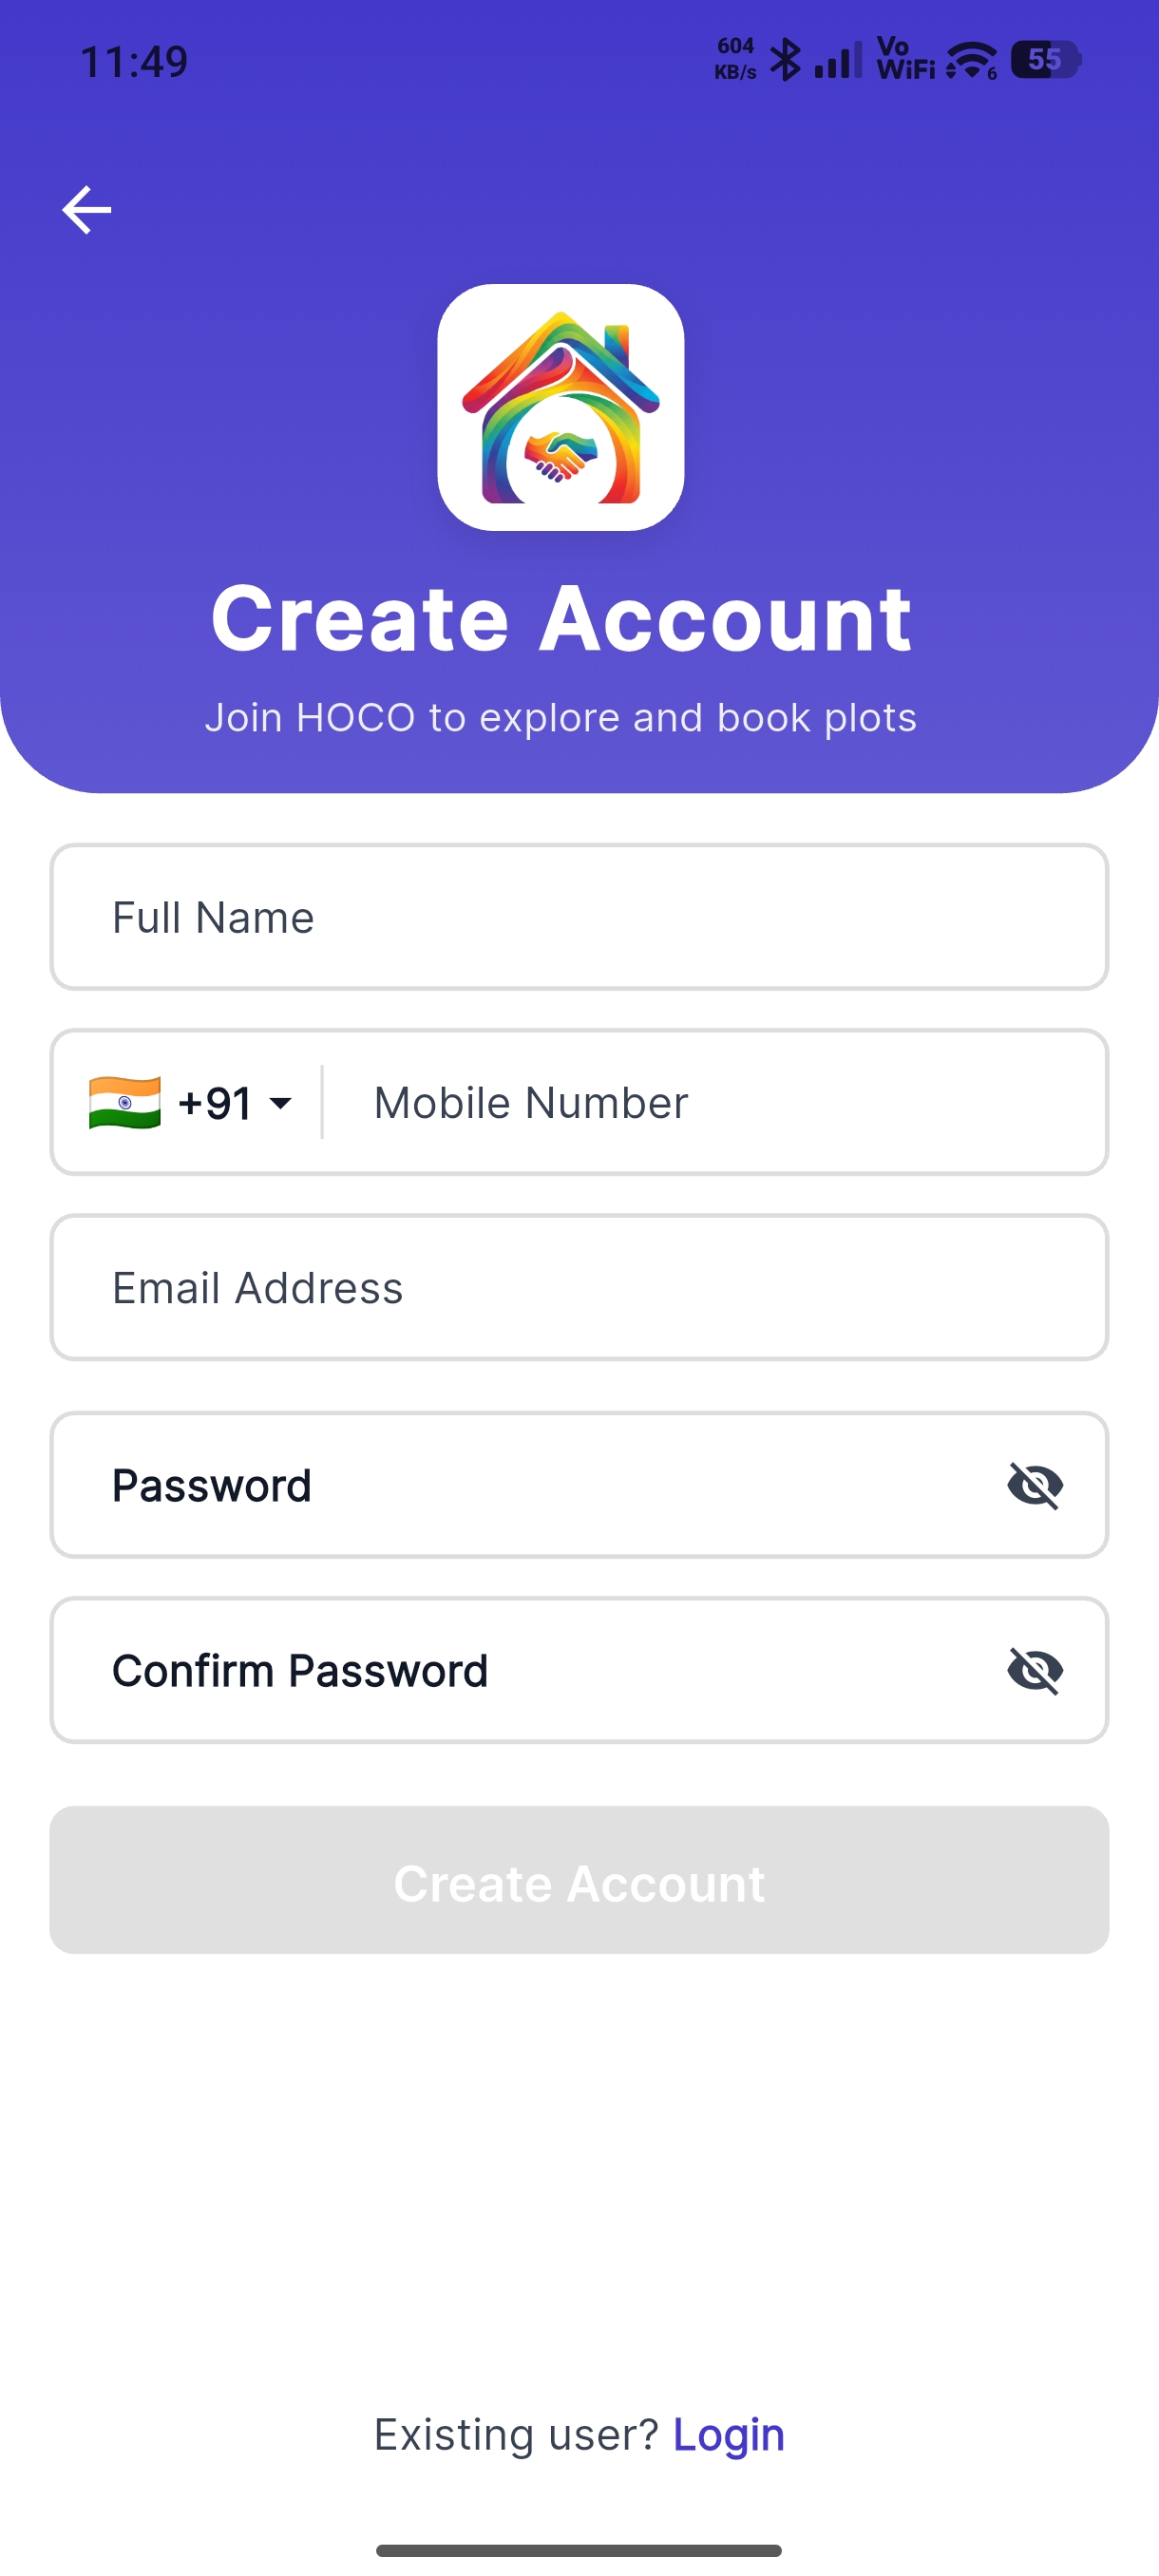
Signing Up
- Tap Register on the login screen
- Enter your details:
- Full name (as per Aadhaar)
- Email address
- Mobile number
- Password (minimum 6 characters)
- Tap Create Account
- Enter the OTP sent to your email or mobile
- You're in!
Logging In
Two ways to log in:
With Password
- Enter your email or mobile number
- Enter your password
- Tap Login
Passwordless (OTP Only)
- Tap Login with OTP
- Enter your registered email or mobile number
- Enter the OTP sent to you
- You're logged in — no password needed
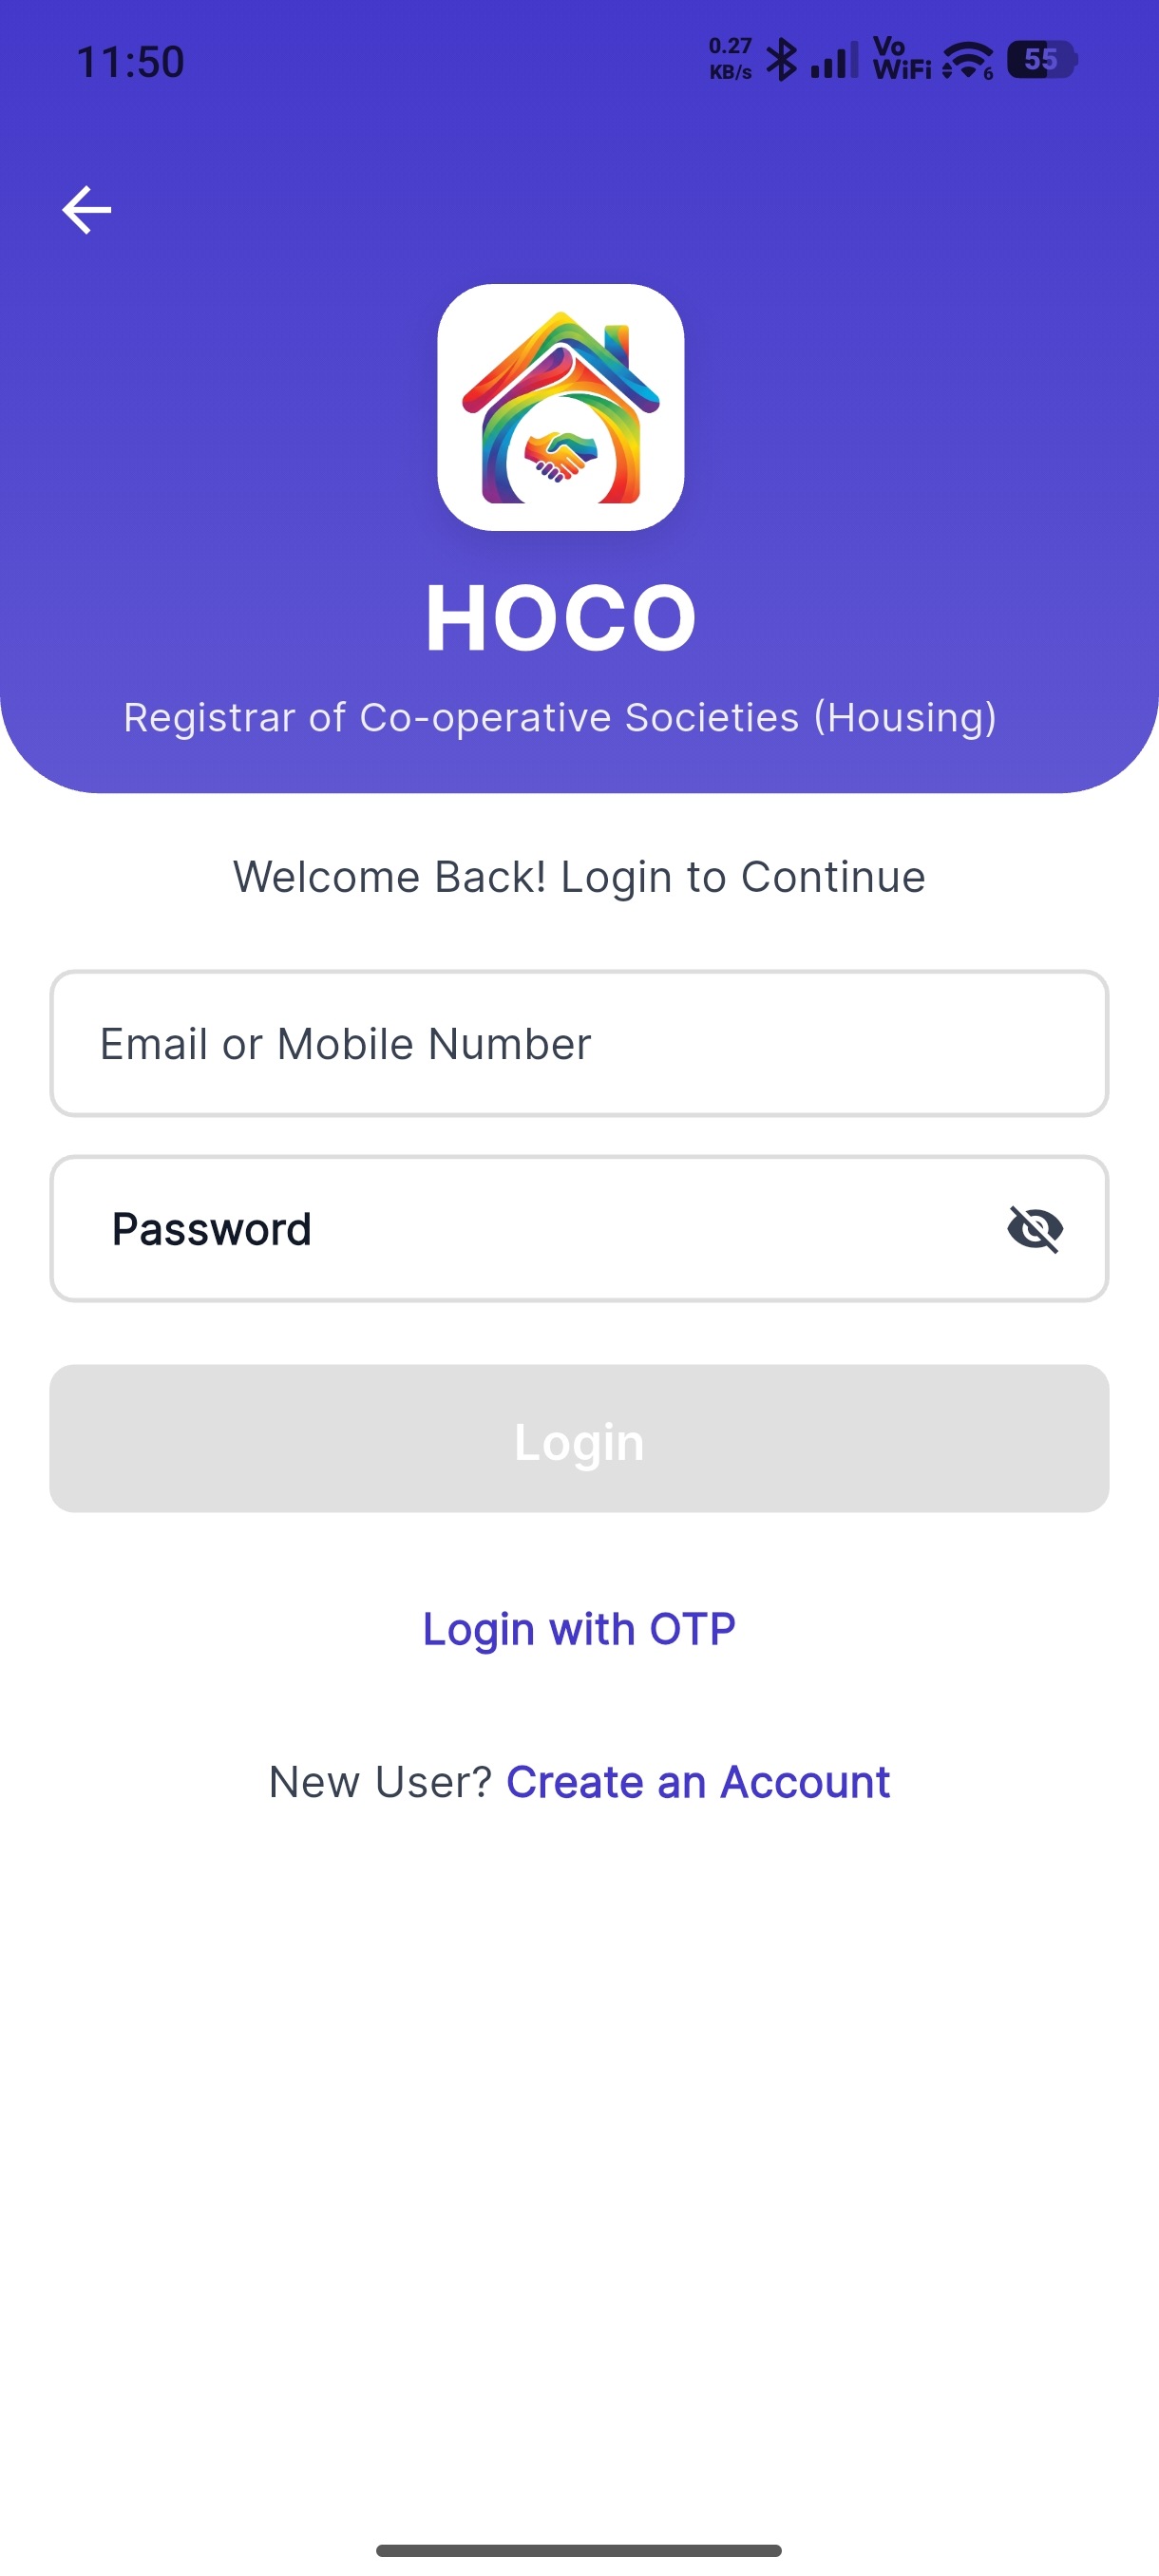
Passwordless login is a quick way to get in if you've forgotten your password.
Home Screen
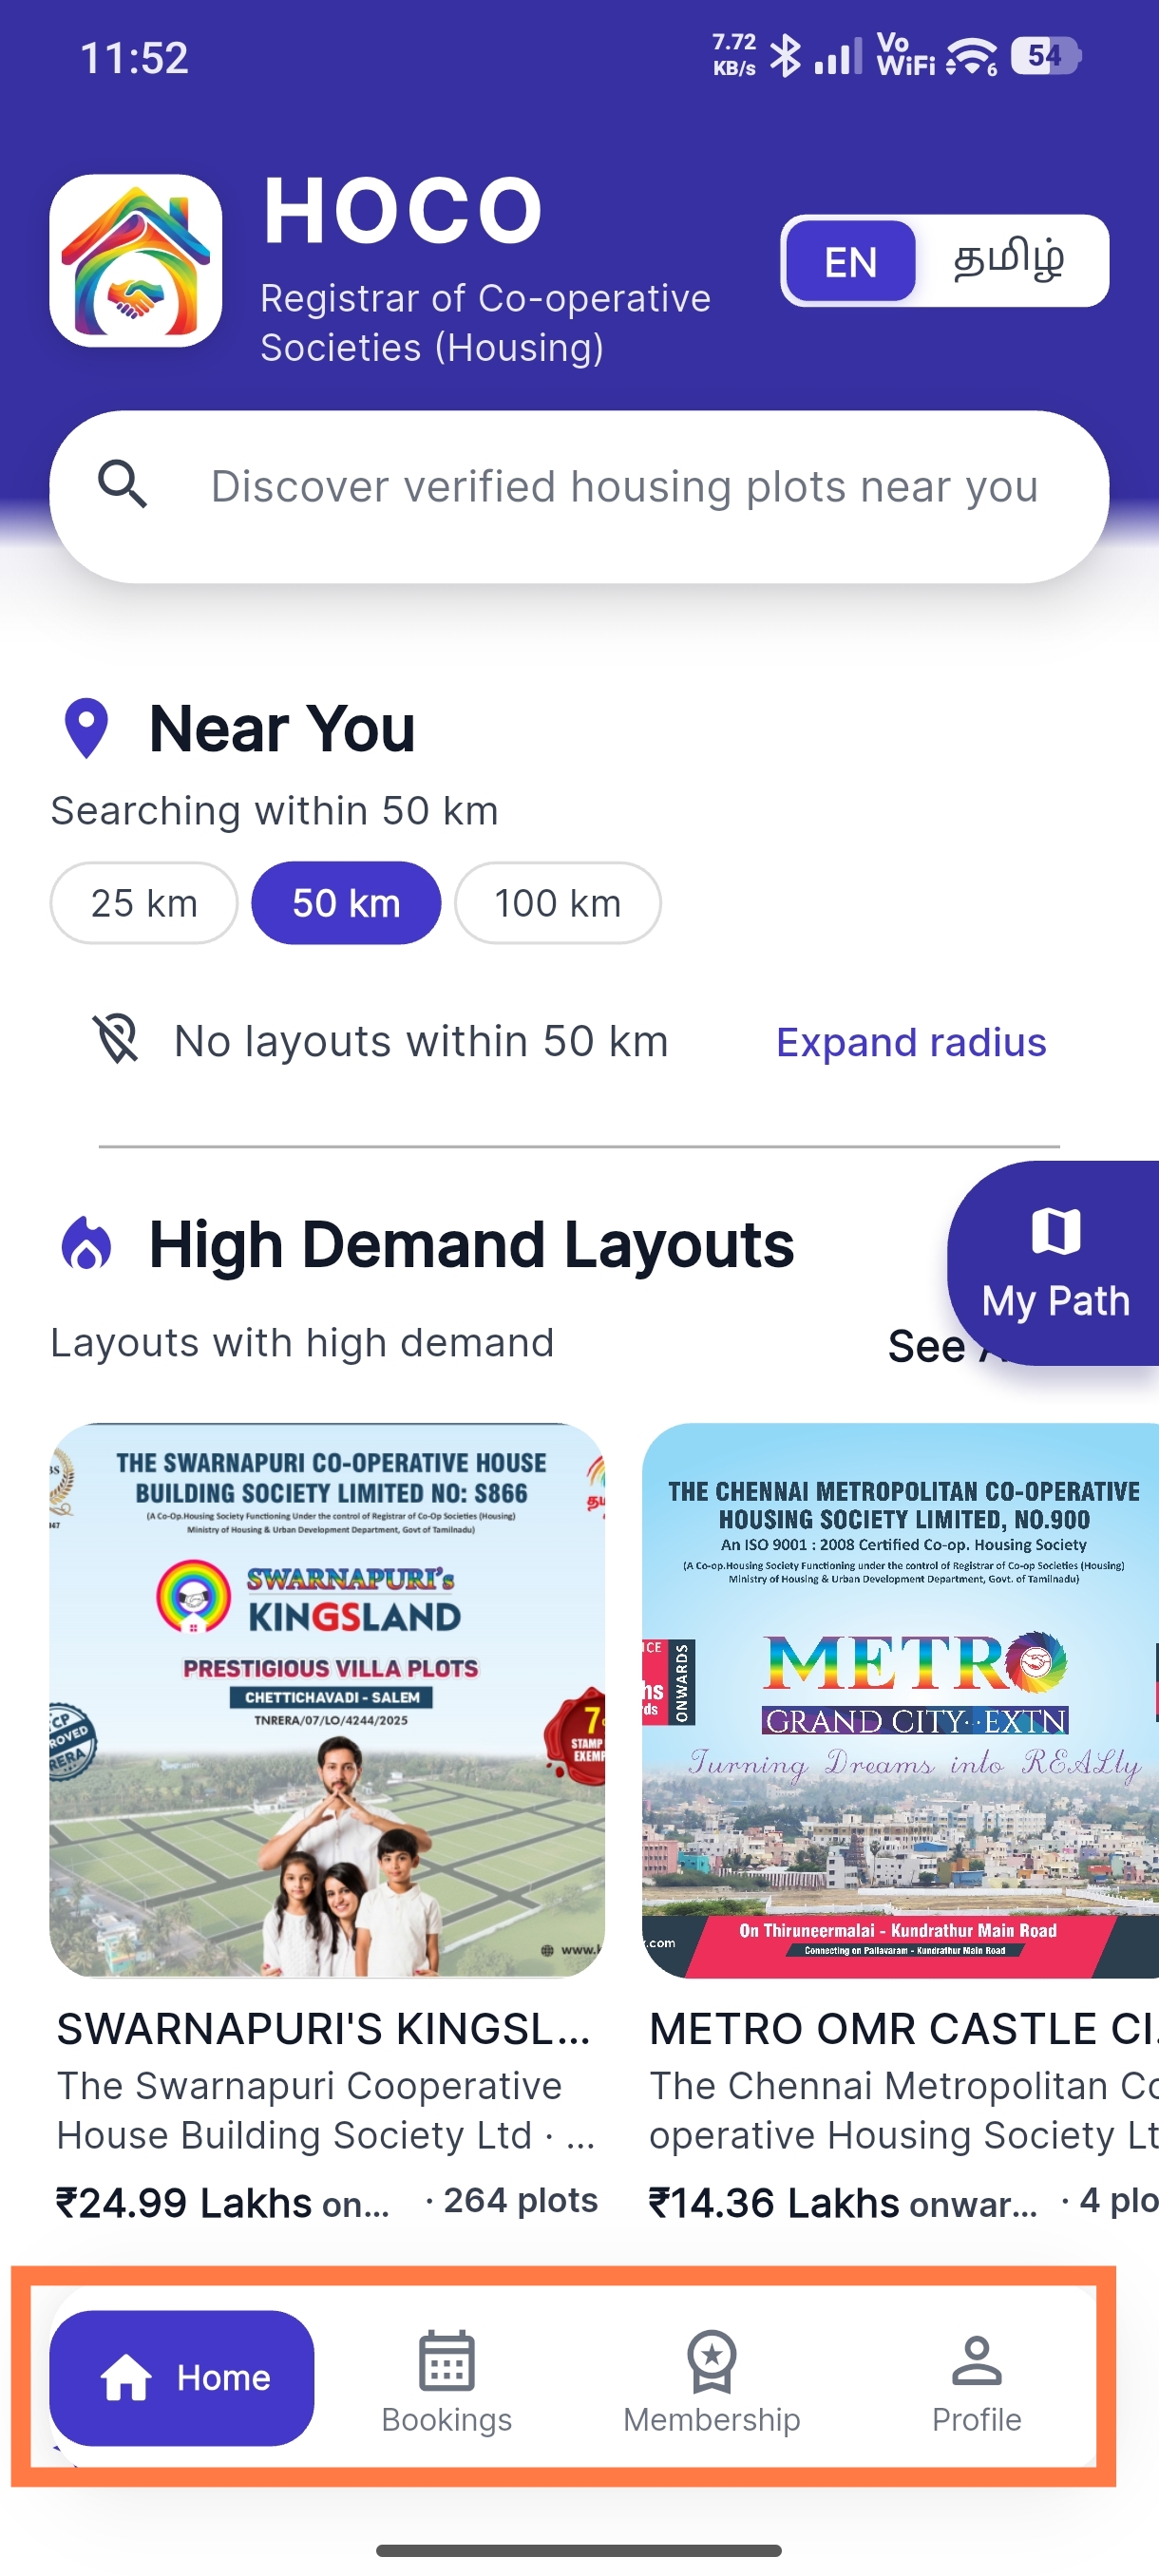
The home screen is your starting point for discovering properties across Tamil Nadu.
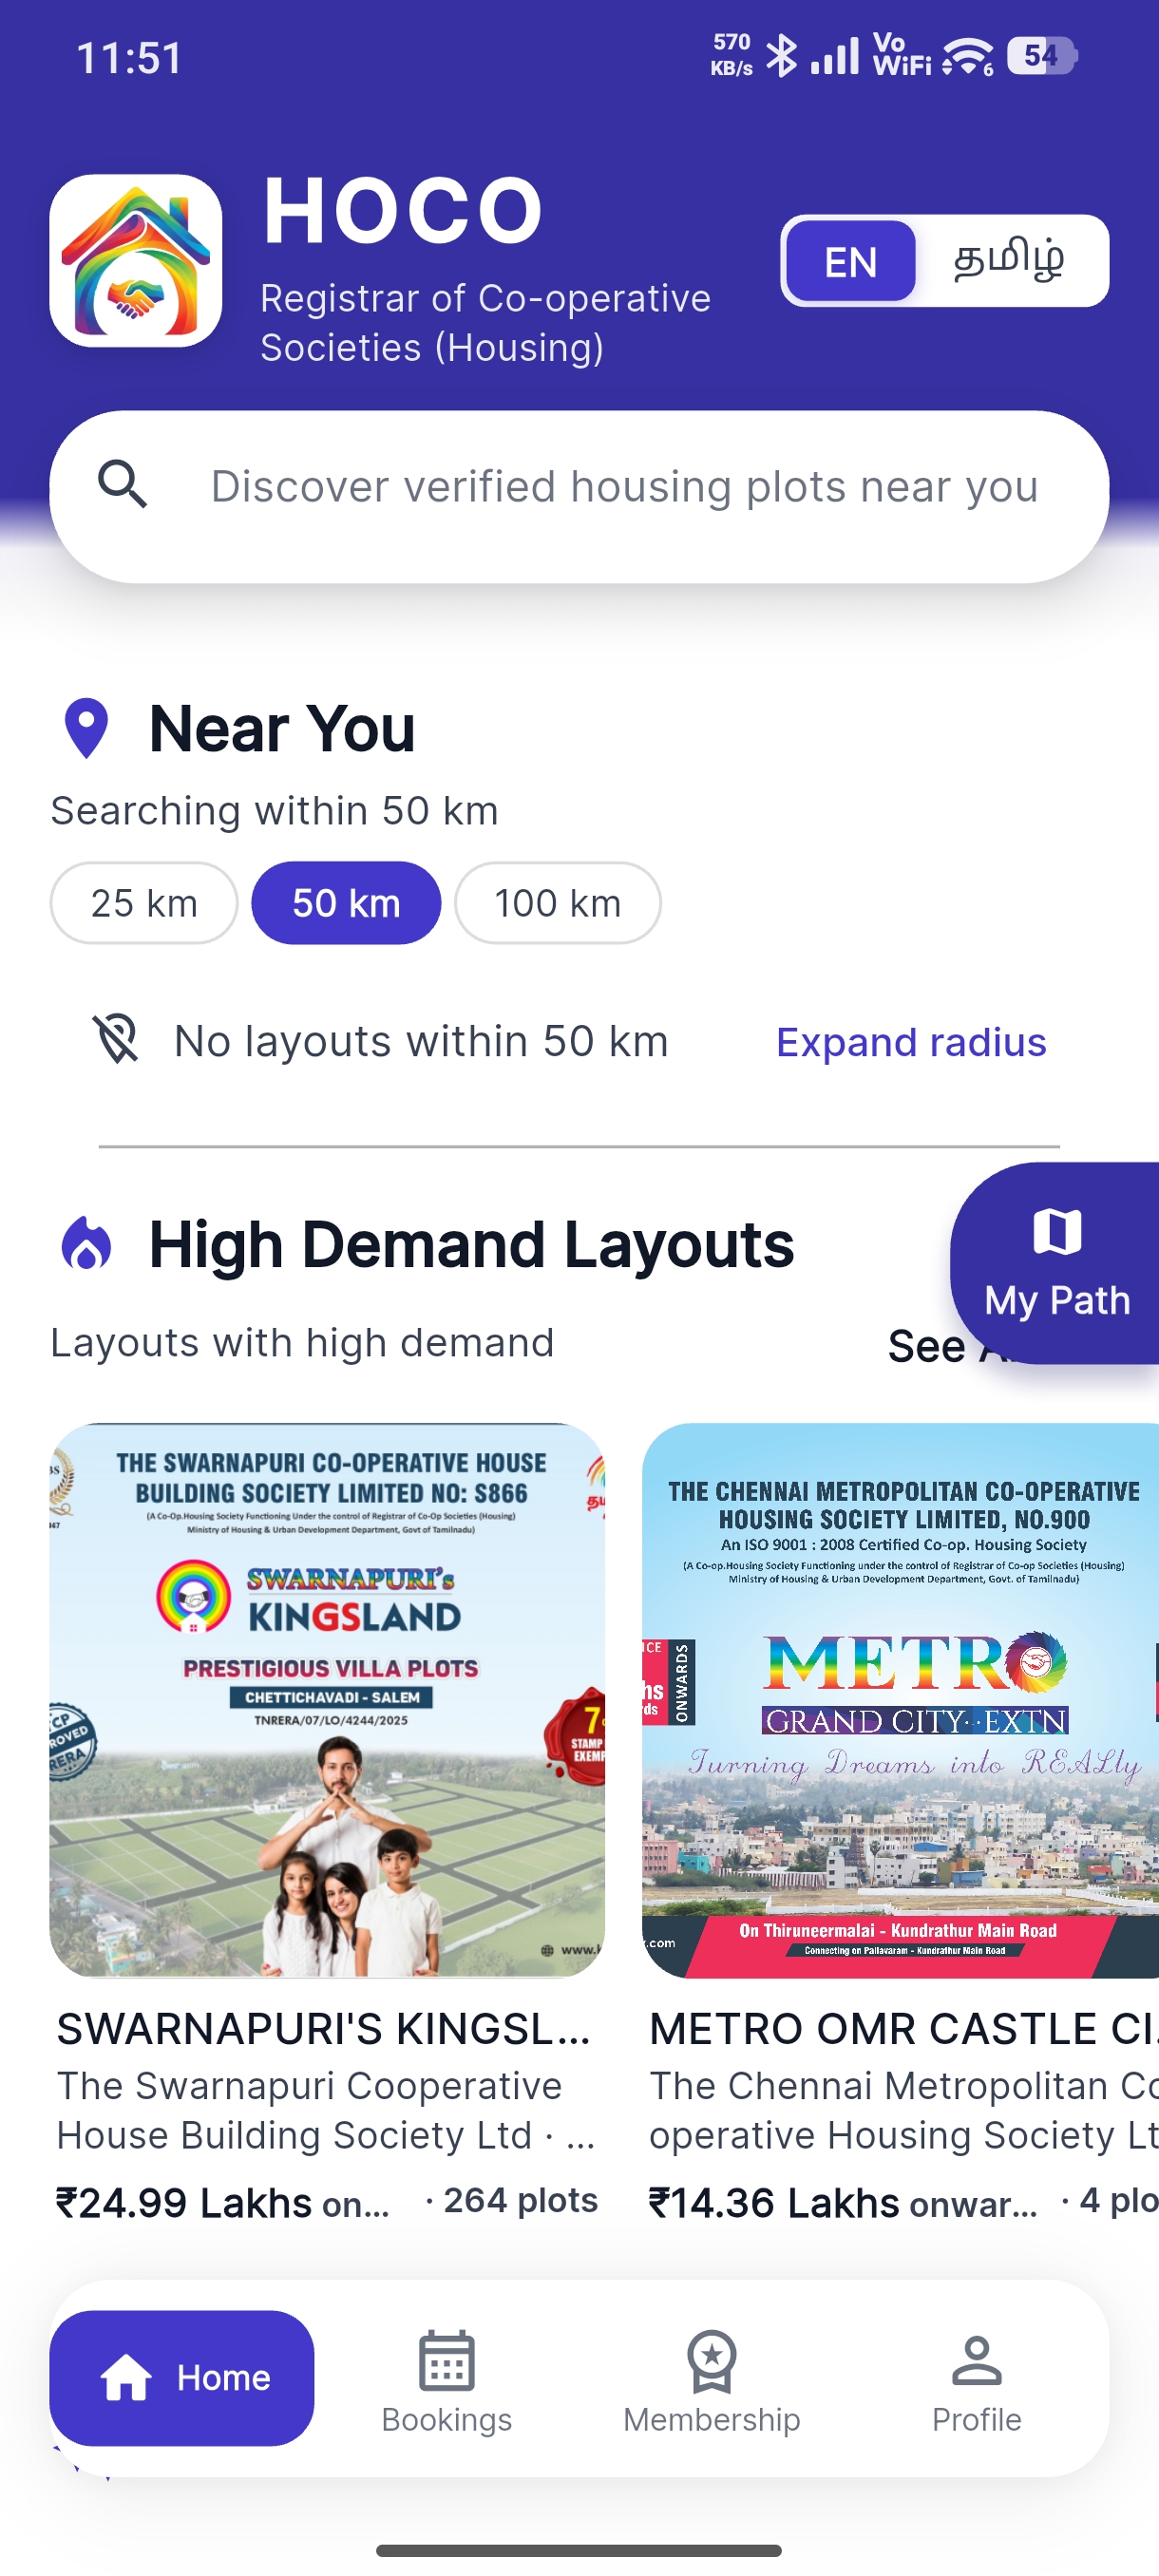
What You'll See
| Section | Description |
|---|---|
| Search Bar | Tap to search by location, society, or layout name |
| Nearby Layouts | Properties near your current location |
| Hot Selling | High-demand layouts with fast-moving plots |
| New Launches | Recently launched properties |
| Upcoming | Properties coming soon with expected launch dates |
| Announcements | Pinned updates from housing societies |
Bottom Navigation
The app has four main tabs at the bottom:
| Tab | Purpose |
|---|---|
| 🏠 Home | Browse & discover properties |
| 📋 Bookings | View your active and past bookings |
| 🏛️ Membership | Manage society memberships |
| 👤 Profile | Account settings and personal info |
Browsing & Searching Layouts
Quick Search
- Tap the search bar on the Home screen
- Type a district name, city, or society name
- Results appear as you type
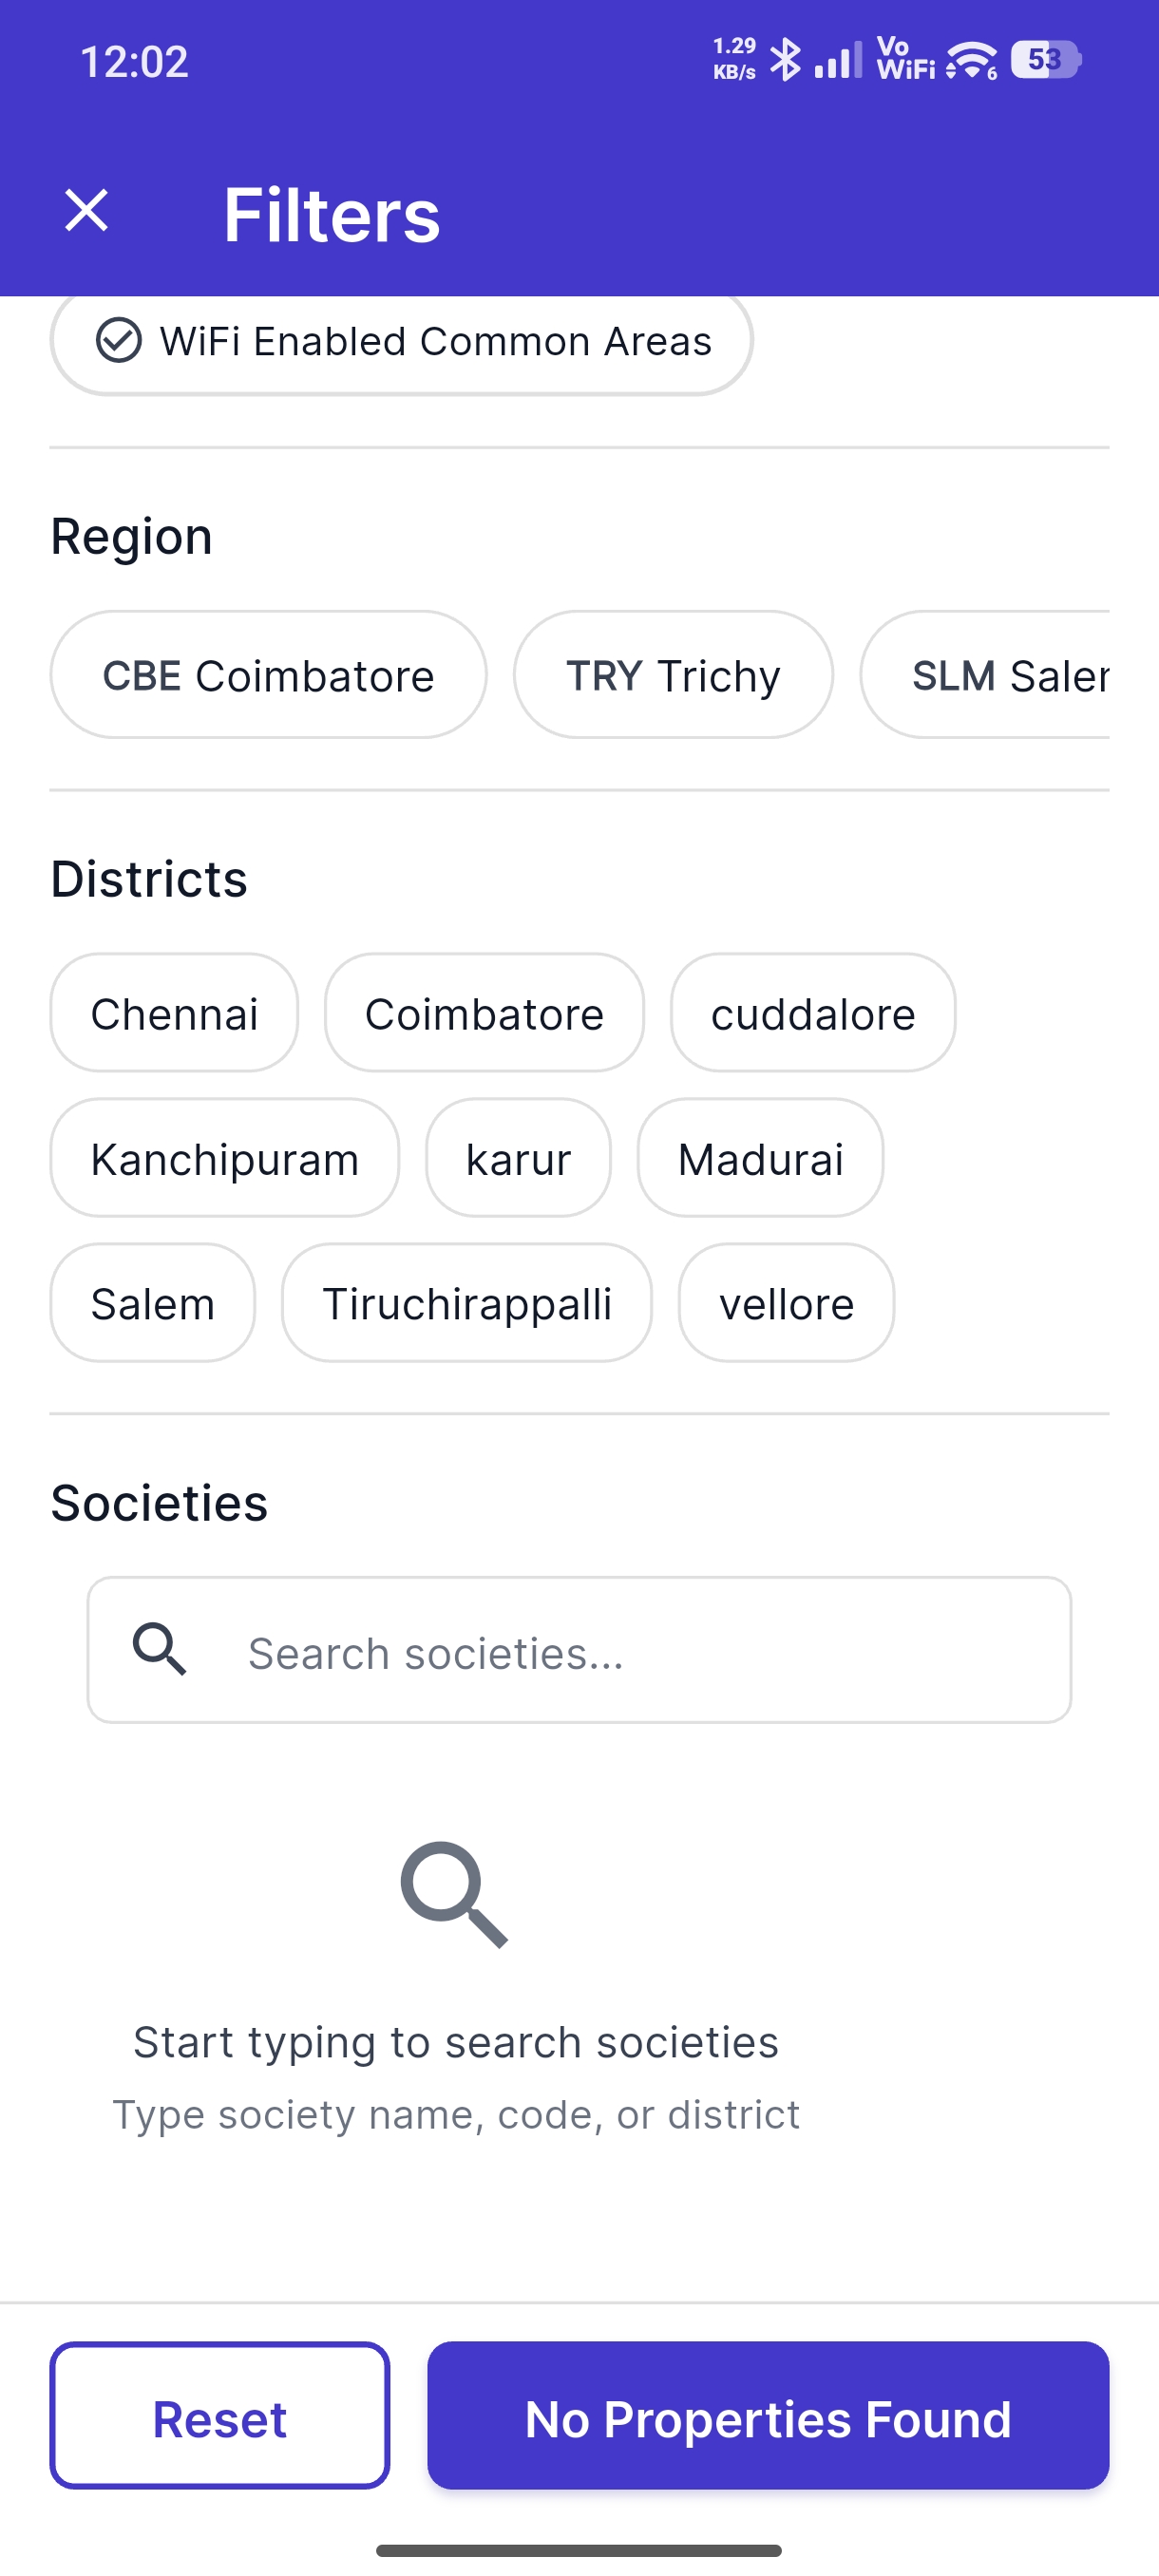
Advanced Filters
Tap the filter icon to narrow your search:
| Filter | Options |
|---|---|
| District | Select from Tamil Nadu districts |
| Price Range | Set your minimum and maximum budget |
| Area Range | Filter by plot size in sq.ft. |
| Amenities | Water, electricity, road access, parks, etc. |
Nearby Layouts
The app uses your location to show properties near you:
- Allow location permission when prompted
- Nearby layouts appear automatically on the Home screen
- Tap See All for the full nearby list
Layout Details
Tap any property card to view full details.
What's Included
- Image Gallery — Swipe through property photos
- Location — Address and map view
- Society Info — Name and details of the housing co-operative
- Pricing — Starting price per plot
- Availability — Number of plots available vs. total
- Amenities — Available facilities (water, roads, parks, etc.)
- Bank Details — Partner bank information for the society
KYC Verification
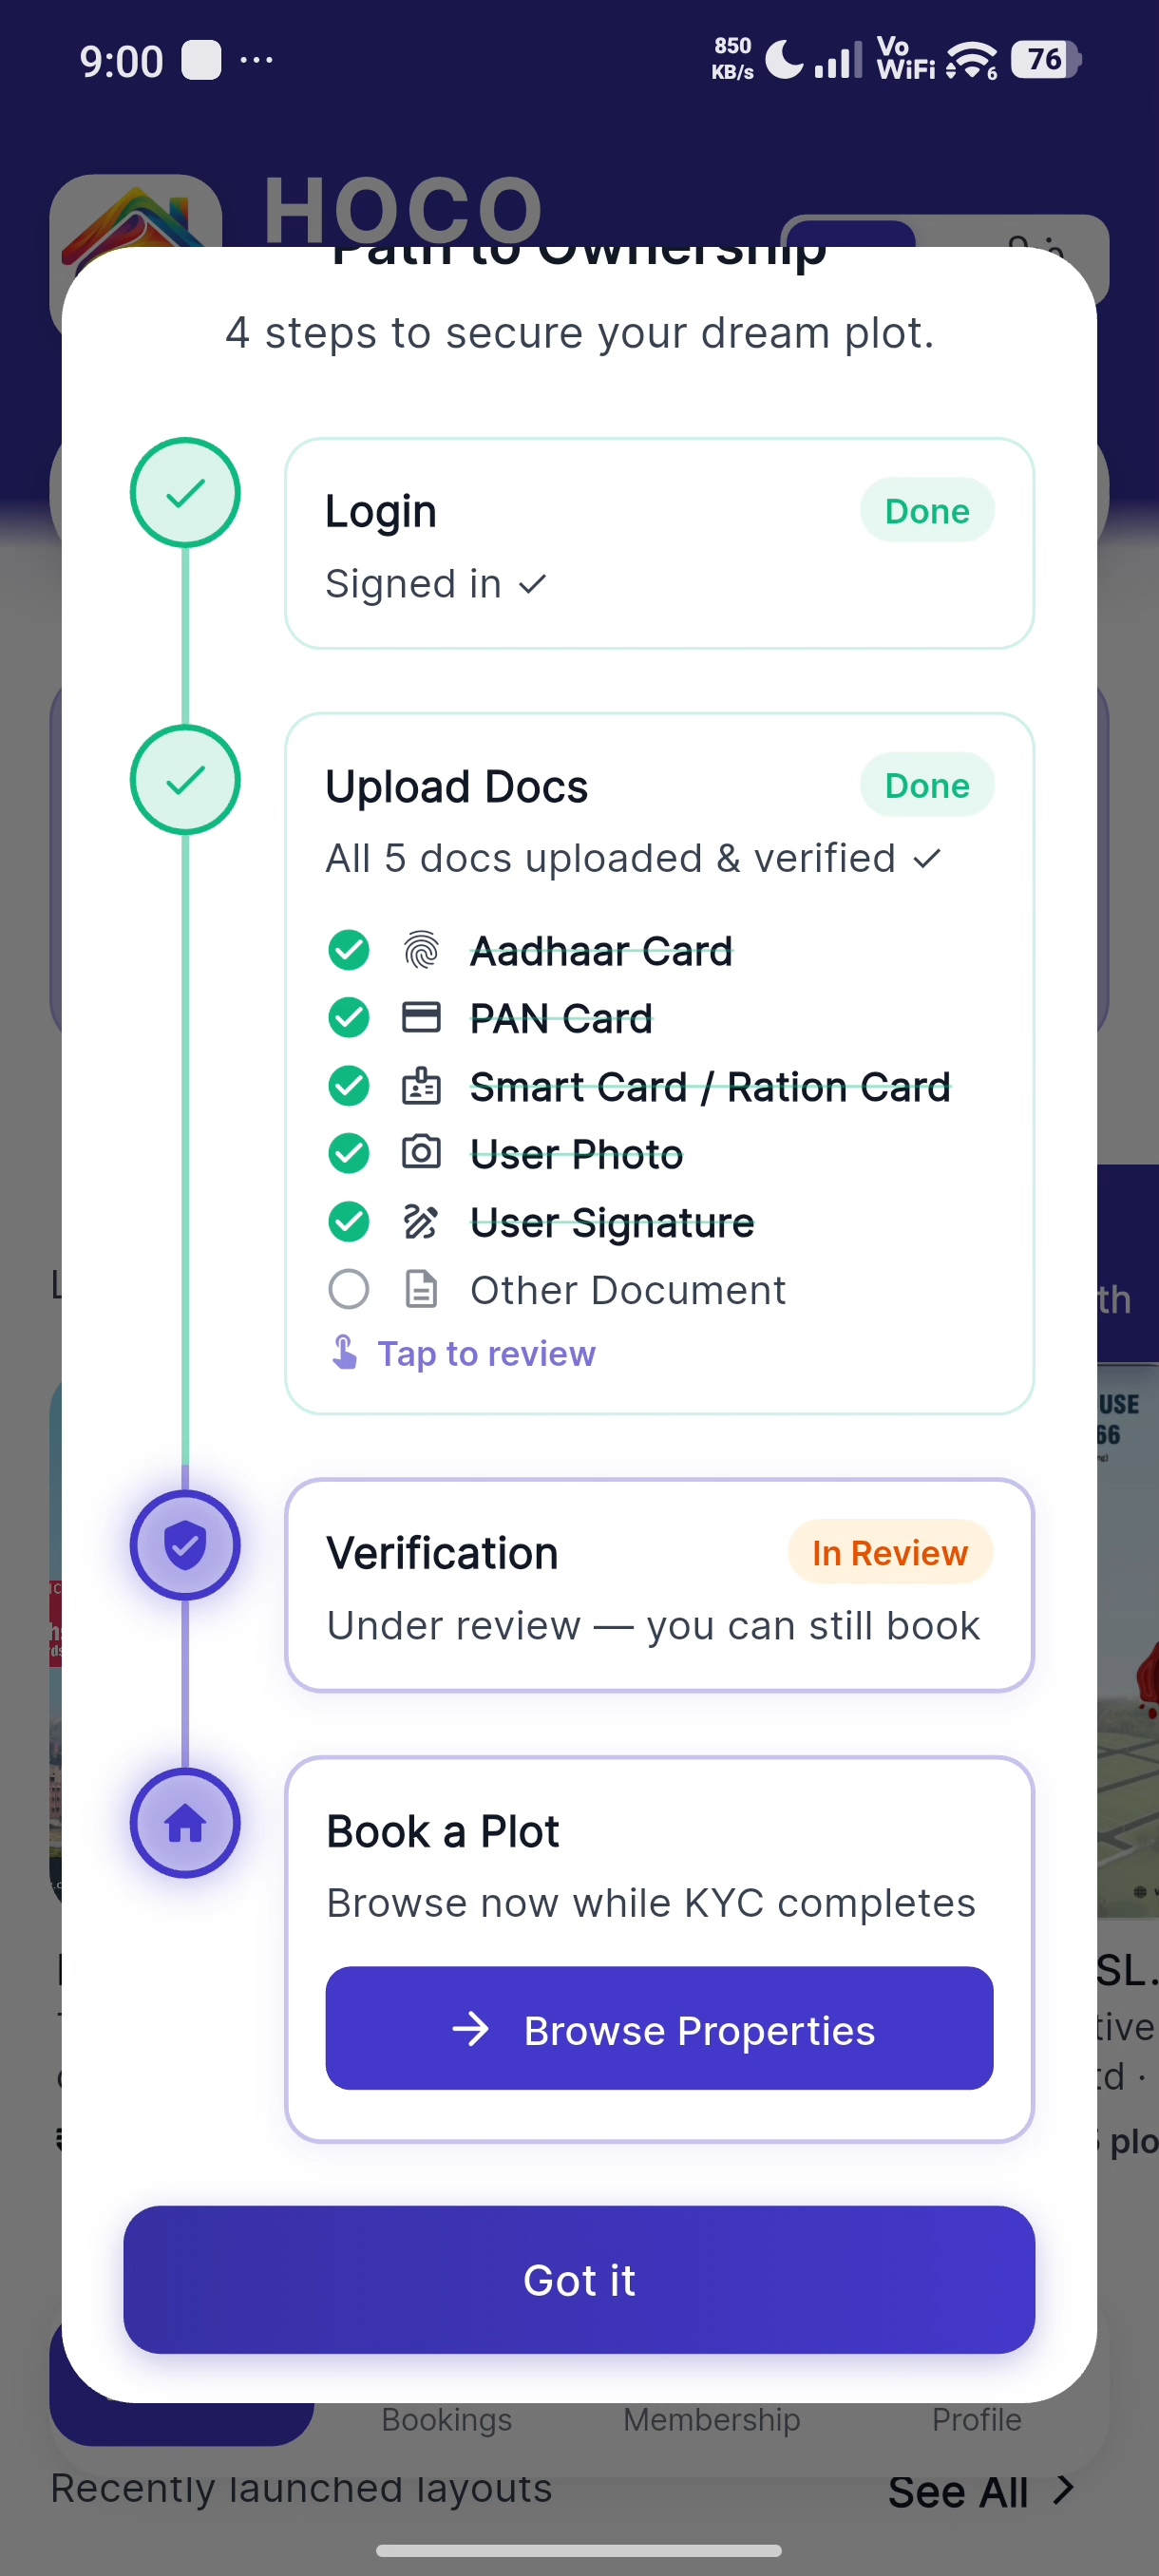
KYC (Know Your Customer) is required before you can book a plot. The app guides you through a simple 5-step process.
Required Documents
| Document | Details |
|---|---|
| Aadhaar Card | Front and back images |
| PAN Card | Clear image or scan |
| Smart Card | Society-issued smart card |
| Recent Photo | Clear, recent face photo |
| Digital Signature | Scanned signature image or PDF |
Step-by-Step Process
Step 1: KYC Prompt
After logging in, you'll be prompted to complete KYC. Tap Start KYC to begin.
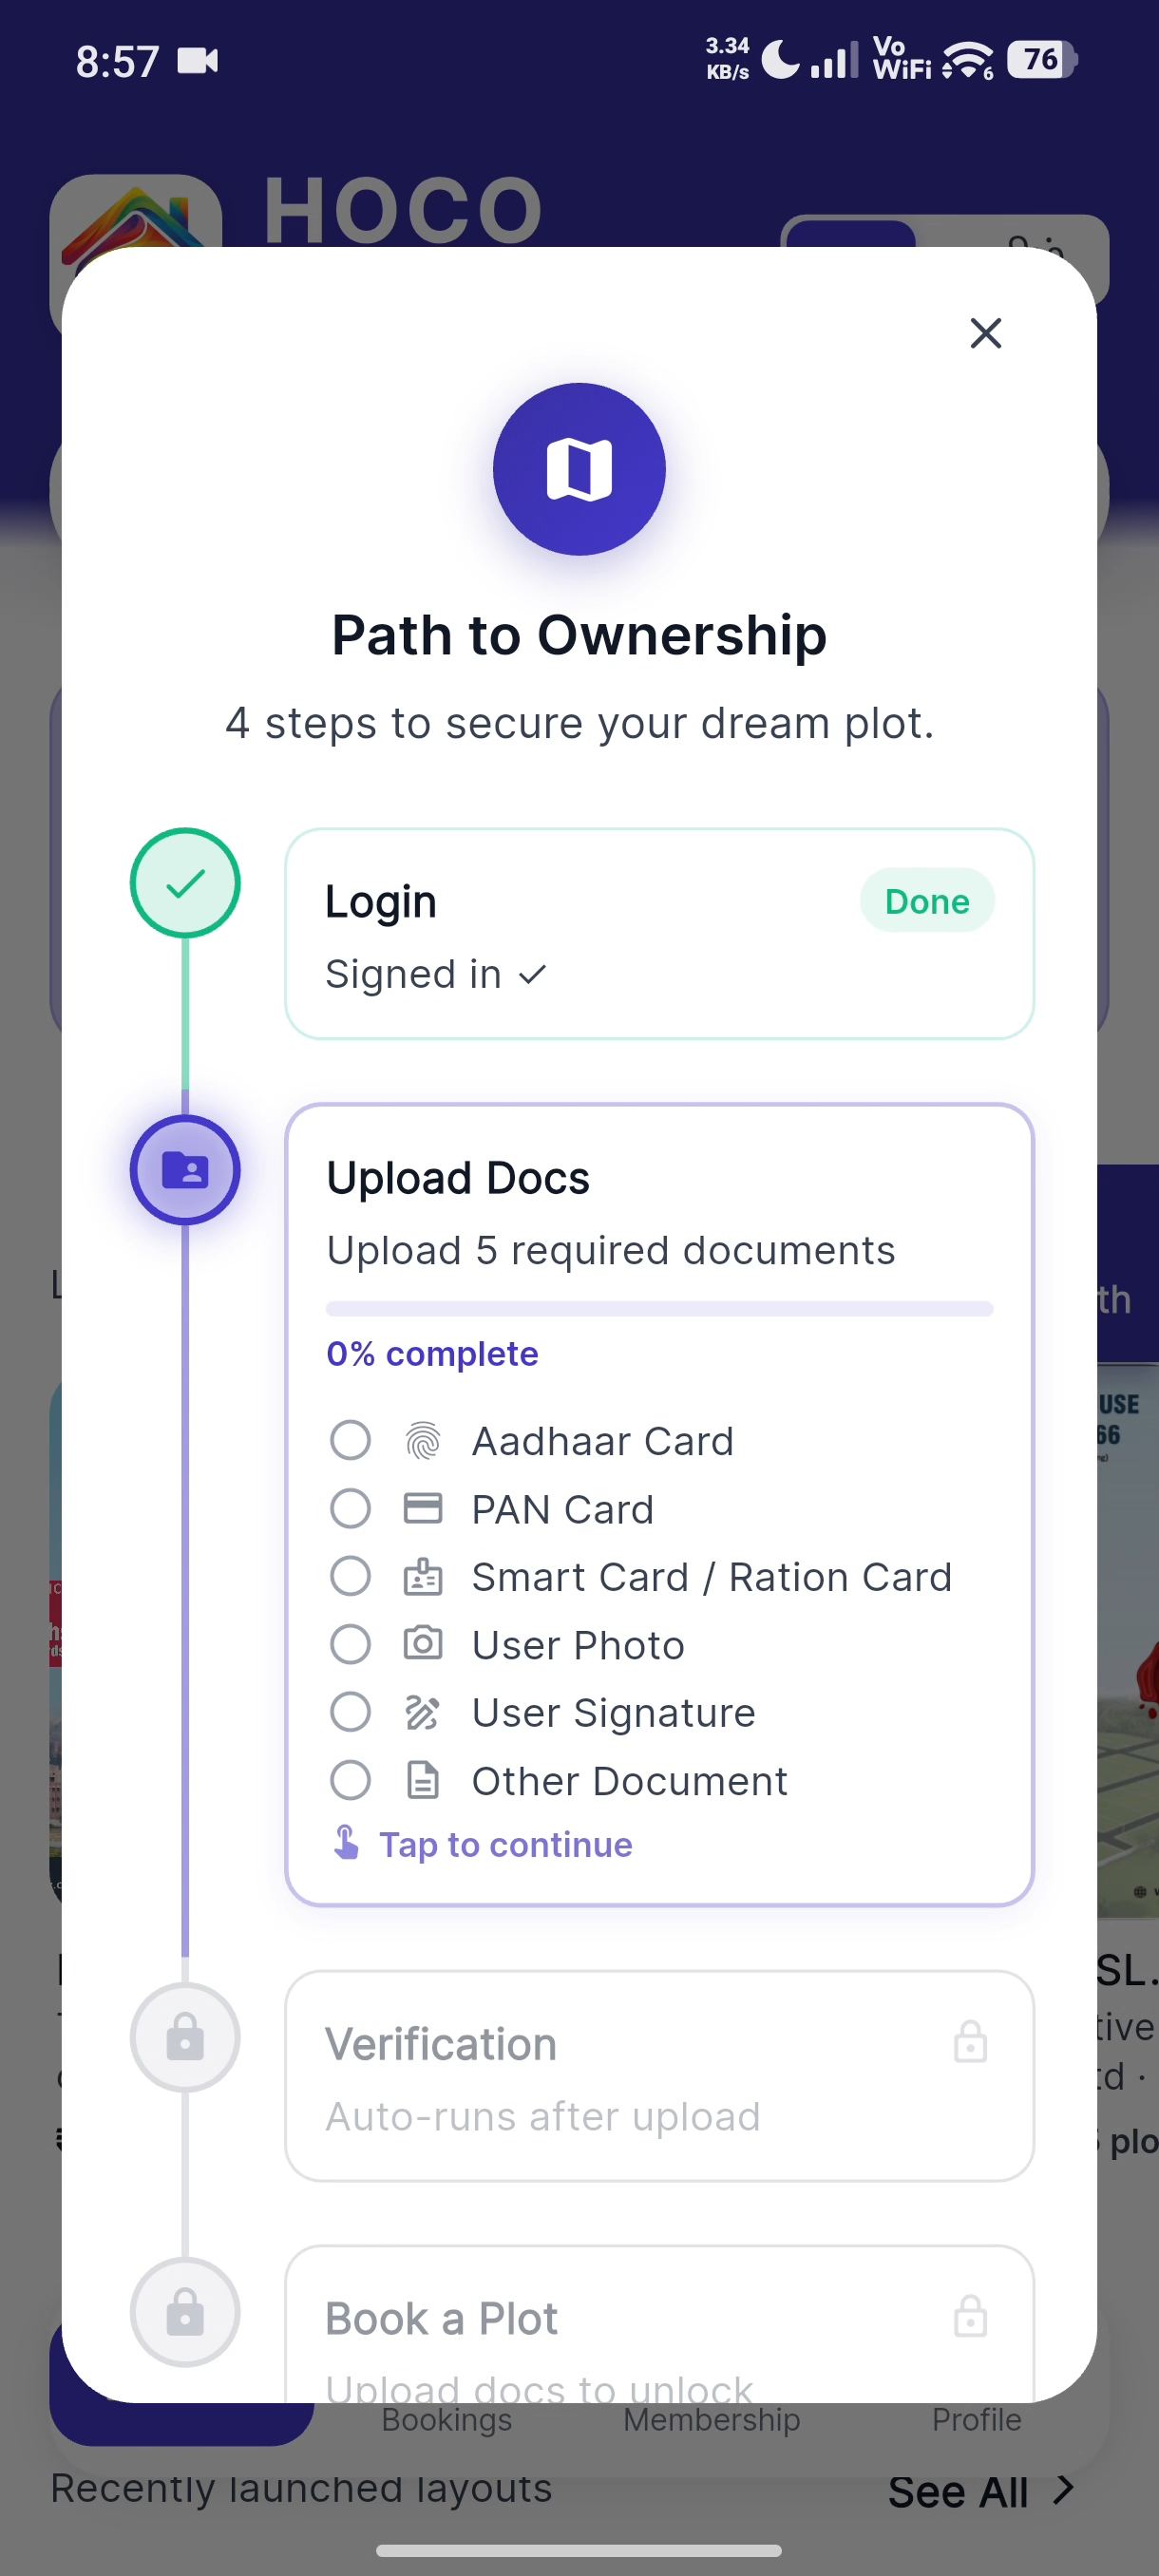
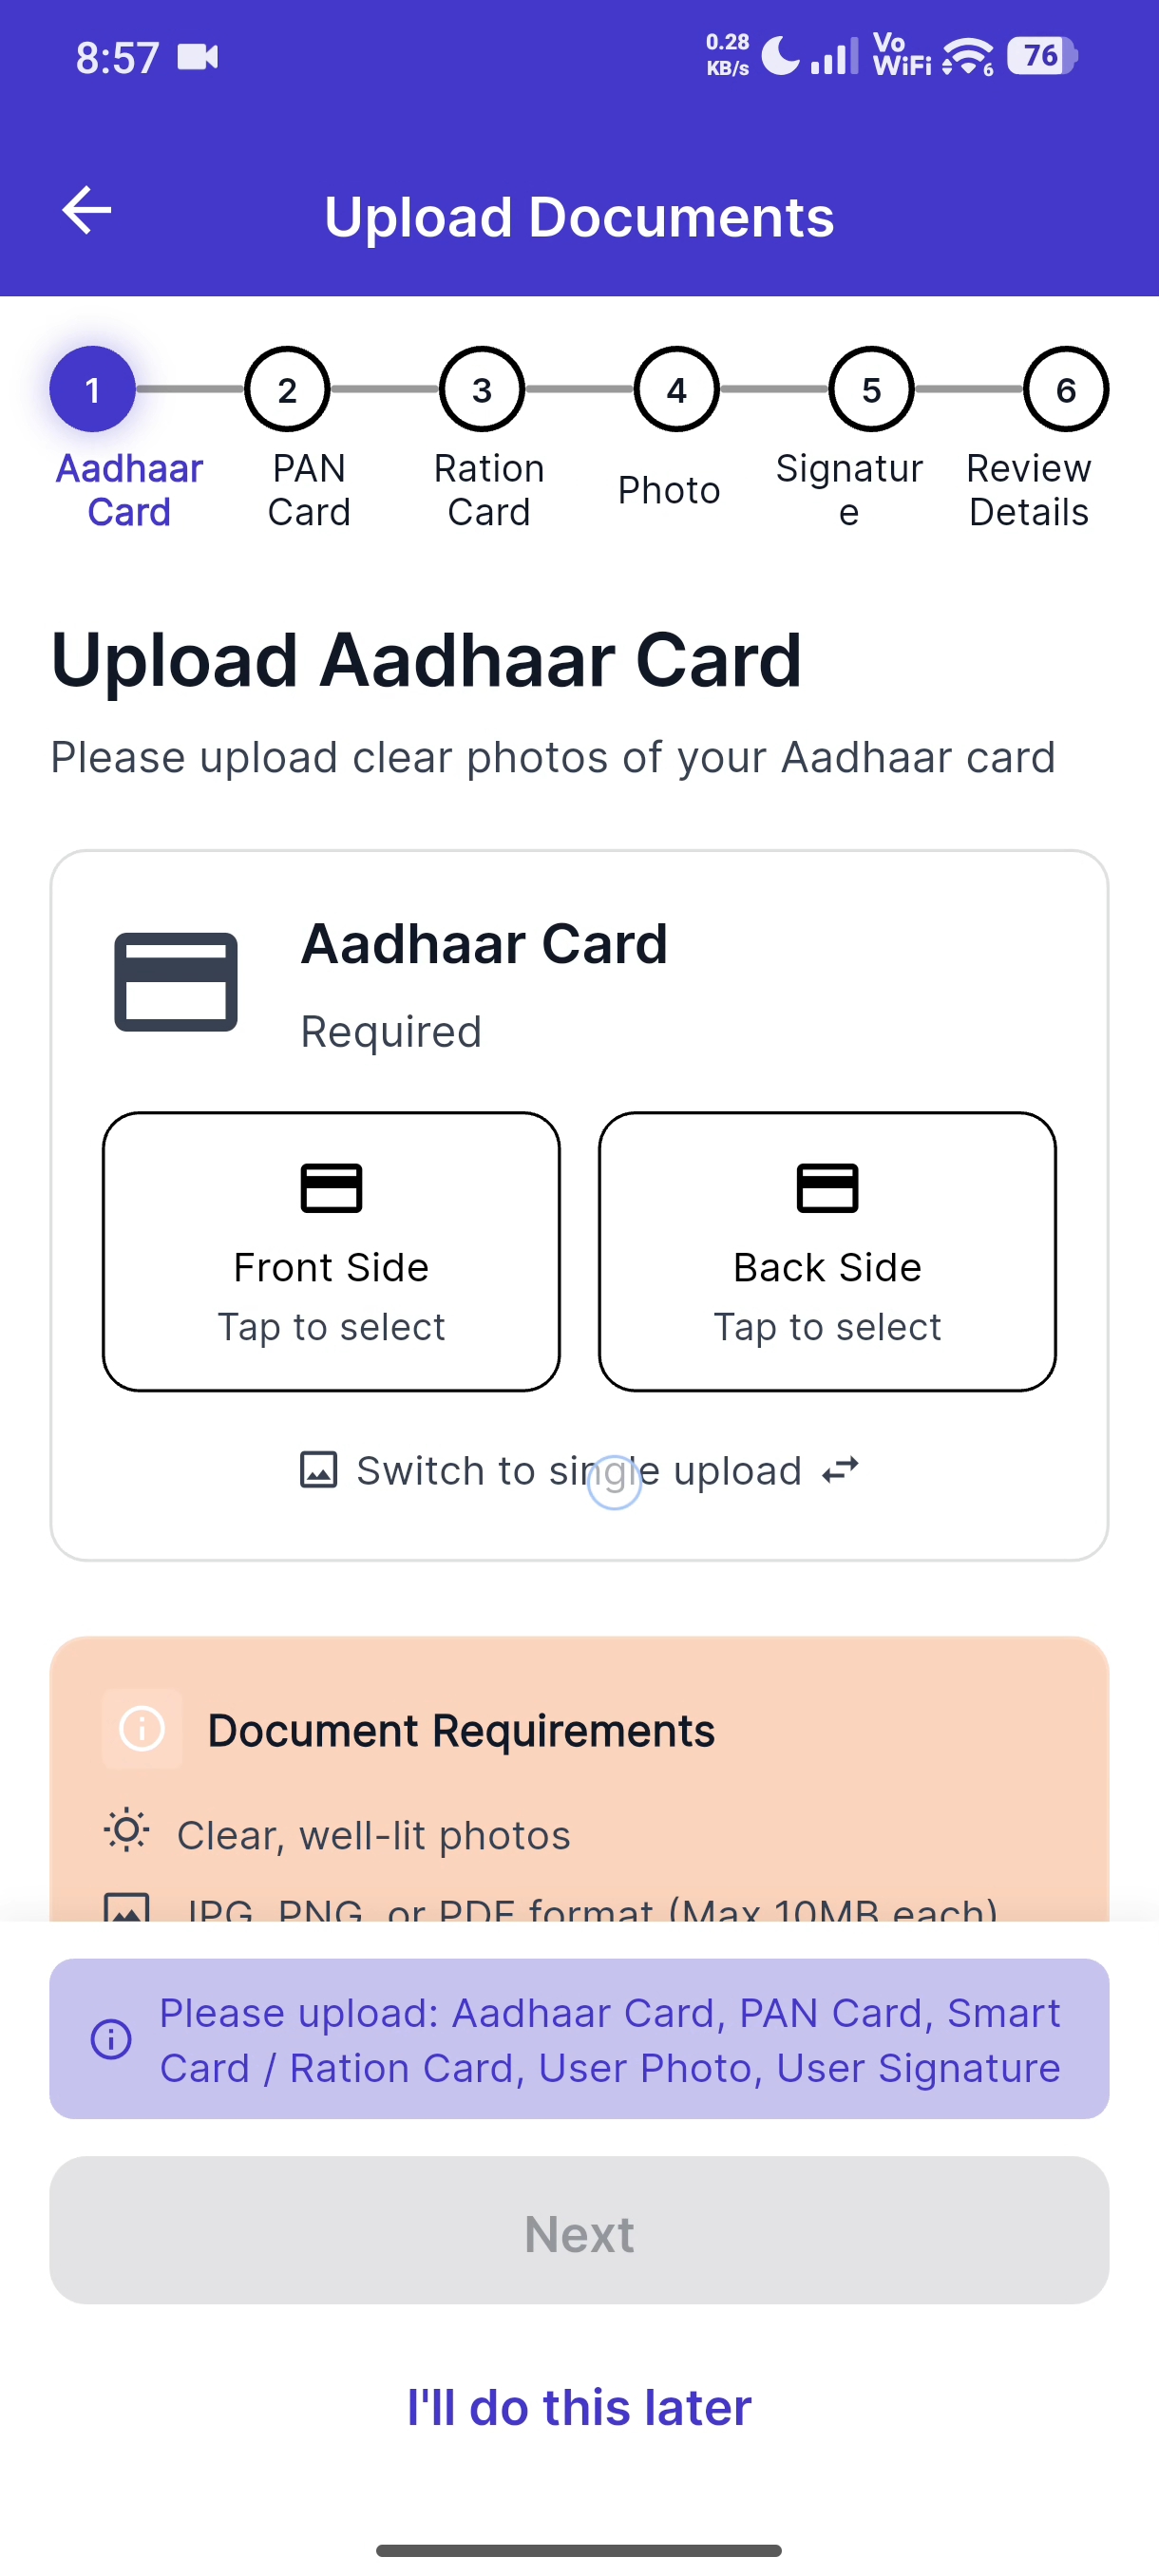
Step 2: Upload Documents
- Tap Upload Aadhaar: Single file or front and back images
- Tap Upload PAN Card and select your PAN image
- Tap Upload Smart Card and Select your Ration Card image
- Tap Upload Photo and provide a recent, clear face photo
- Tap Upload Digital Signature and select your signature image or PDF
- A progress indicator shows each upload's status
The app uses OCR (Optical Character Recognition) to automatically read details from your documents. Make sure images are clear and well-lit.
Step 3: Review Extracted Data
The app auto-fills your details from the uploaded documents:
- Full name
- Father's name
- Date of birth
- Gender
- Address, district, state, pincode
- Aadhaar number
- PAN number
Review each field and correct anything that didn't read properly.
Your date of birth must show you are at least 18 years old to proceed.
Step 4: Submit
Tap Submit for Verification after reviewing all details. You can also Save as Draft to continue later.
Step 5: Confirmation
A success screen confirms your KYC submission. Verification is usually completed within 24–48 hours.
KYC Status
| Status | Meaning |
|---|---|
| Pending | Documents submitted, under review |
| Verified | KYC approved — you can book plots |
| Rejected | Re-upload required (check reason provided) |
Society Membership
Before booking a plot, you must join the housing co-operative society that manages the layout. Tamil Nadu has 700+ registered societies on the platform.
Registering for a Society
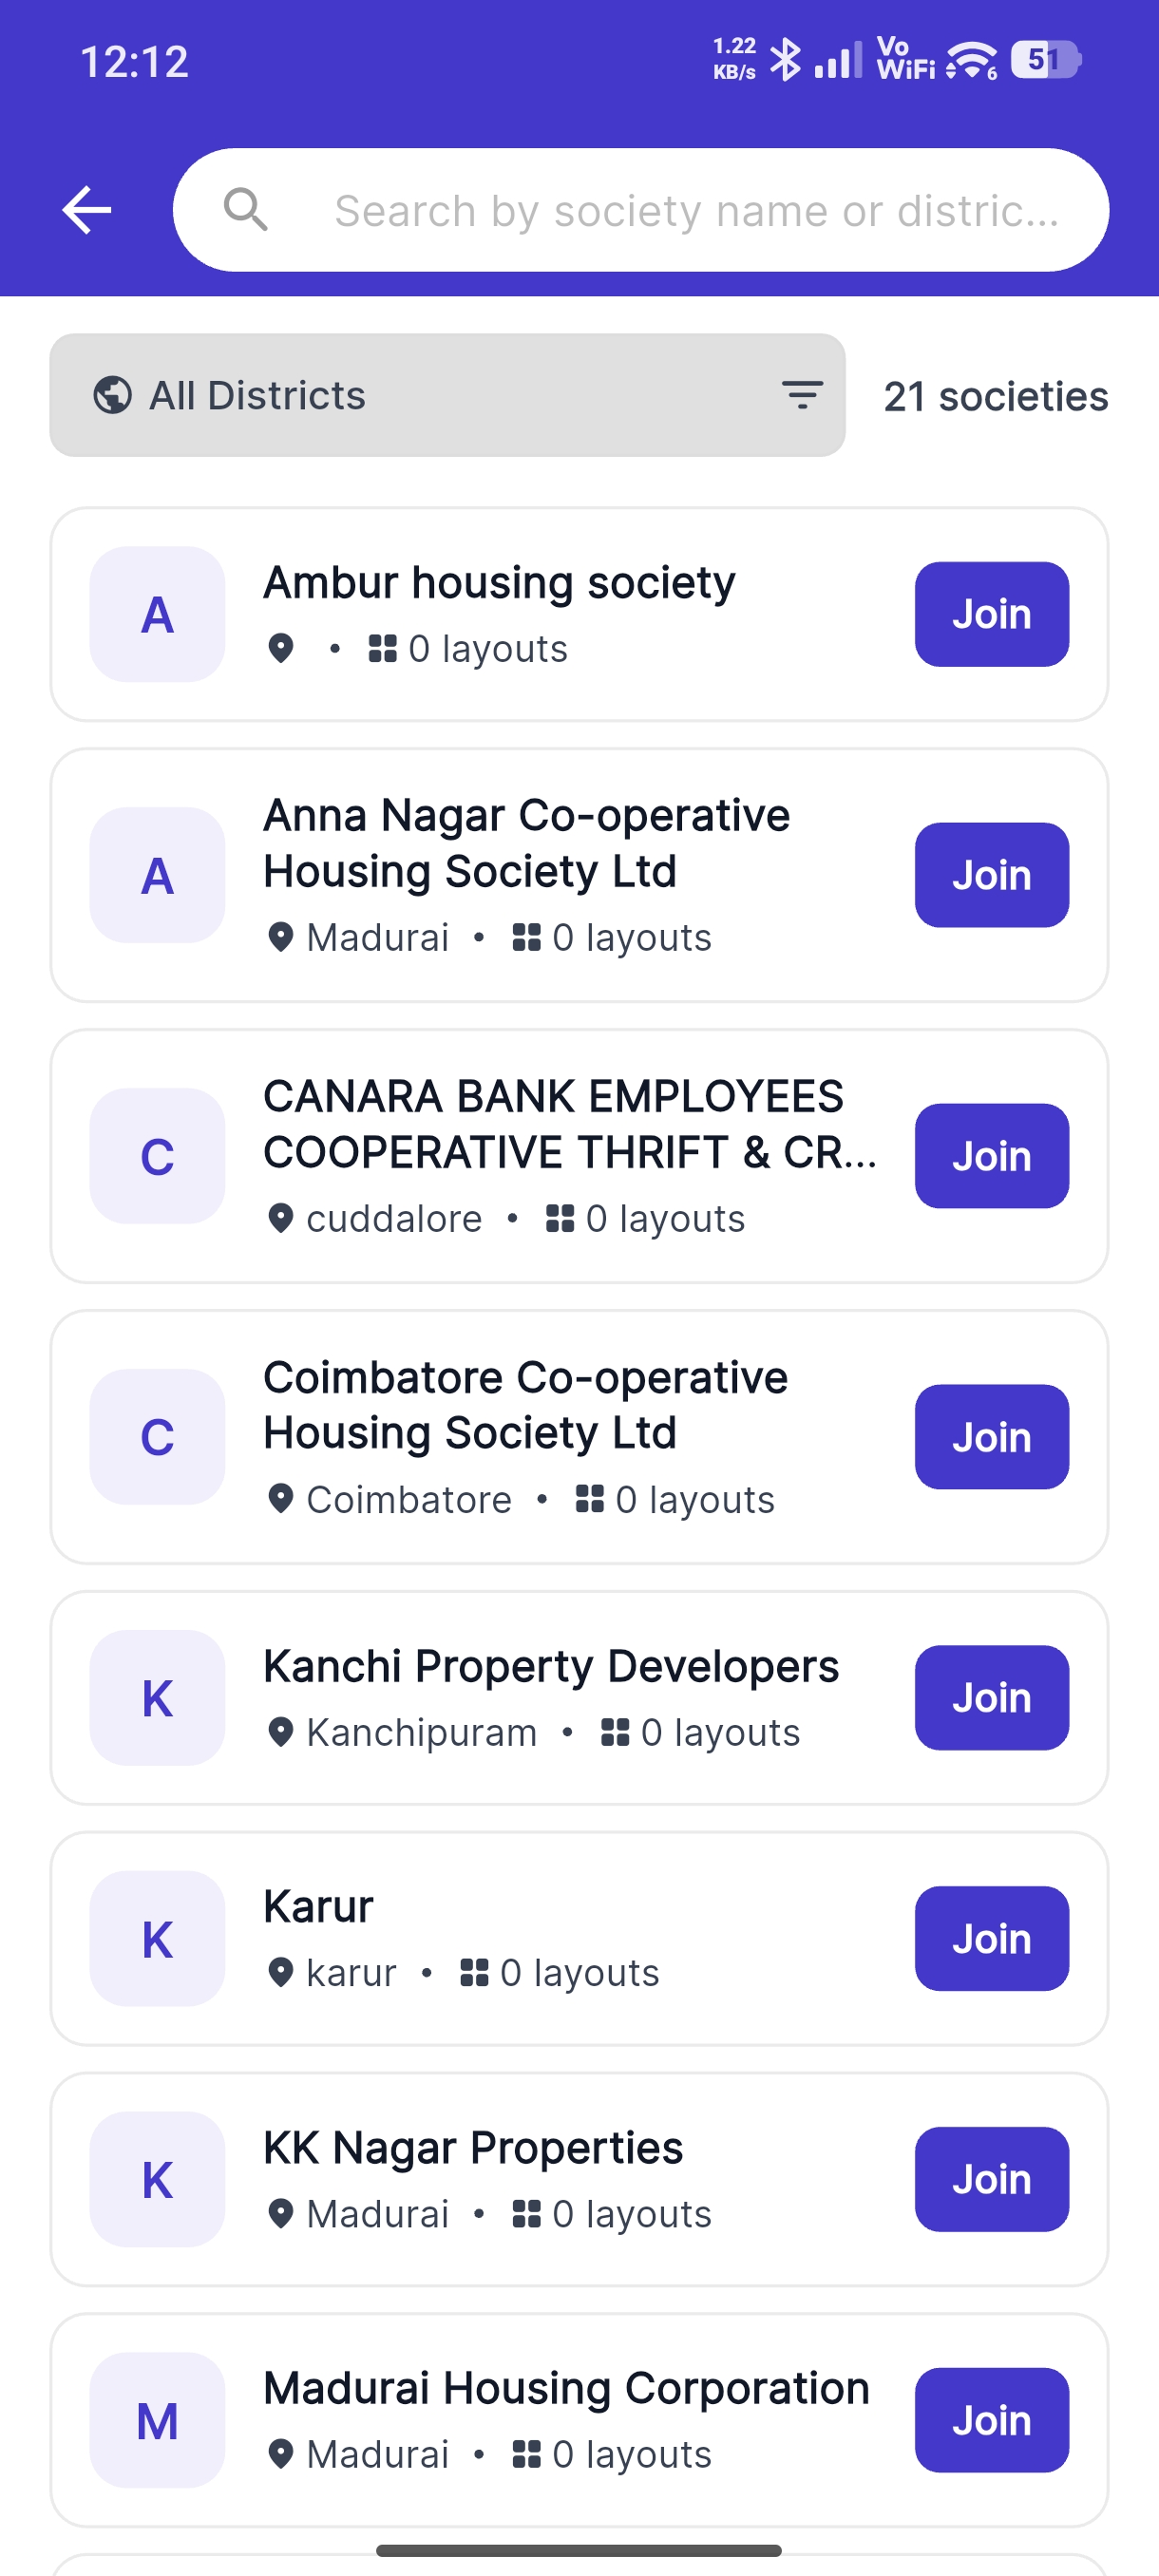
- Tap the Membership tab in bottom navigation
- Tap Register New
- Search societies by name or filter by district
- Tap a society card to see details and benefits
- Tap Register to apply
Membership Fees
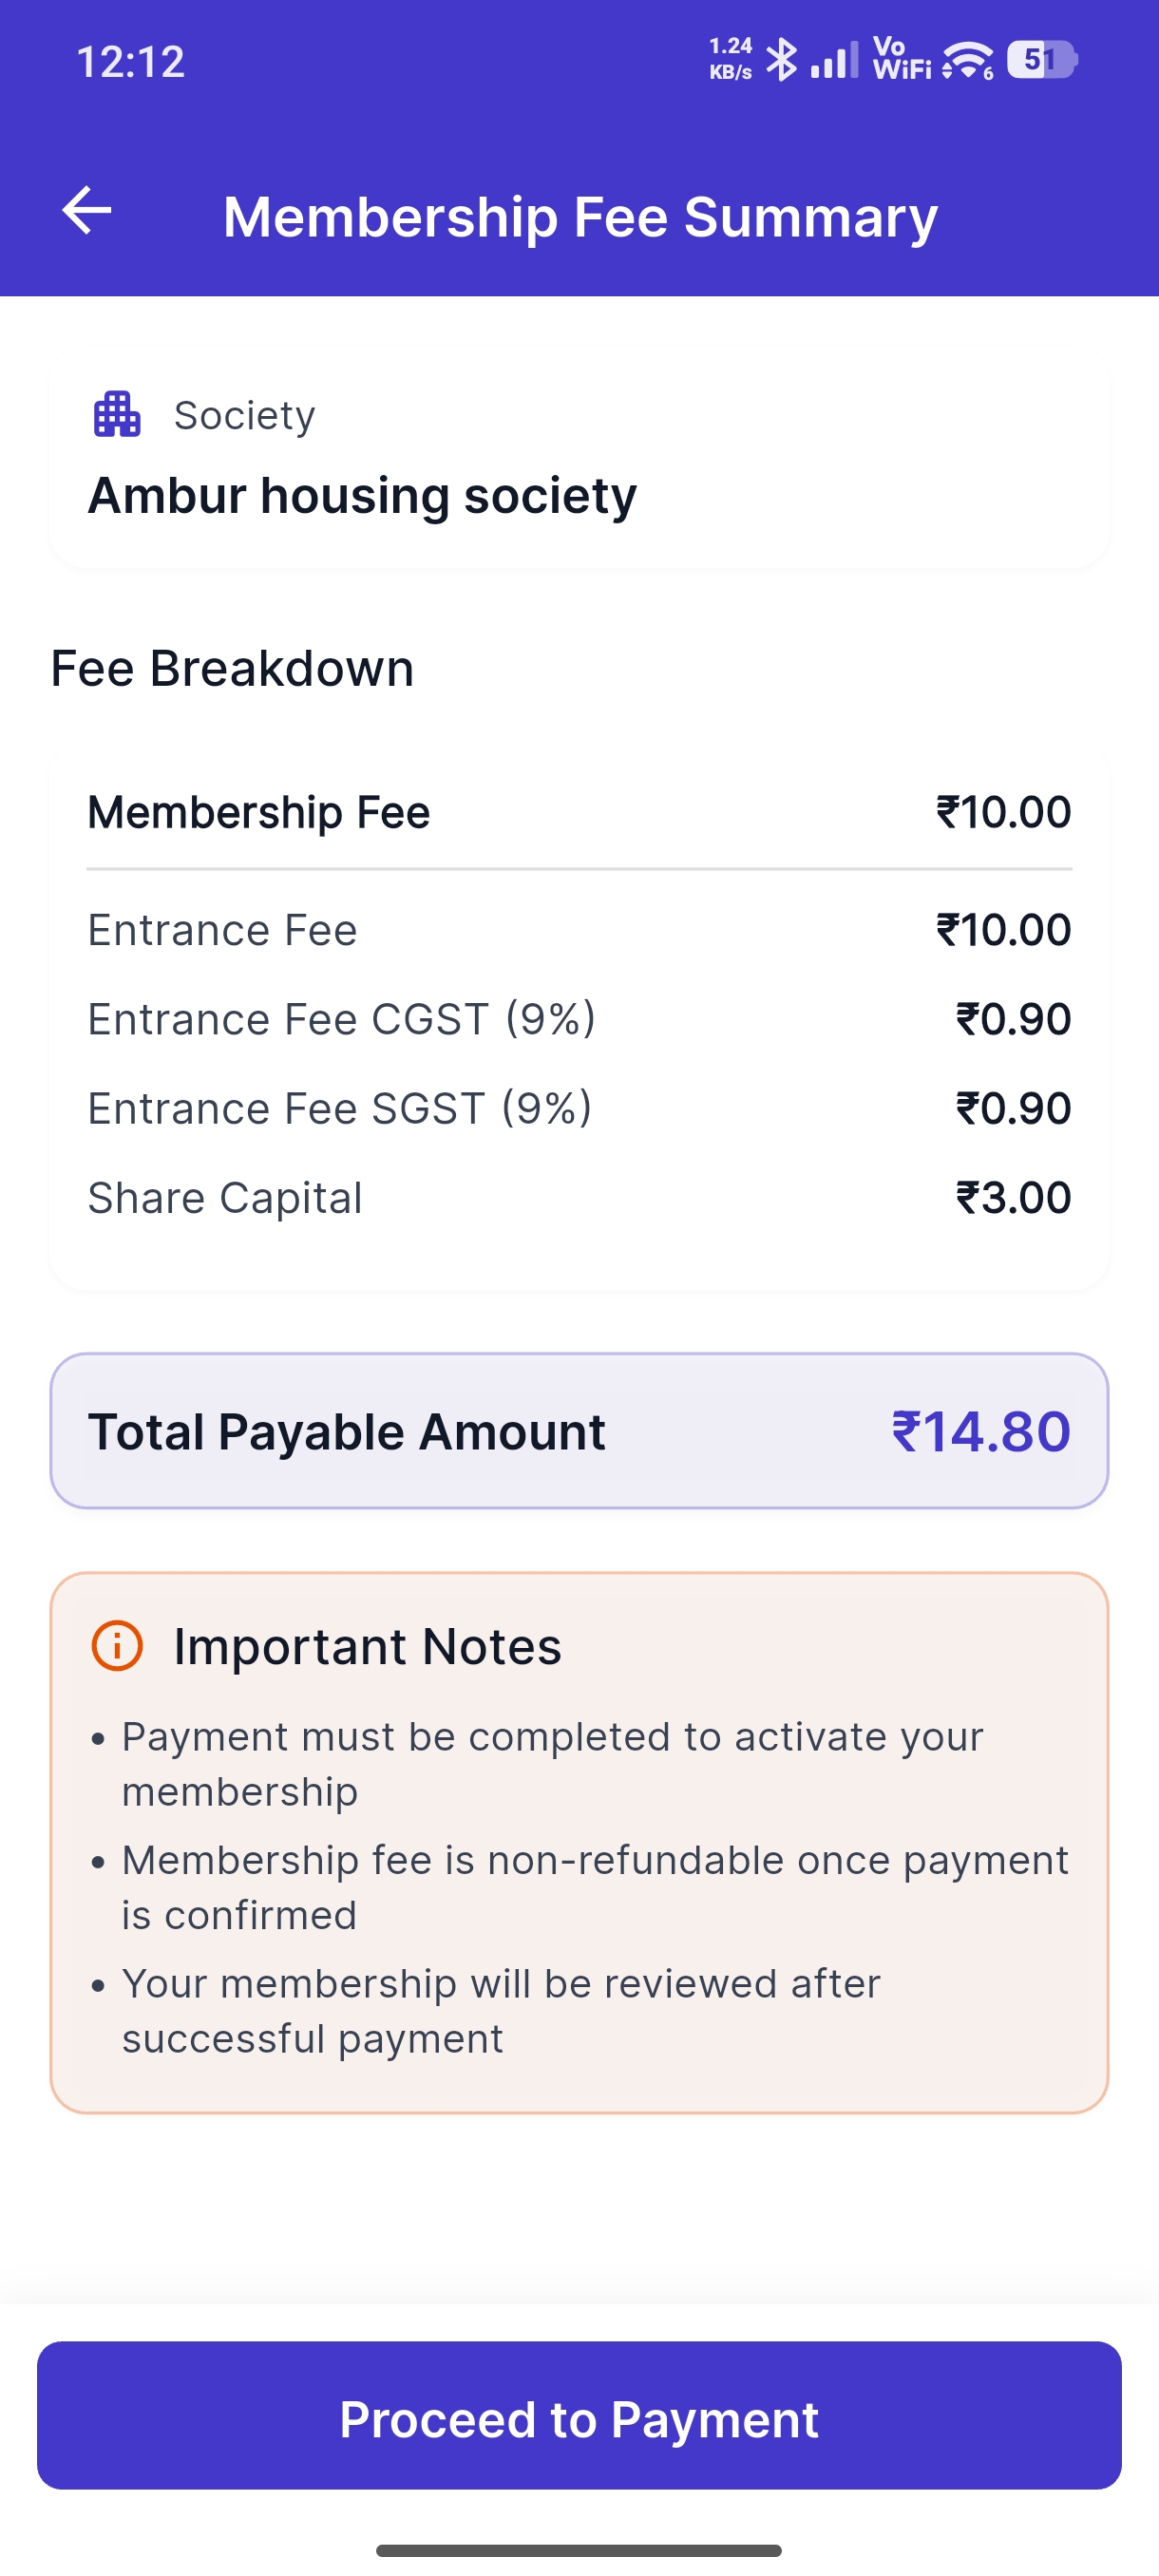
After registering, you'll see a fee summary:
| Fee Type | Description |
|---|---|
| Registration Fee | One-time fee to join the society |
| Other Charges | As defined by the individual society |
Tap Pay Now to complete the membership fee payment.
Viewing Your Memberships
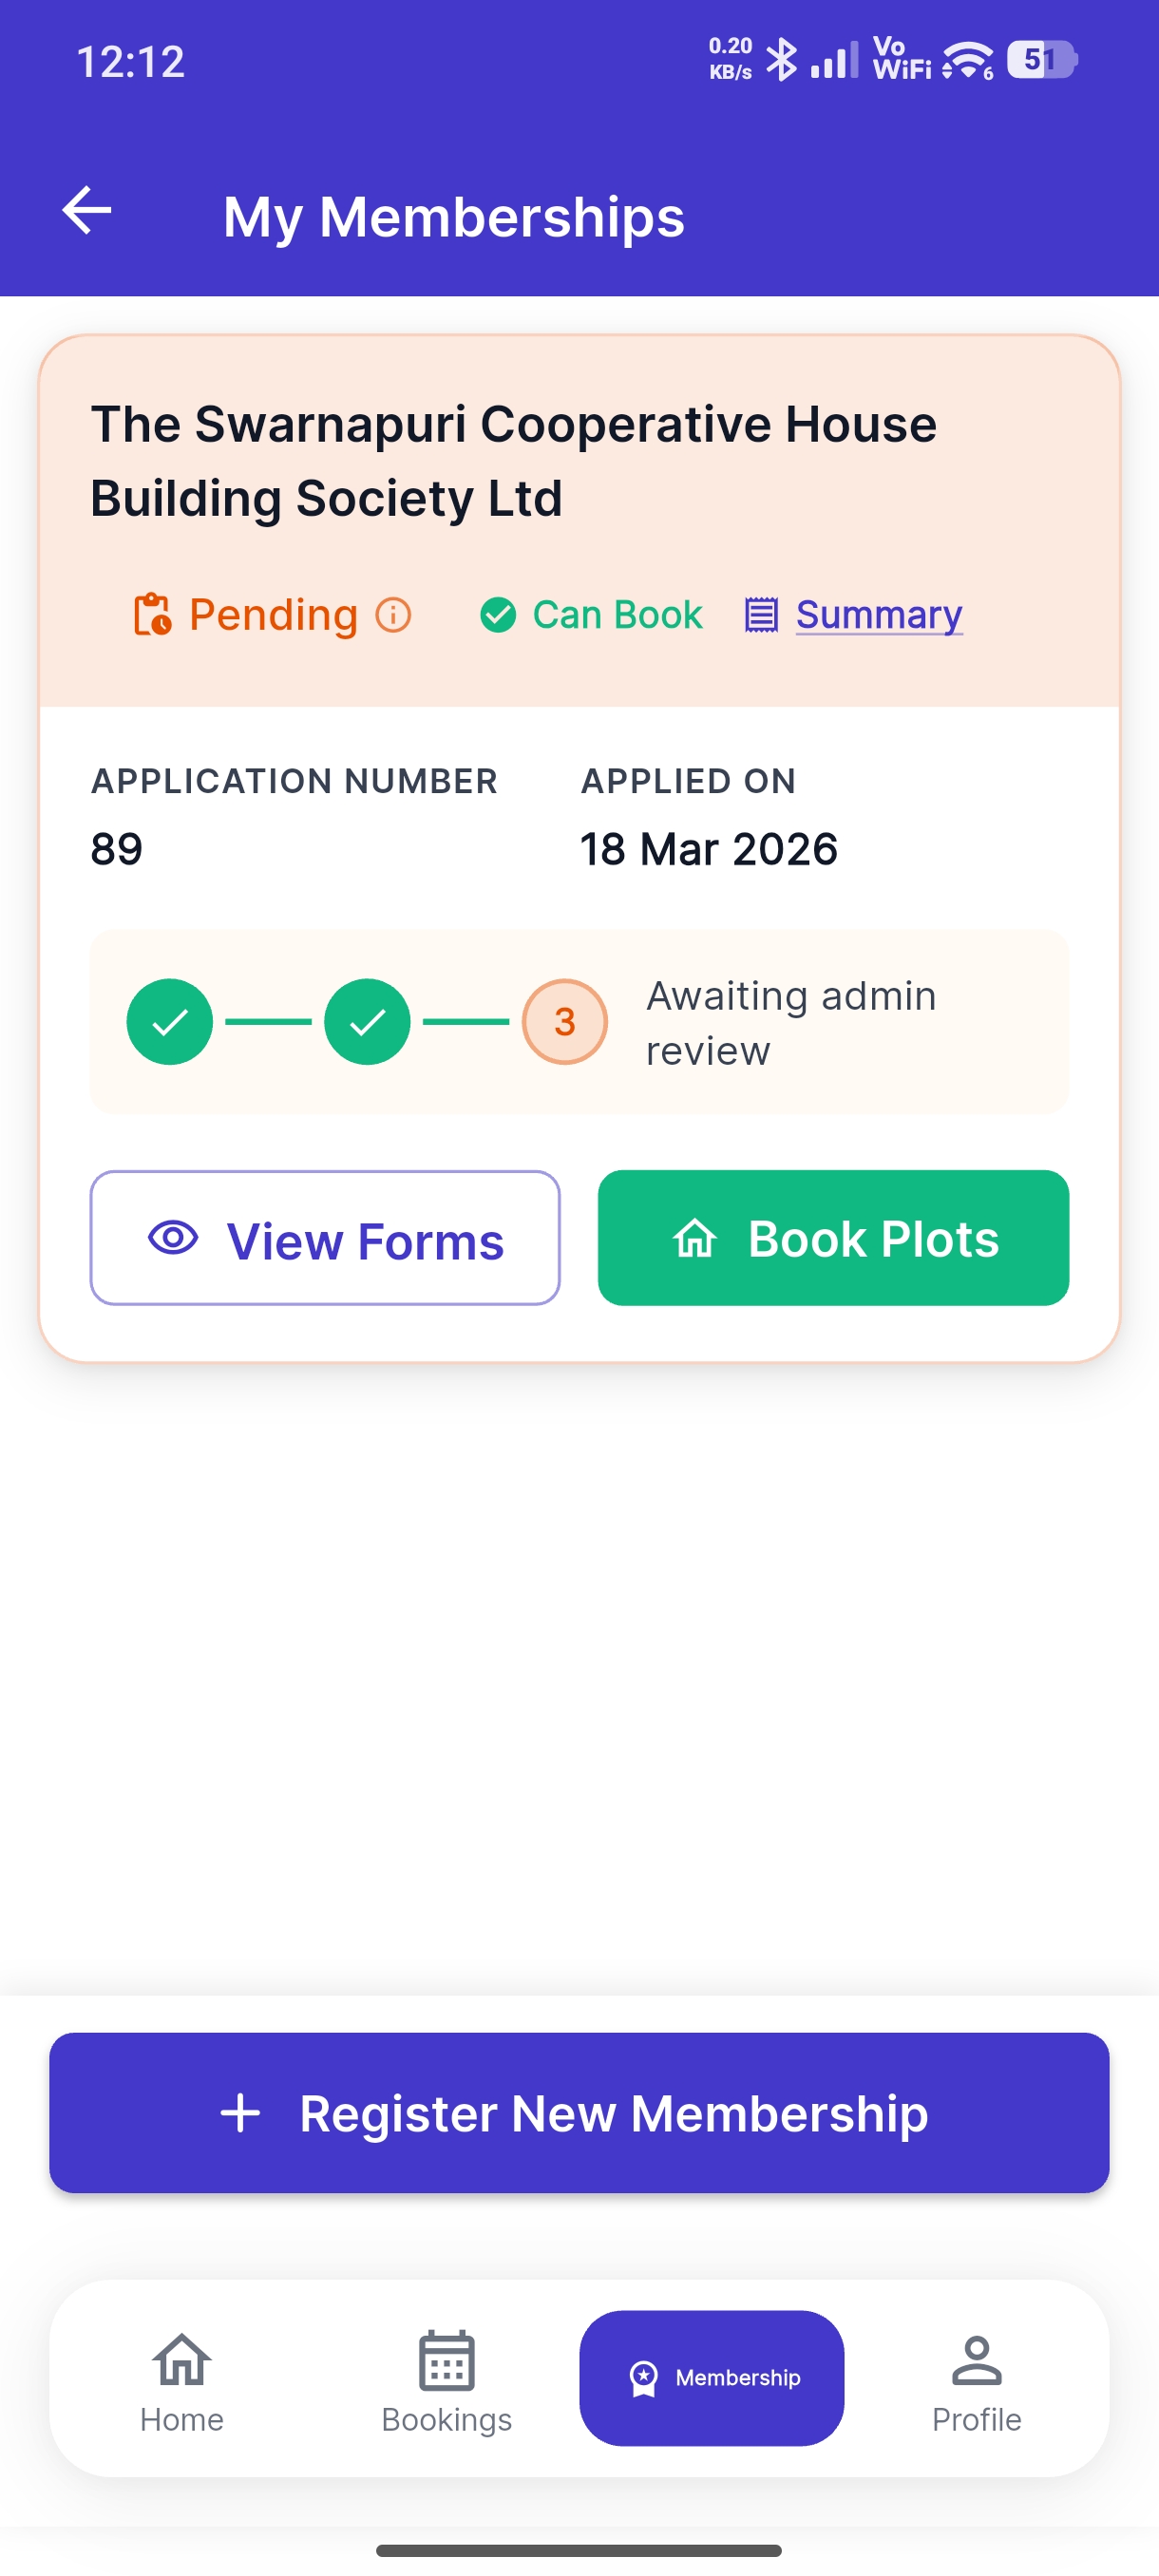
Go to the Membership tab to see all your memberships and their statuses:
| Status | Meaning |
|---|---|
| Pending | Application submitted, awaiting admin approval |
| Approved | Membership active — you can browse and book |
| Rejected | Application rejected (reason shown) |
Membership Forms (Form 16 & Form 17)
After your membership is approved, you may need to fill out government compliance forms.
What Are These Forms?
| Form | Purpose |
|---|---|
| Form 16 | Personal & occupational information — occupation, annual income, reason for membership |
| Form 17 | Declaration — nominee details, witness details, property declaration |
Filling Out the Forms
- Go to Membership tab → tap your approved membership
- The app checks your eligibility to submit forms
- Fill out both forms on a single scrollable screen:
- KYC section (read-only, auto-filled from your verified KYC)
- Form 16 fields — occupation, income, reason
- Form 17 fields — nominee name & address, witness name & address
- Tap Save Draft to save progress, or Preview & Submit to review
- On the preview screen, verify all details
- Tap Submit to finalize
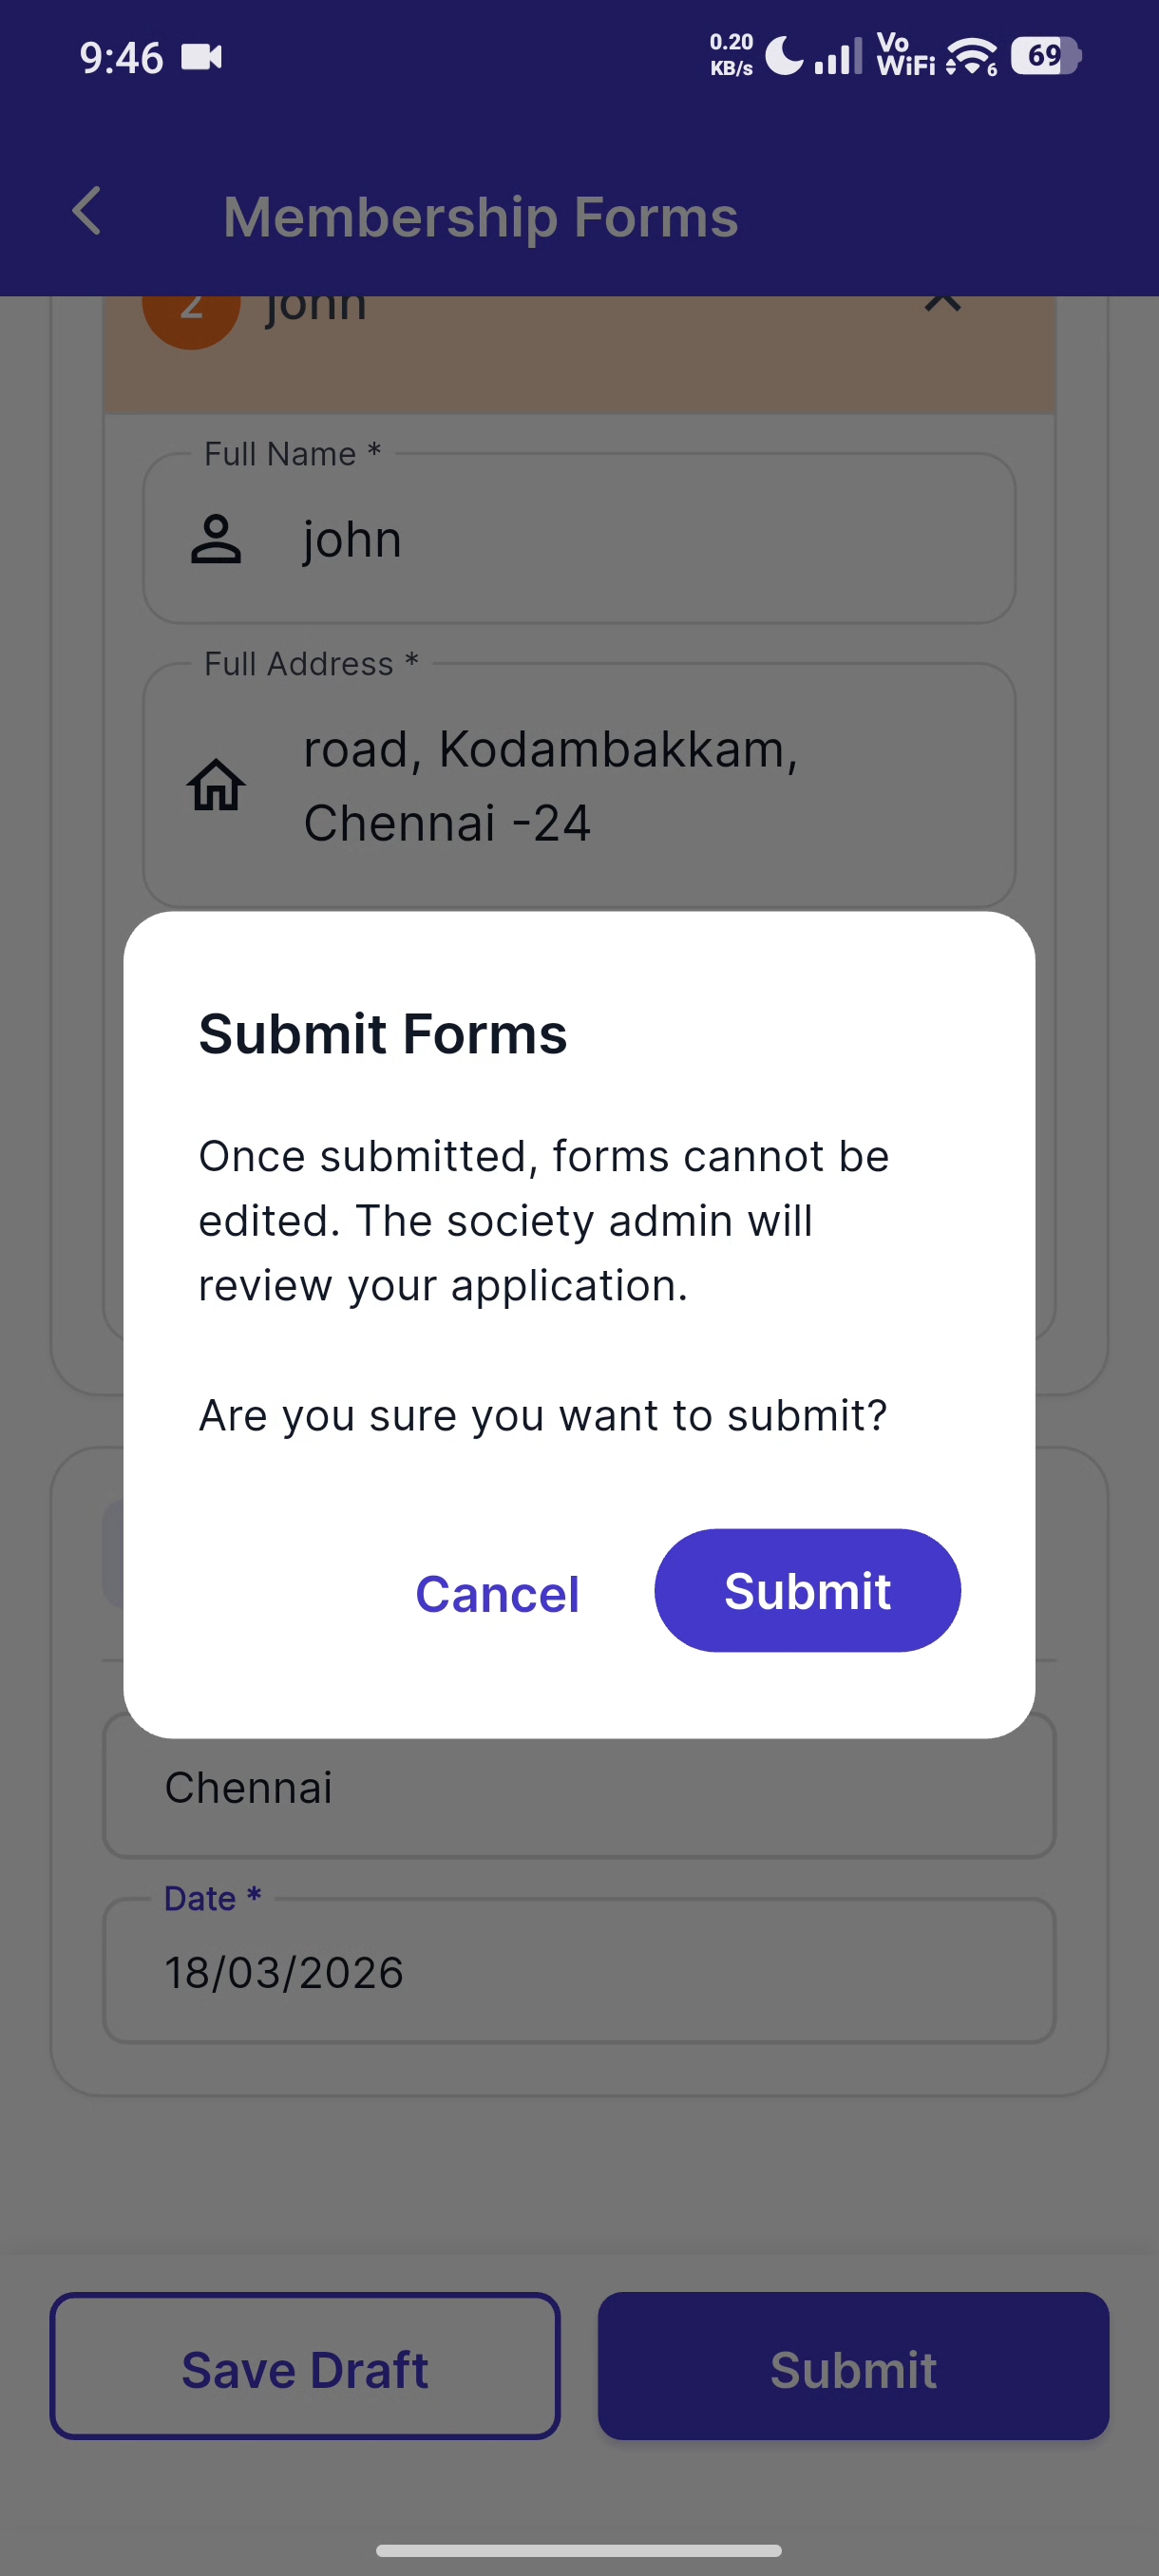
Your KYC-verified details (name, address, Aadhaar, PAN) are auto-populated and cannot be edited in the form. If they are wrong, update your KYC first.
Booking a Plot
Before You Begin
Make sure you have:
- ✅ Completed KYC verification (status: Verified)
- ✅ An active membership with the society managing the layout
- ✅ A payment method ready (UPI, card, or net banking)
Step 1: Select a Plot
- Open a layout's detail page
- Tap Book a Plot
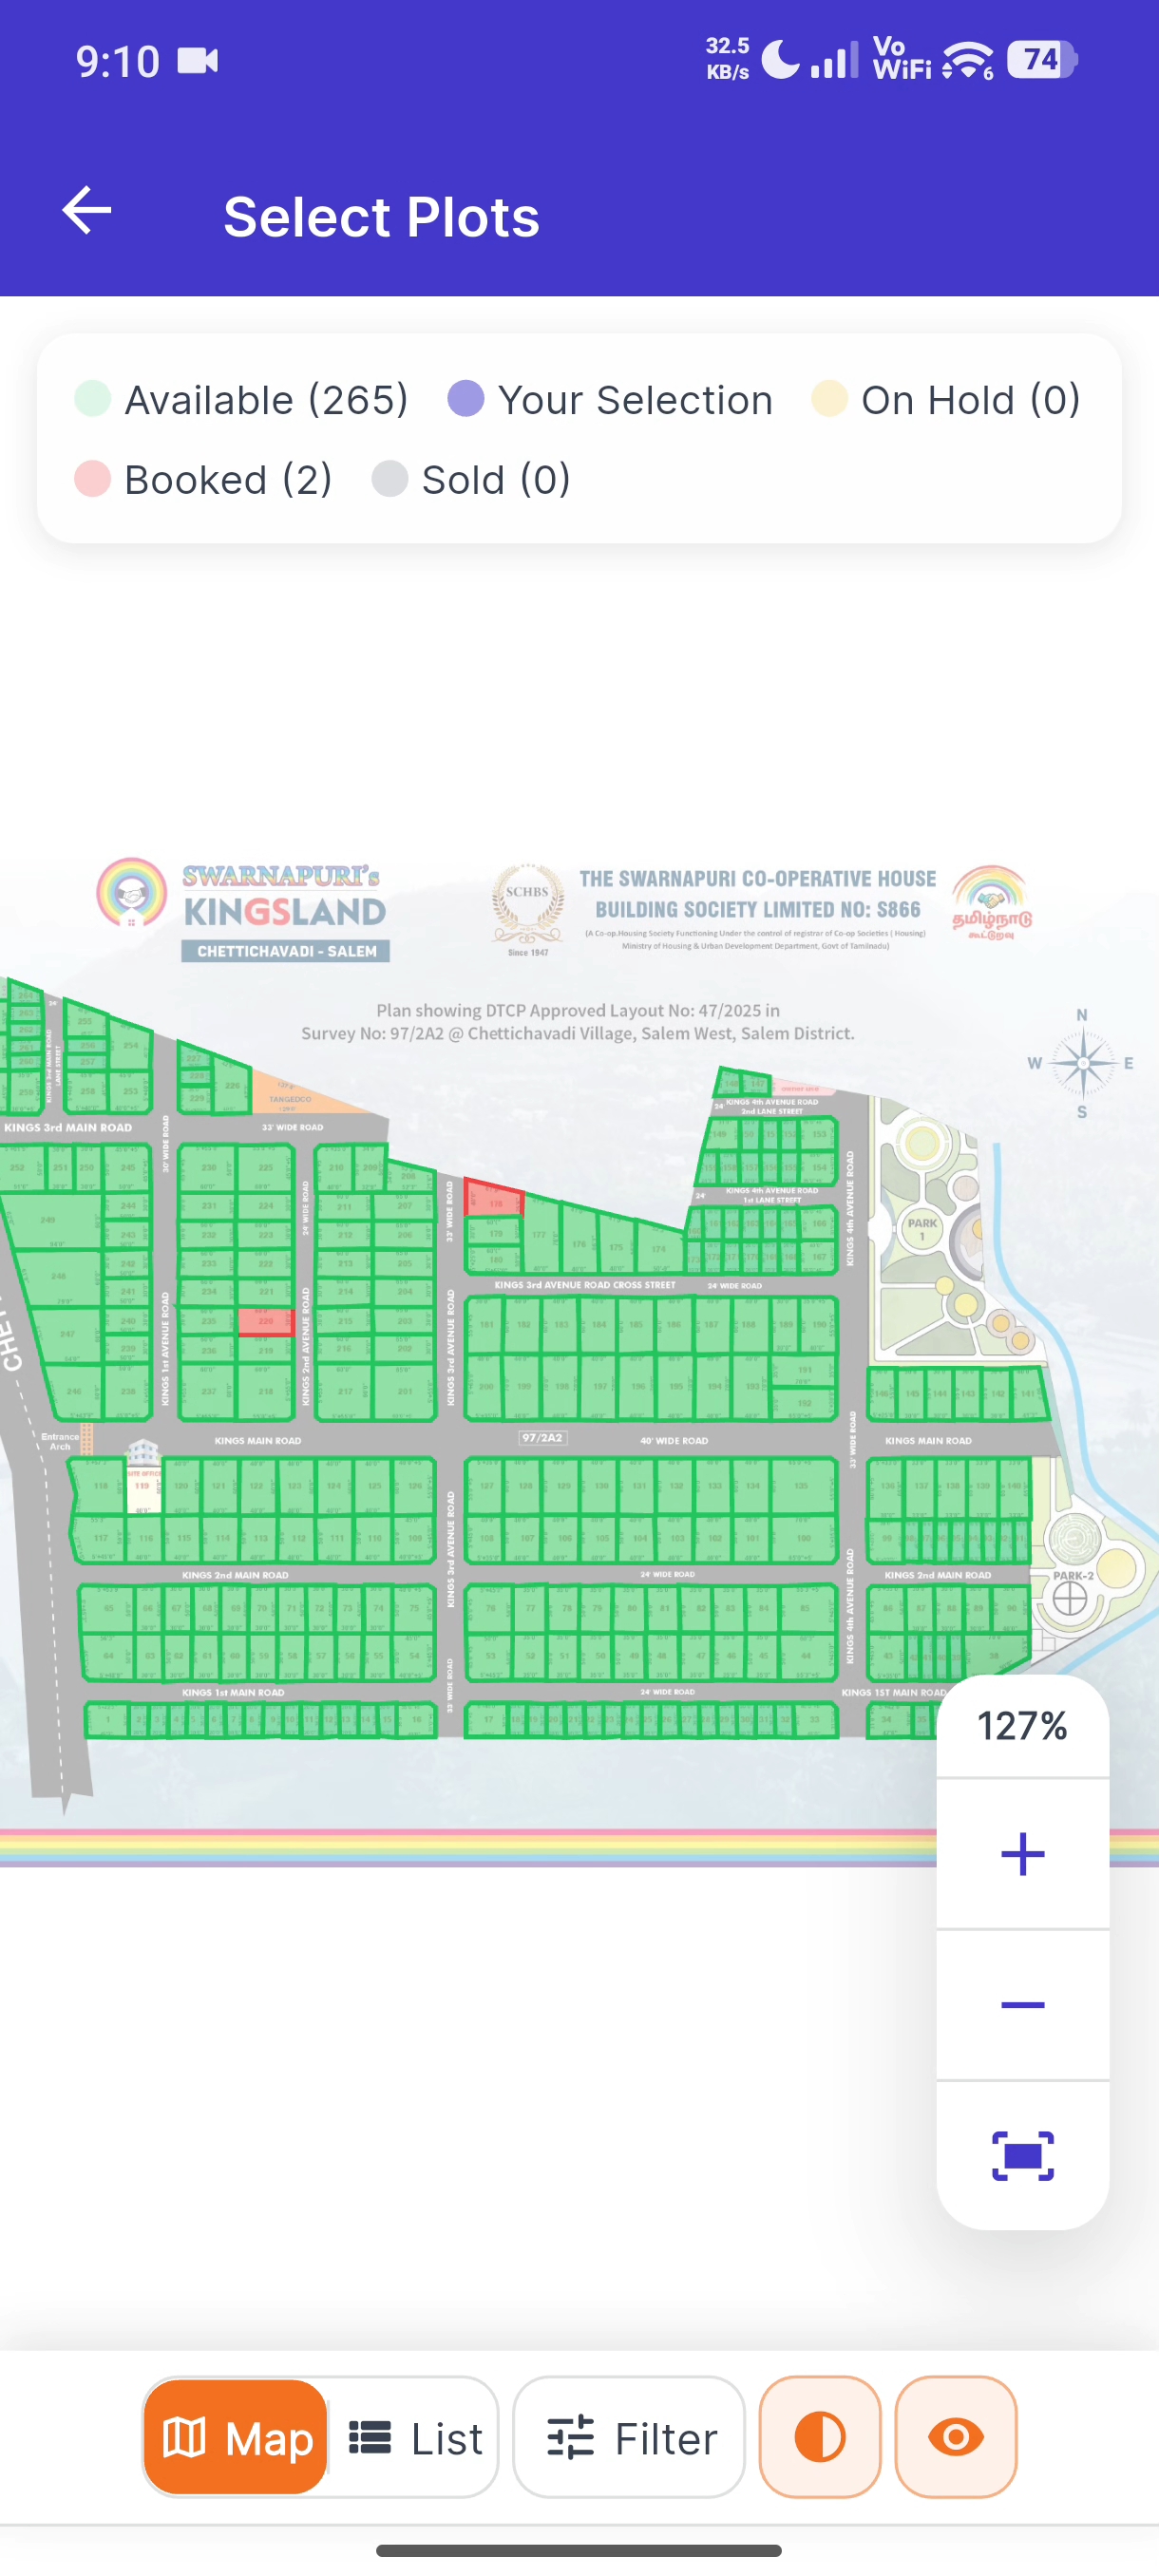
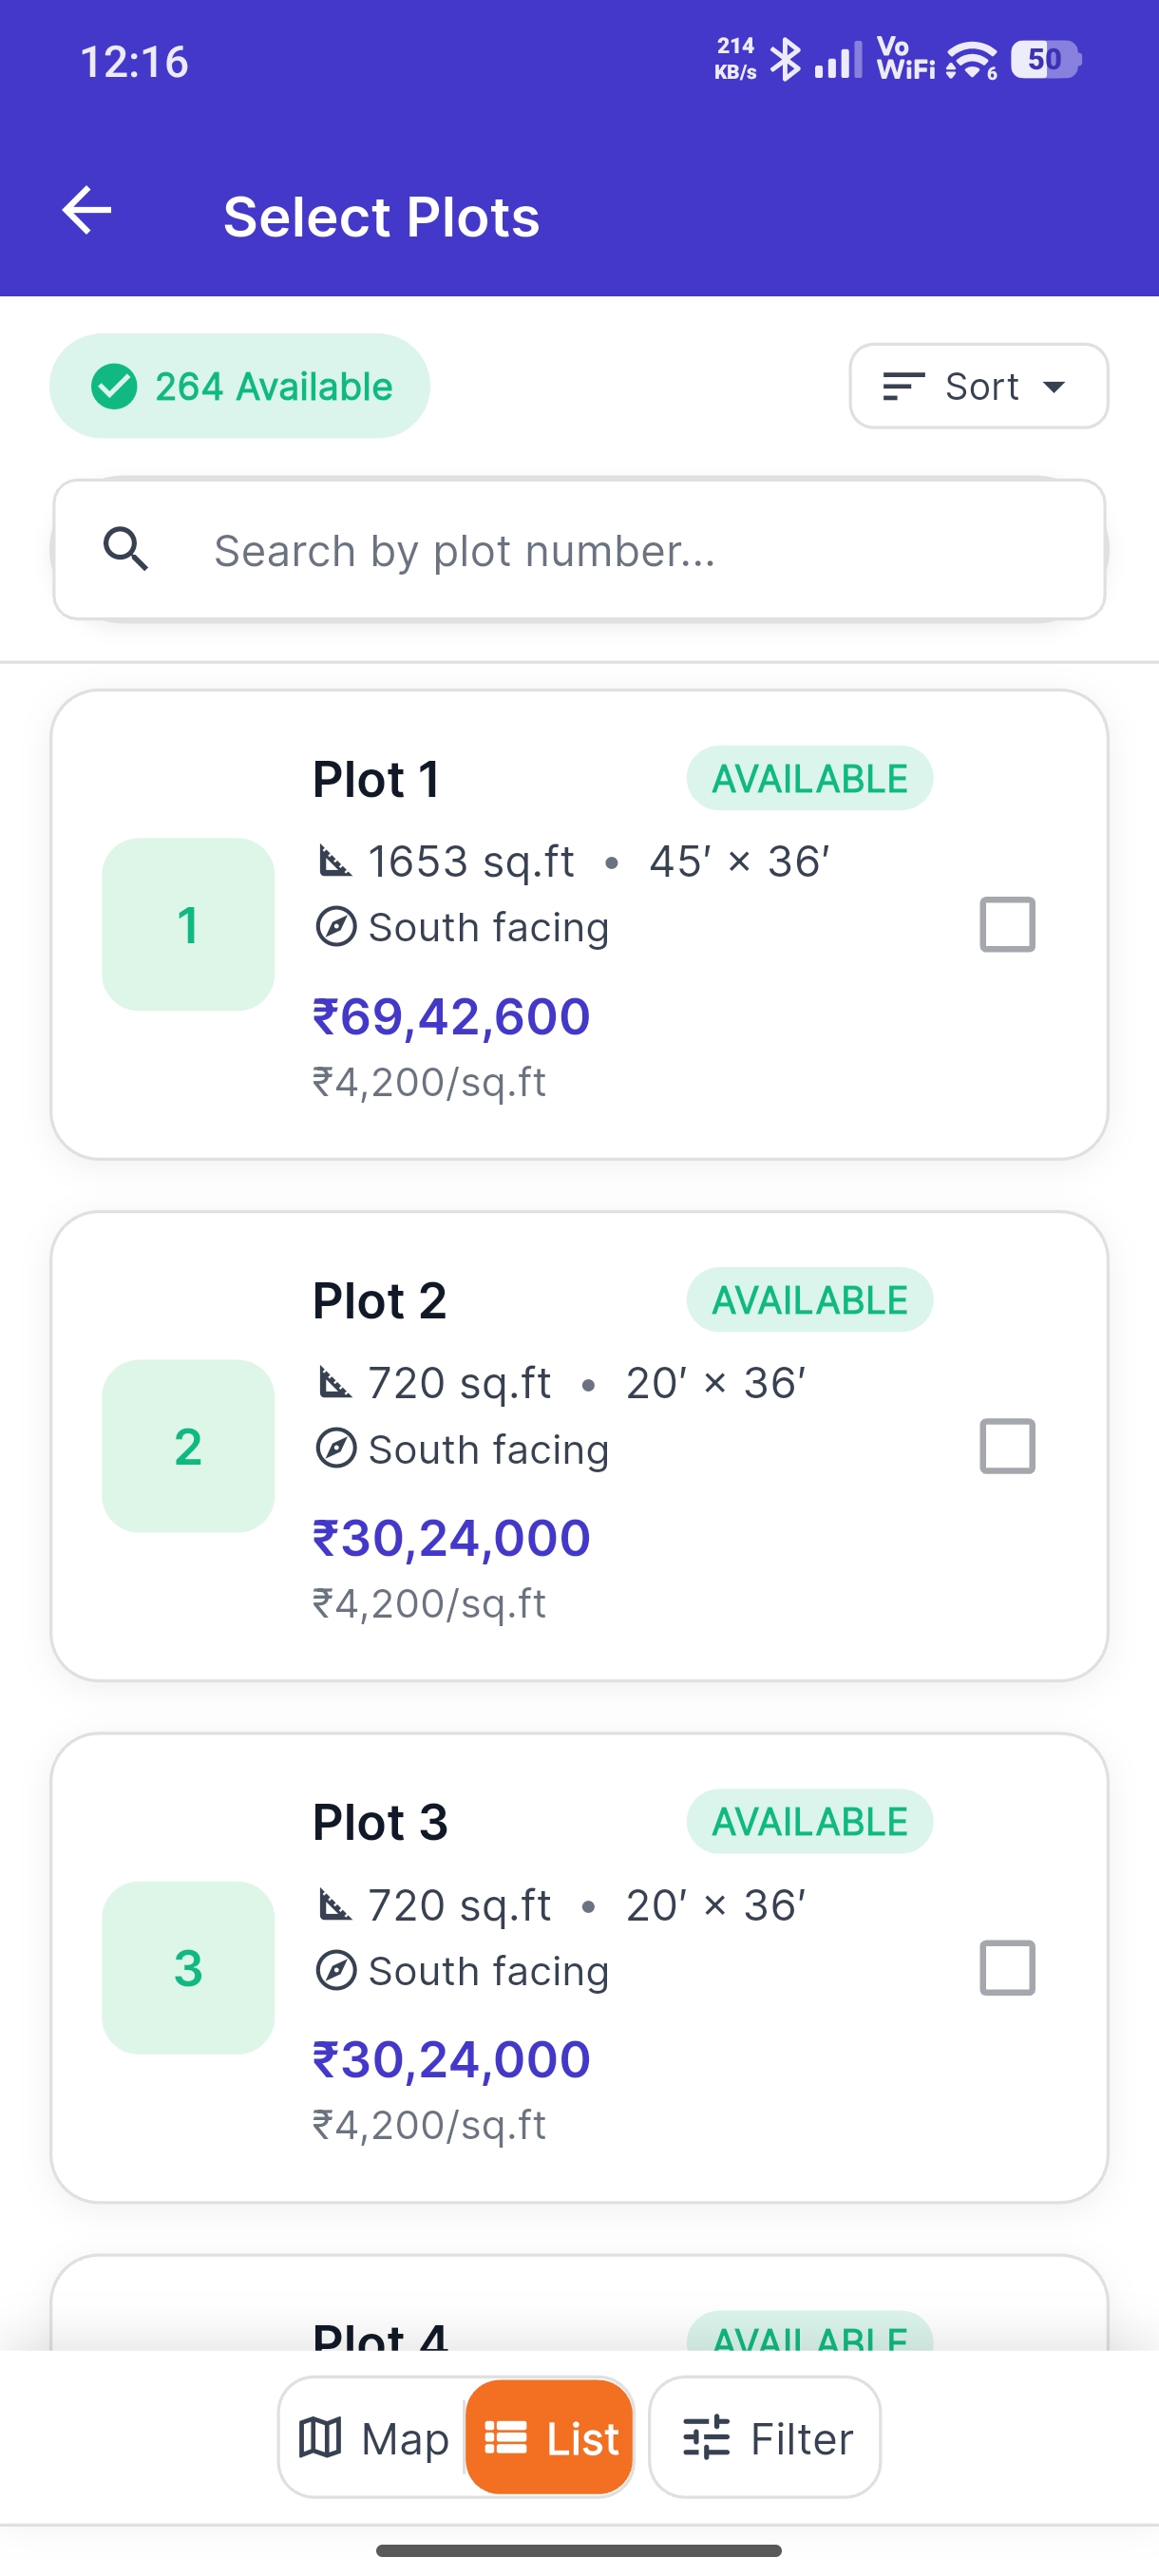
- Choose your view:
- Map View — Interactive visual map of the layout
- List View — Tabular list of available plots
Understanding Plot Colors (Map View)
| Color | Status |
|---|---|
| 🟢 Green | Available — tap to select |
| 🔴 Red | Sold |
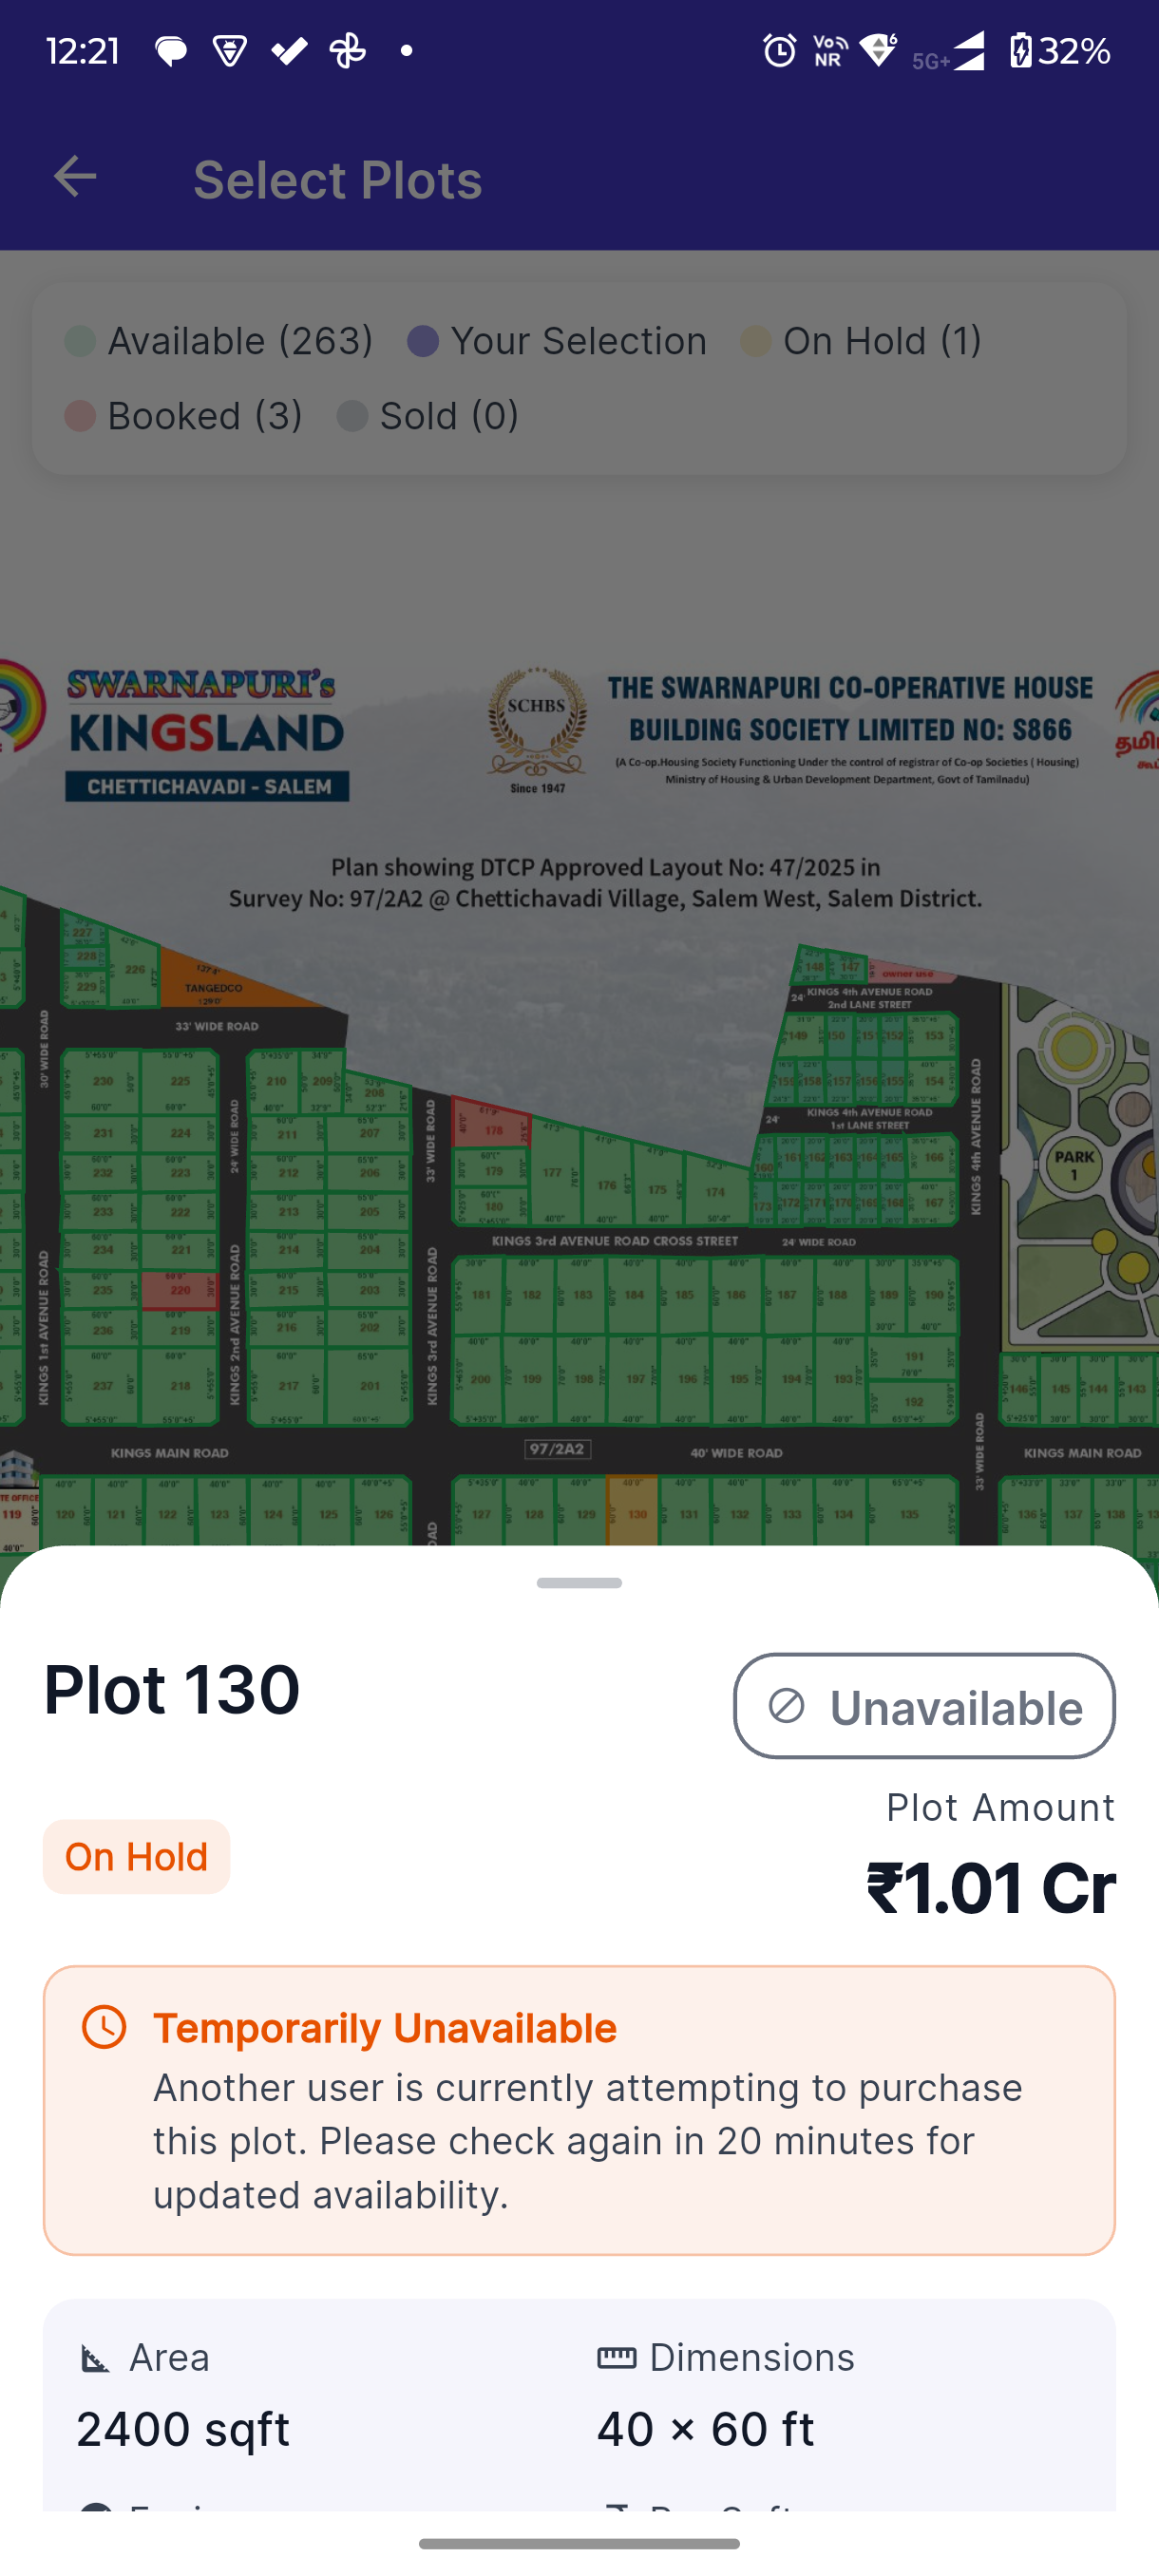
| ⚪ Yellow | On hold or reserved |
Filtering Plots
Use the filter options to narrow down:
- Facing — North, South, East, West
- Size — Range in sq.ft.
- Corner plots — Plots on corners
- Main road facing — Plots facing a main road
Step 2: Hold the Plot
When you tap an available plot, a preview hold is placed (typically valid for 10 minutes). This temporarily reserves the plot while you complete your booking.
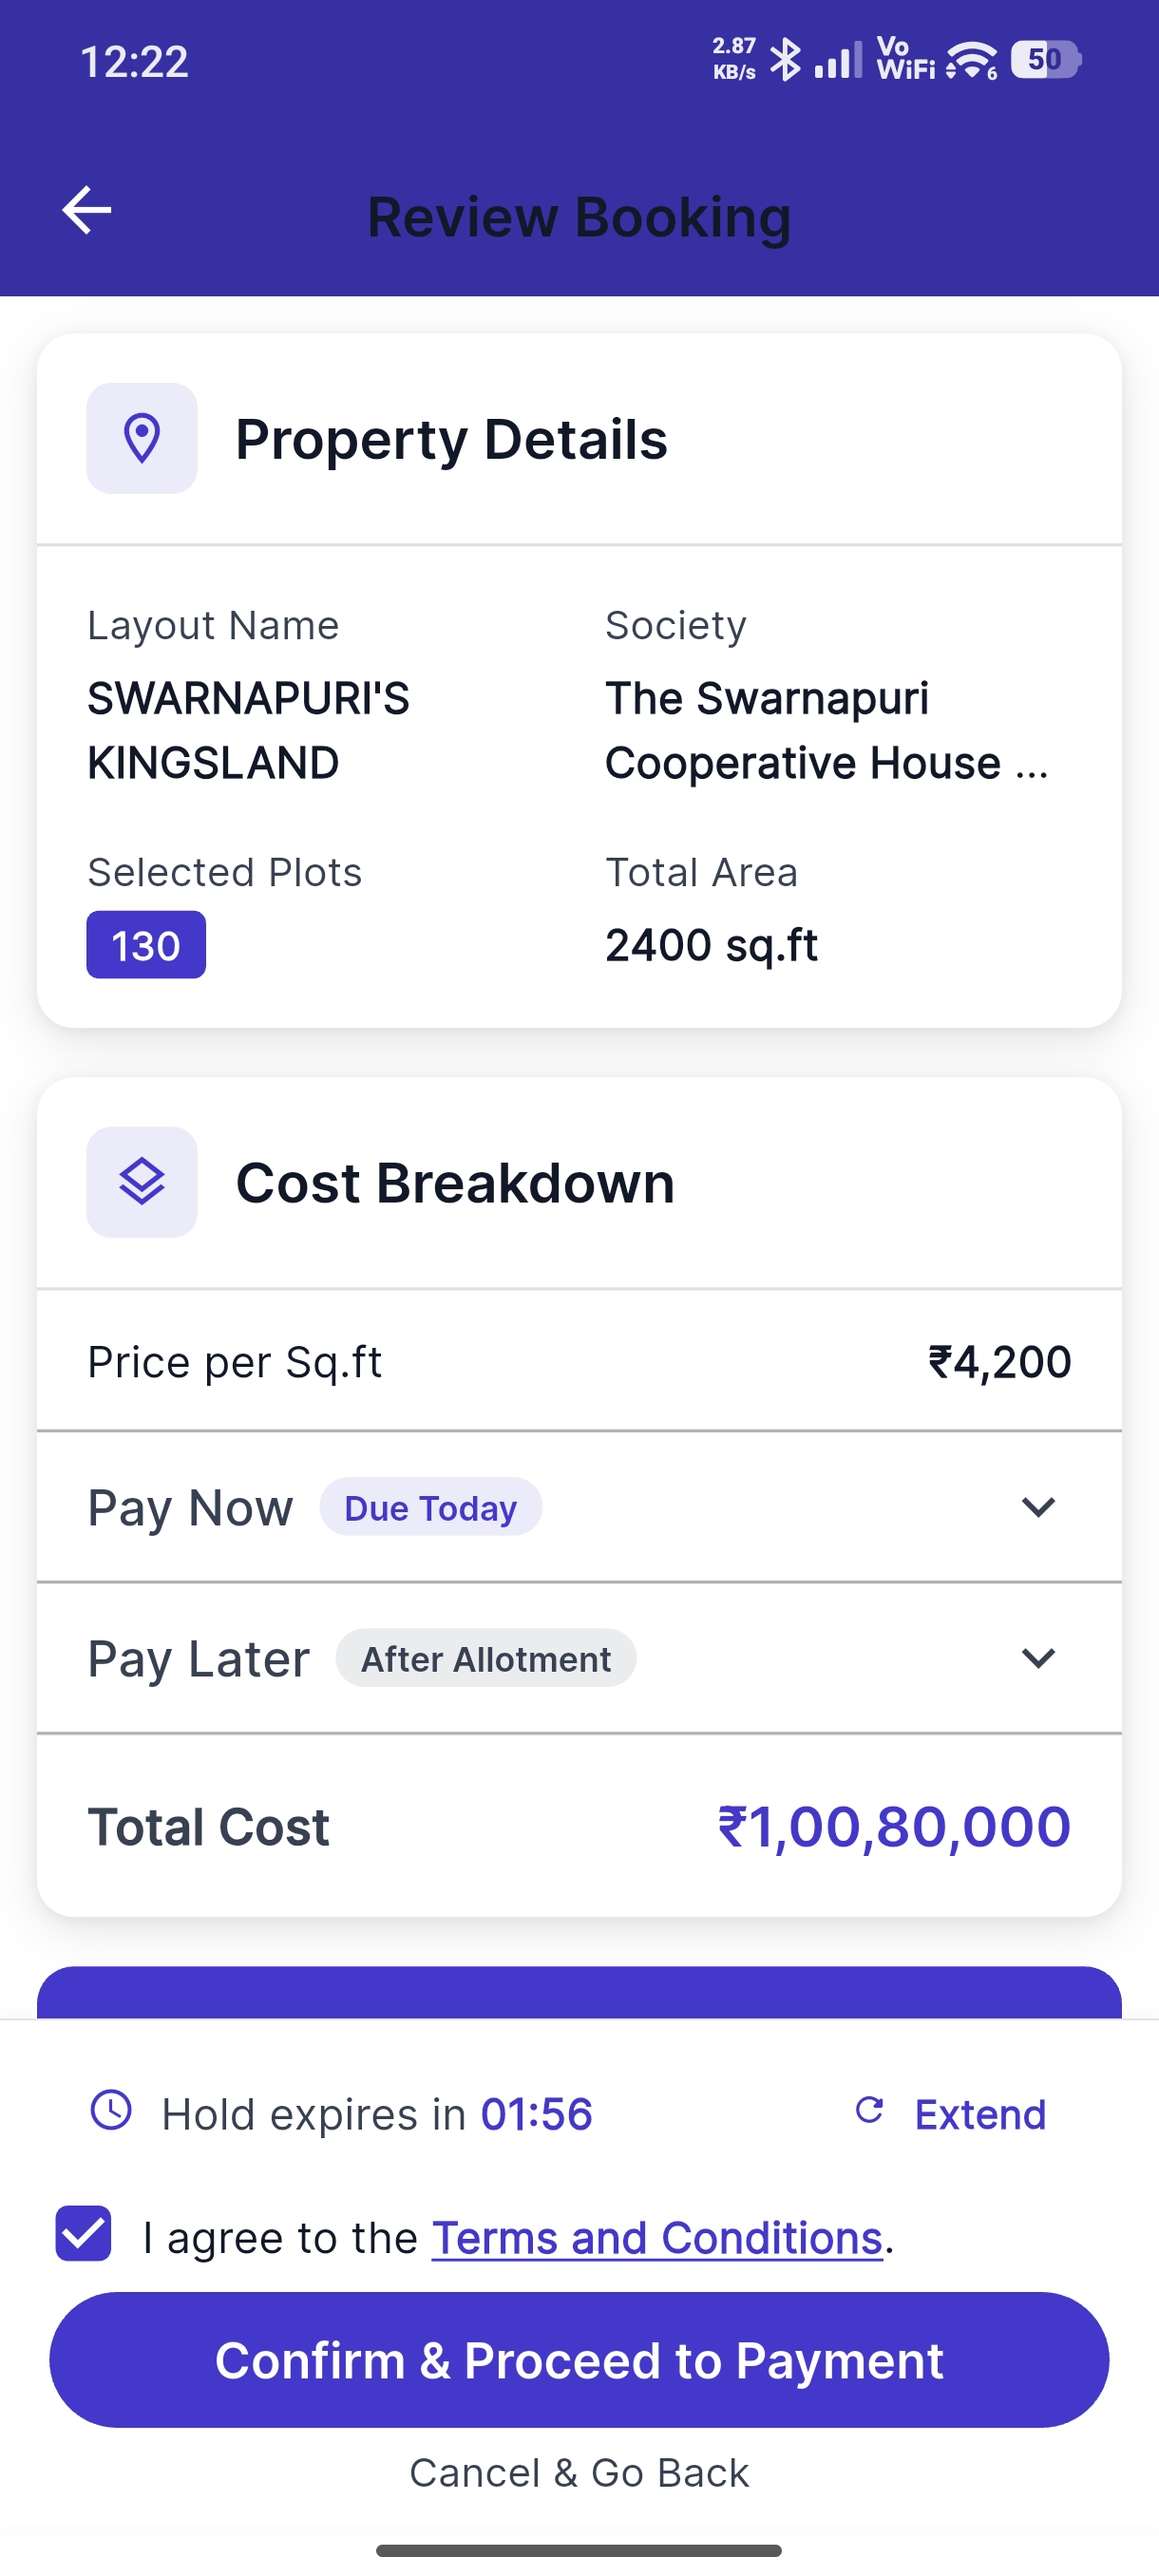
Step 3: Review Booking Details
The confirmation screen shows:
| Item | Details |
|---|---|
| Plot Number | Selected plot identifier |
| Dimensions | Length × Width |
| Total Area | In sq.ft. |
| Facing | Direction the plot faces |
| Base Amount | Plot price |
| Registration Fee | Society charges |
| Taxes | Applicable taxes |
| Total Payable | Final amount to pay |
Step 4: Make Payment
- Tap Proceed to Payment
- You'll be taken to the secure payment gateway (Razorpay)
- Choose your payment method:
- UPI — Google Pay, PhonePe, Paytm, BHIM
- Card — Debit or Credit card (Visa, Mastercard, RuPay)
- Net Banking — Select your bank
- Complete the payment
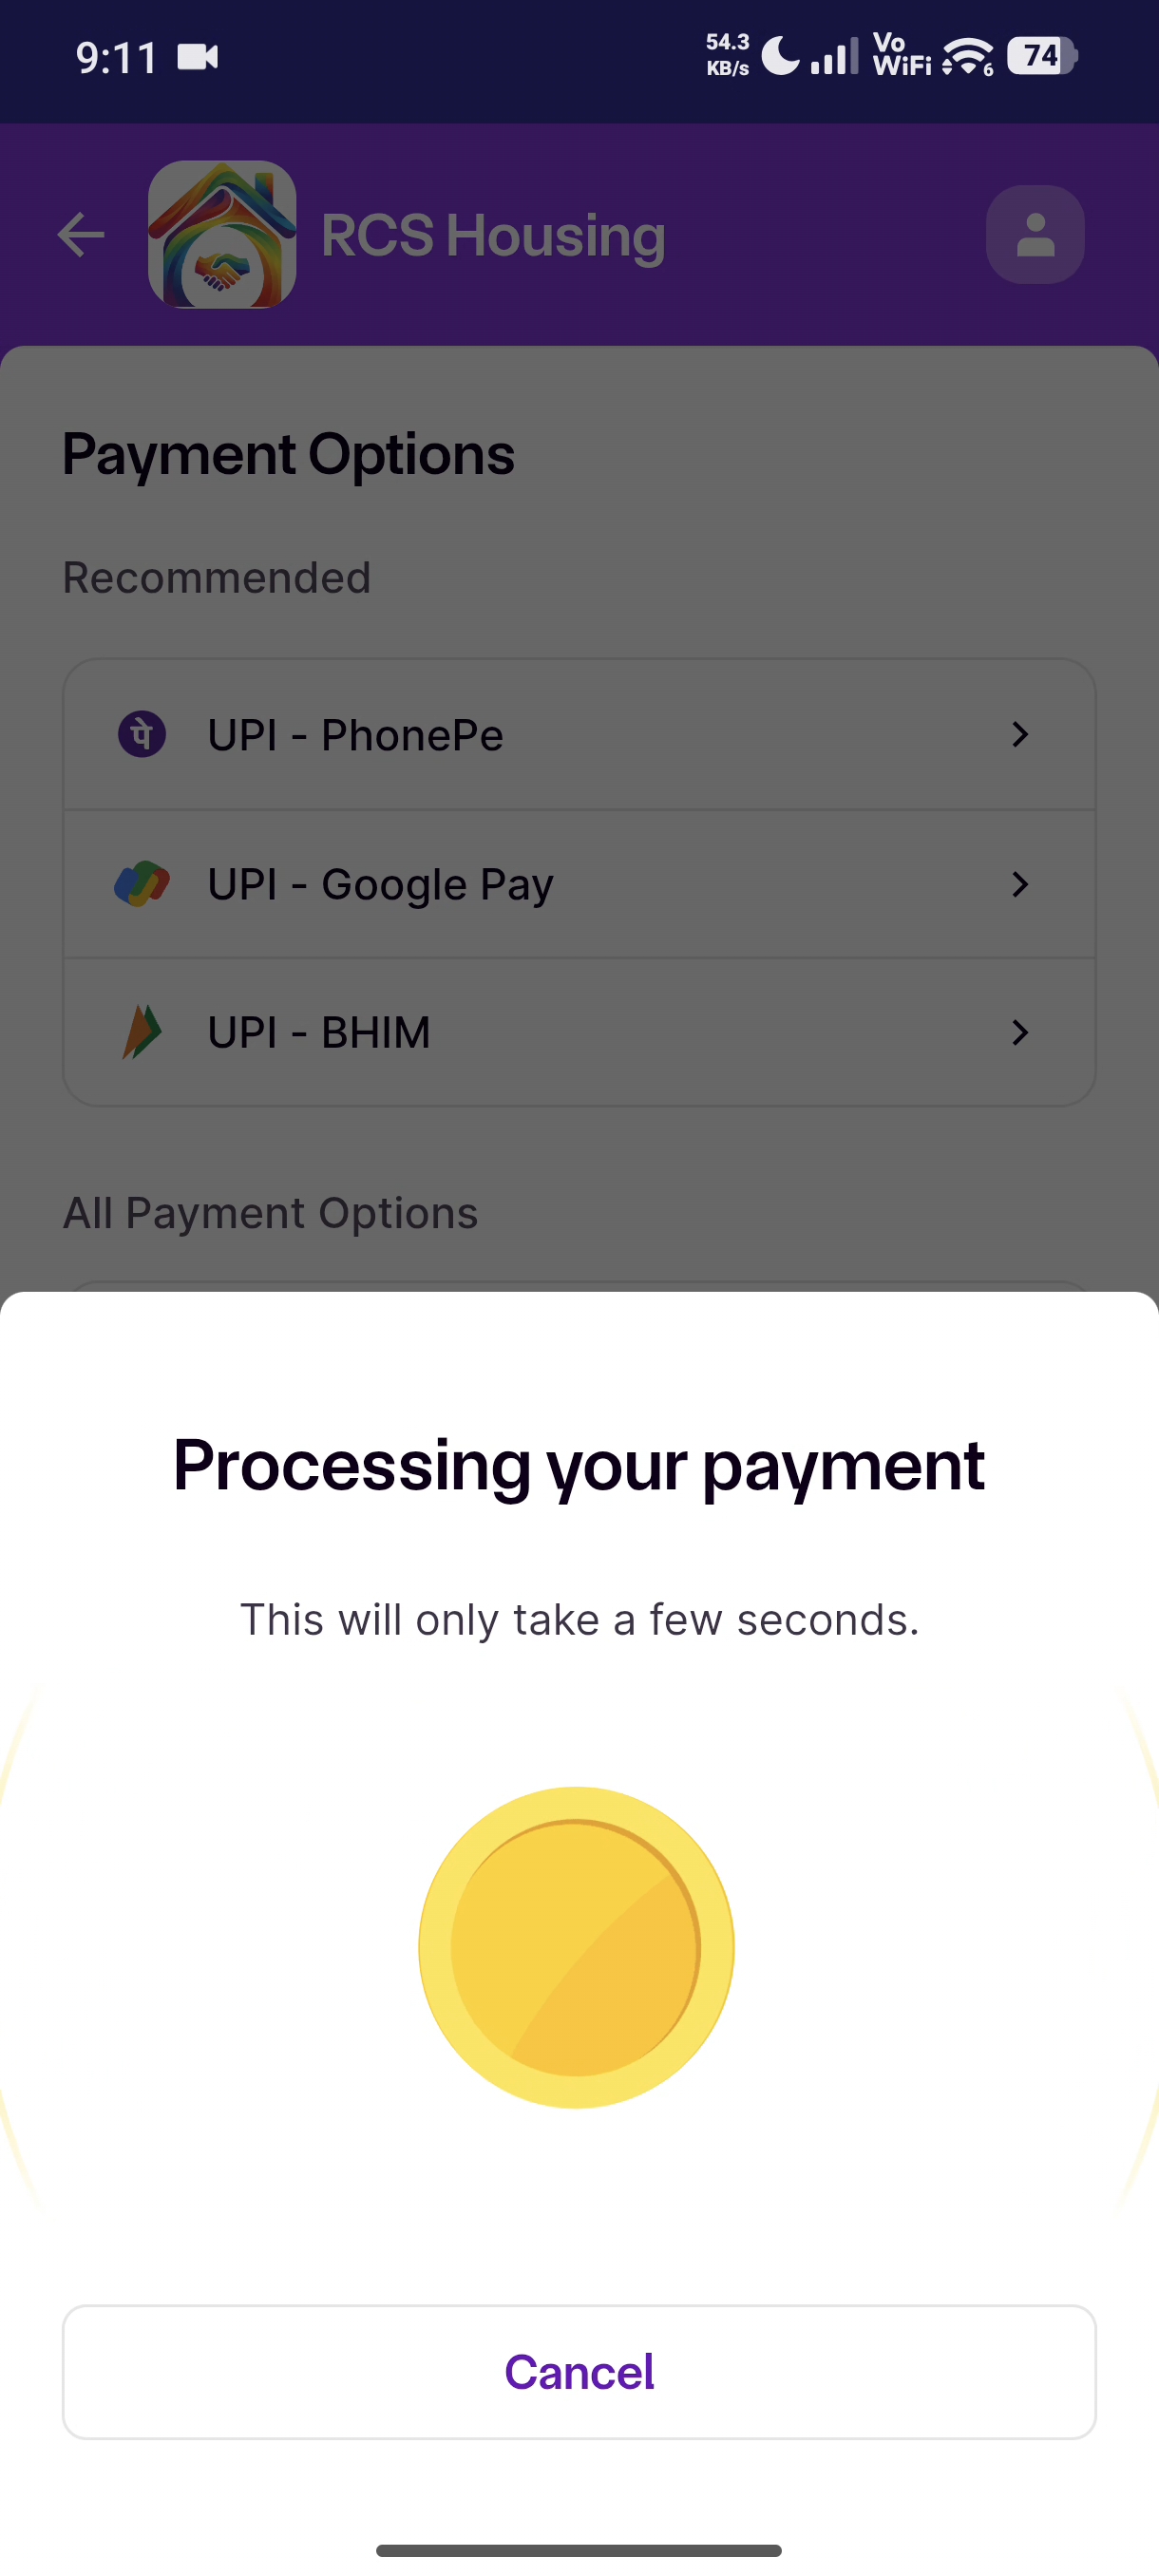
Do not press the back button or close the app while payment is processing. Wait for the confirmation screen.
Step 5: Booking Confirmed
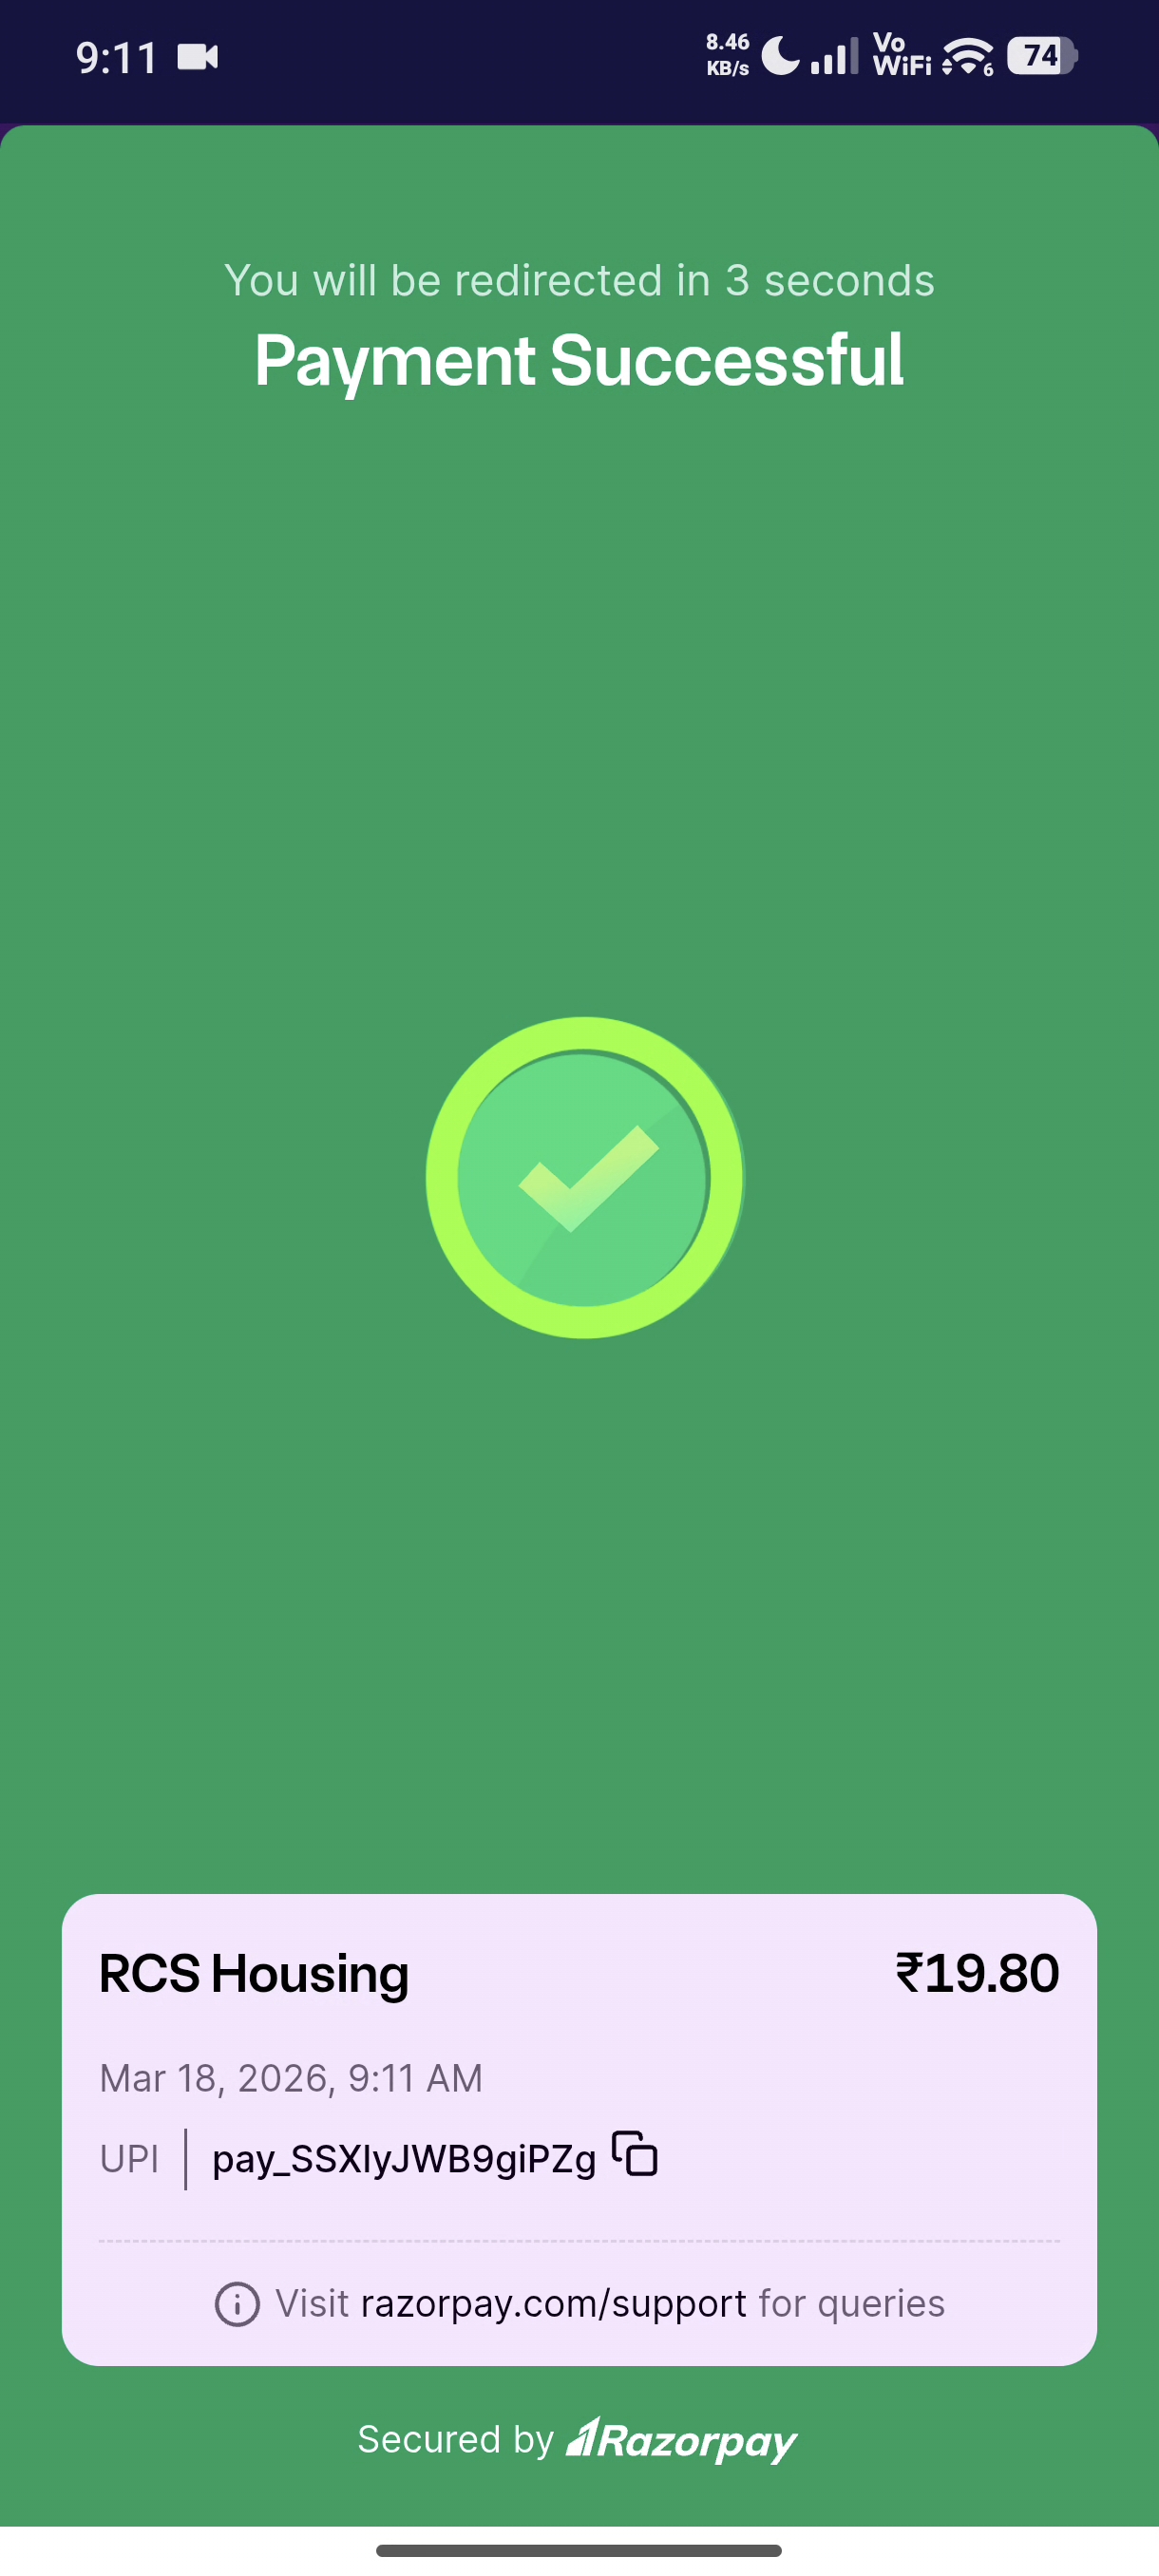
After successful payment:
- A confirmation screen shows your booking ID and transaction details
- You receive an email and SMS confirmation
- The booking appears in your Bookings tab
If Payment Fails
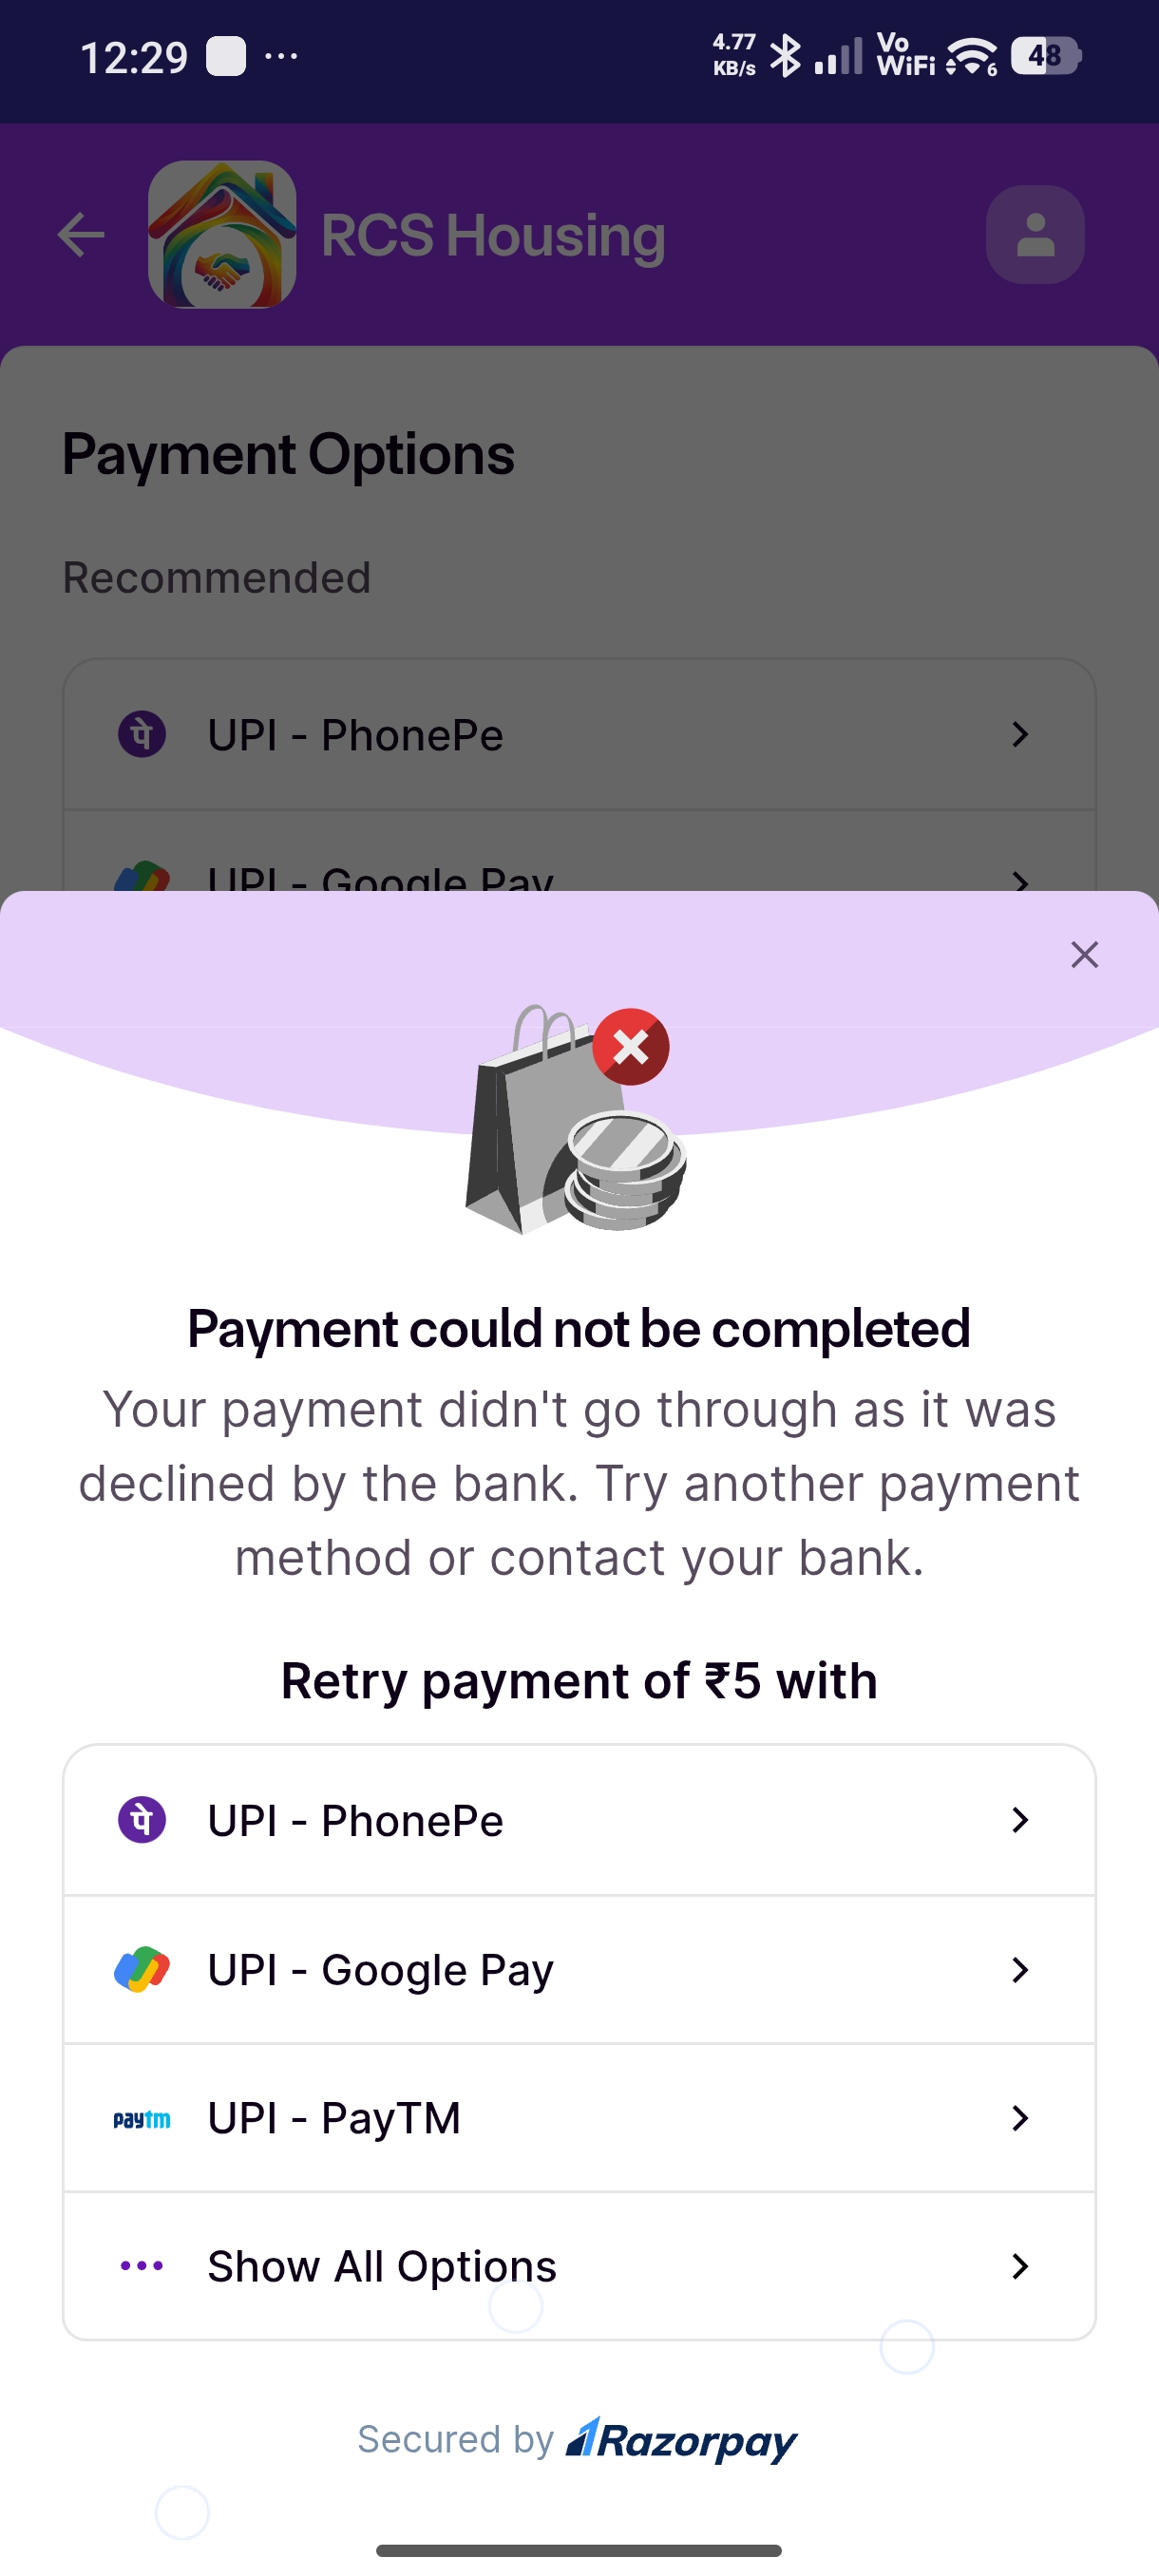
Don't worry — the app handles this:
- Your plot hold remains active
- The failure screen shows the error reason
- Tap Retry Payment to try again
- Try a different payment method if needed
If money was debited but the app shows payment failed, wait 30 minutes and check your booking status. Auto-refund processes within 5–7 business days if the payment truly failed.
My Bookings
The Bookings tab shows all your bookings.
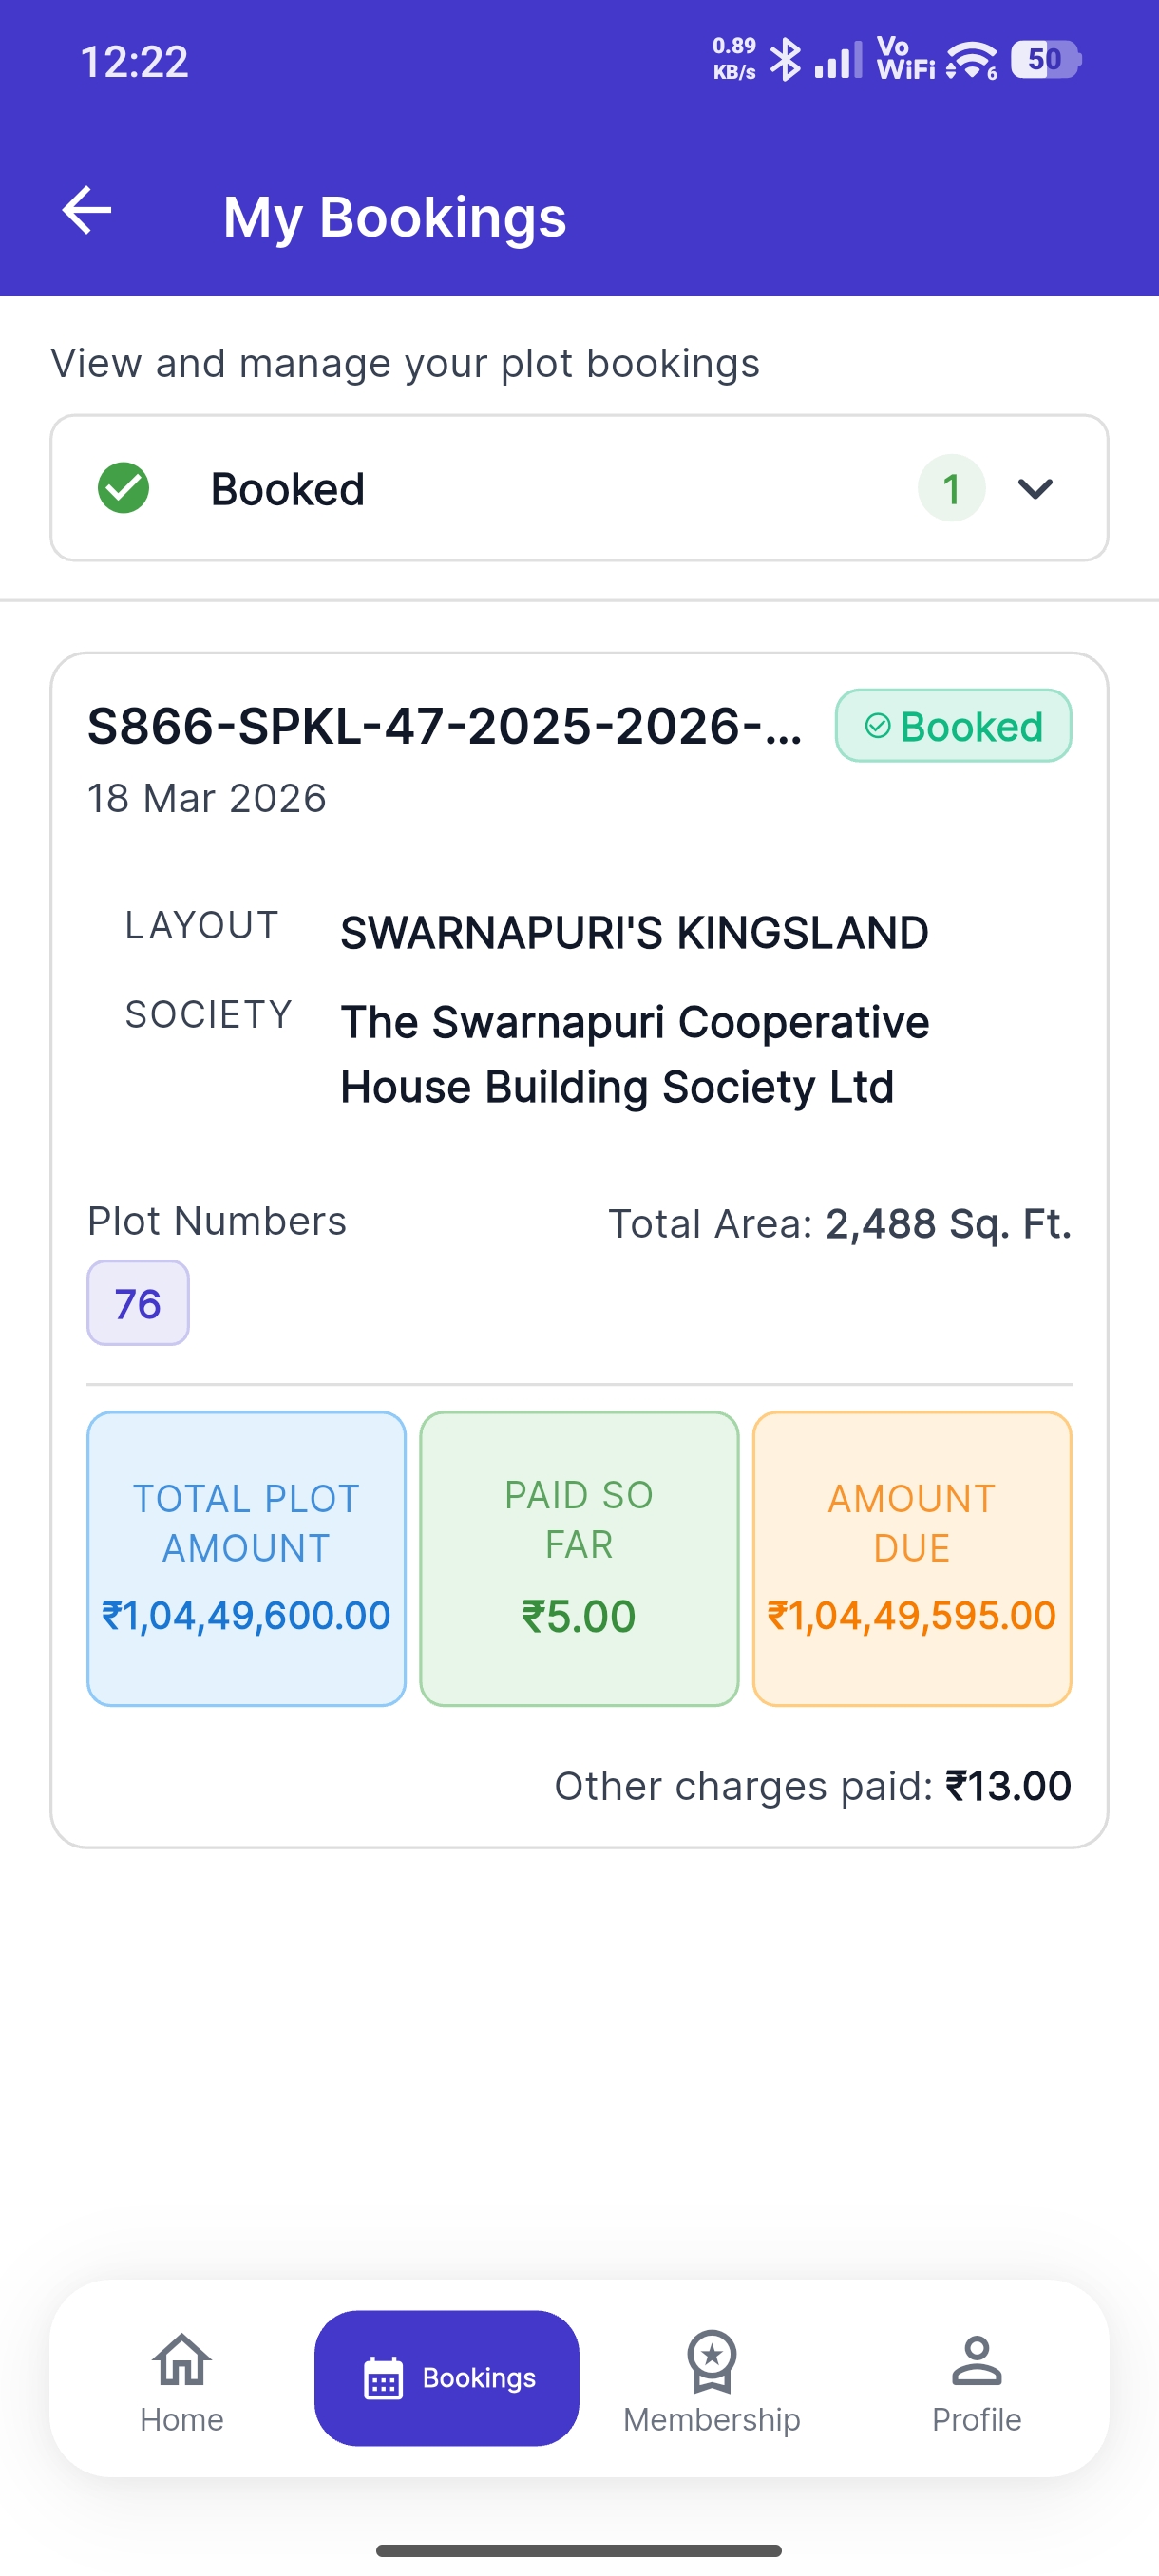
Booking Statuses
| Status | Meaning |
|---|---|
| Booked | Your booked plots |
| Completed | Plot sold to your name |
| Payment Failed | Payment failed bookings list |
| In Cancellation | You request the society to cancel you bookings |
| Cancelled | Society admin approved your cancellation |
What You Can Do
- View plot details, cost breakdown, and payment history
- Make upcoming milestone payments
- Download payment receipts
- Request cancellation (if eligible)
Refunds & Cancellations
Requesting a Cancellation
- Go to Bookings tab
- Tap the booking you want to cancel
- Tap Request Cancellation
- The app checks if your booking is eligible for cancellation
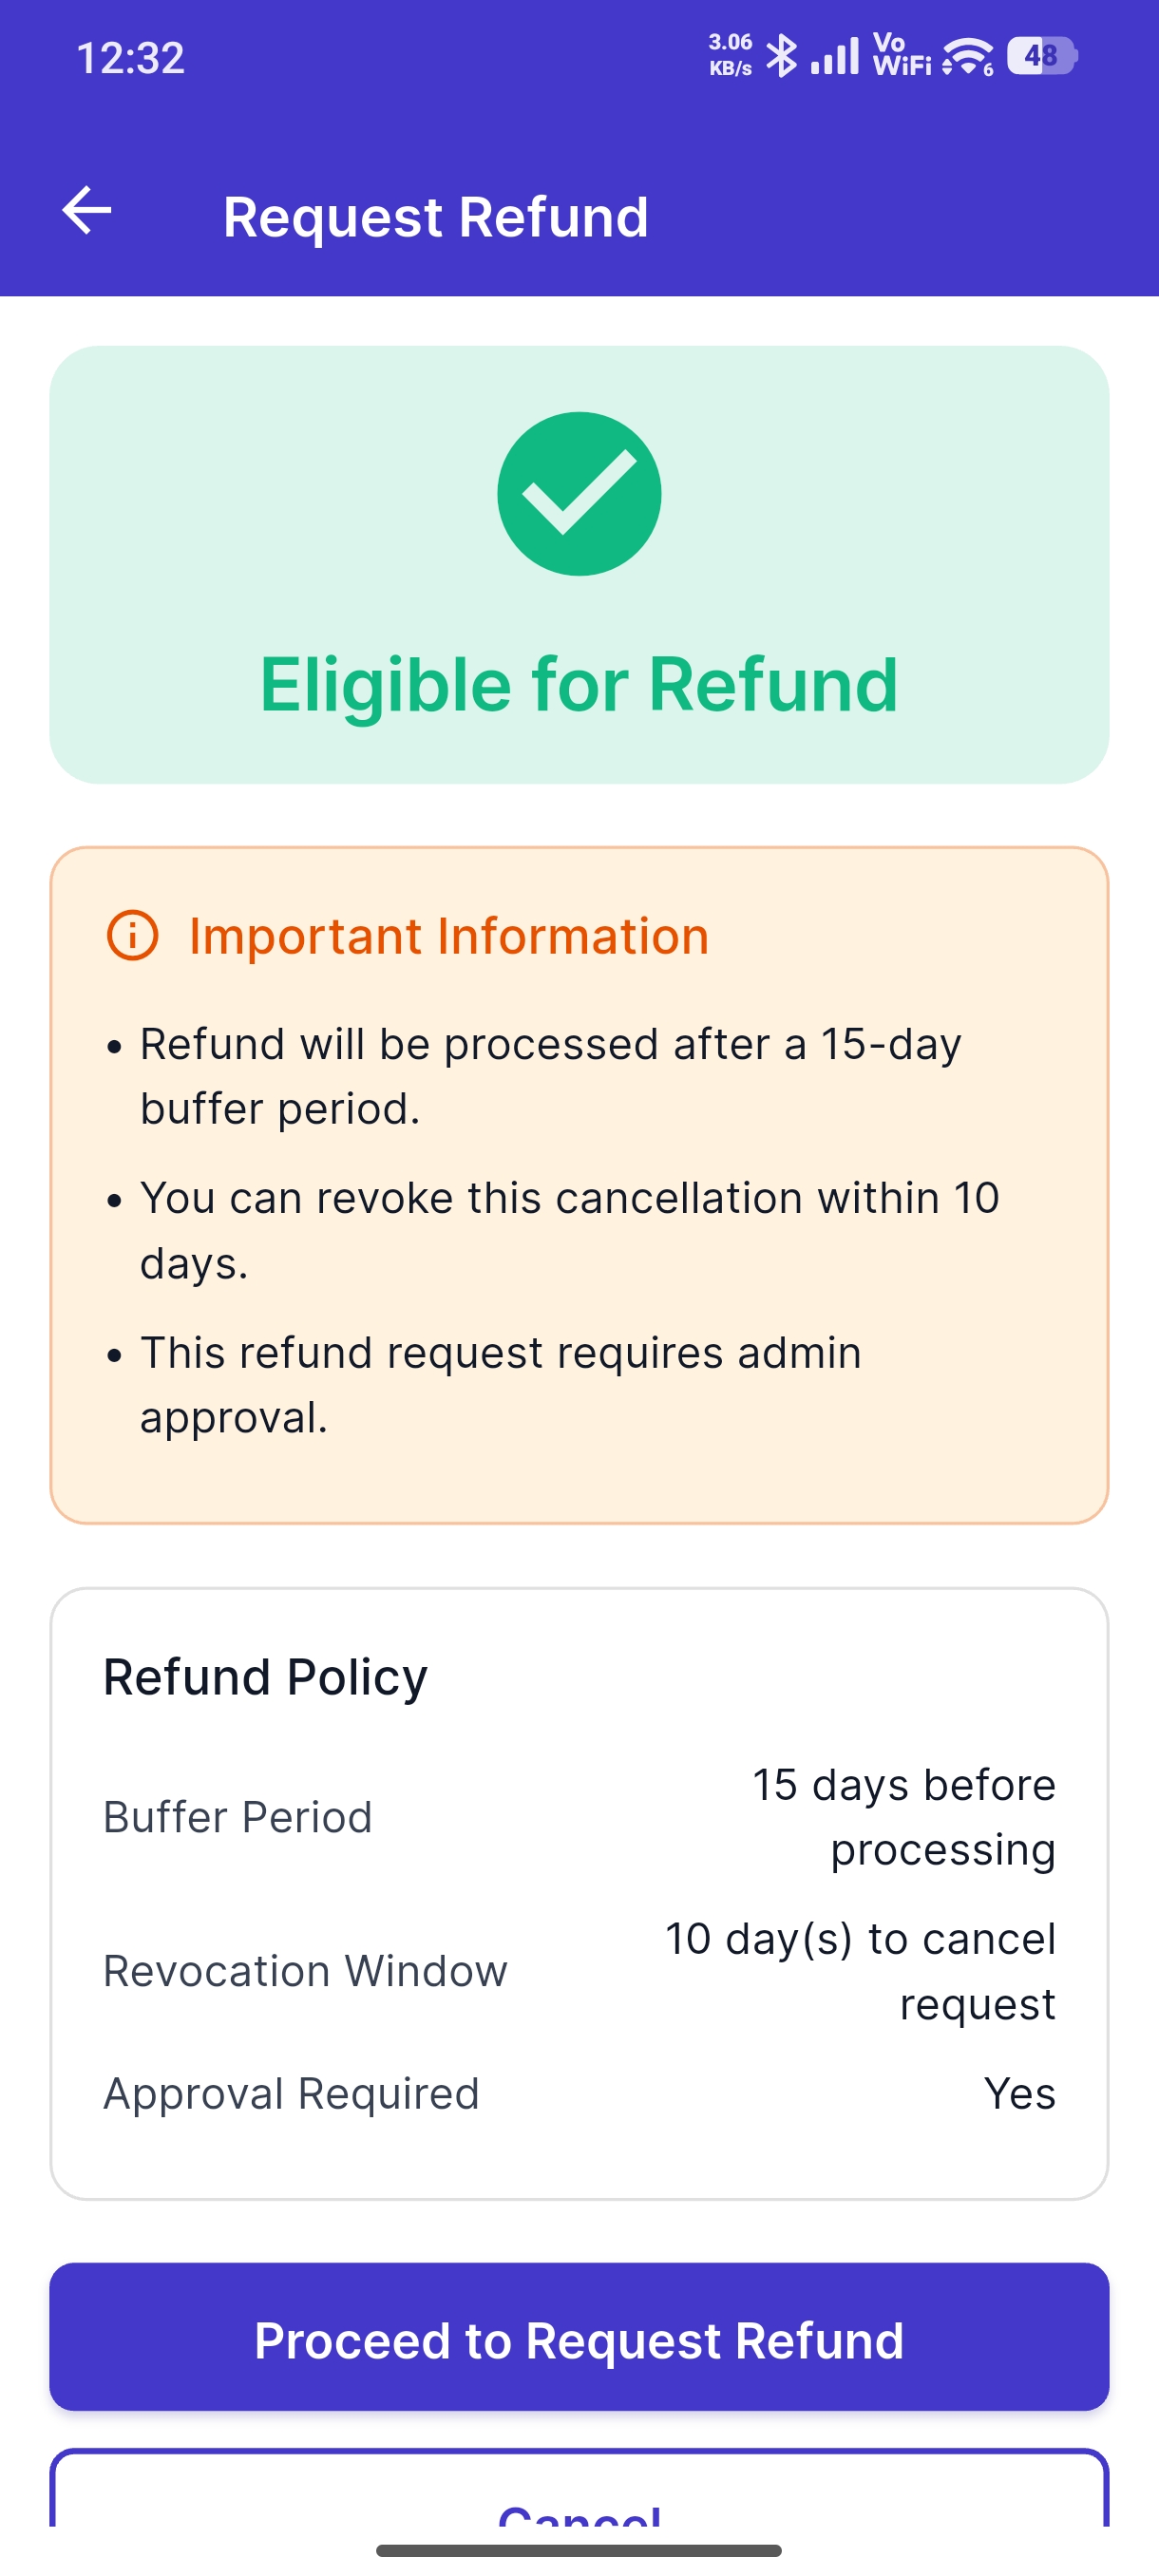
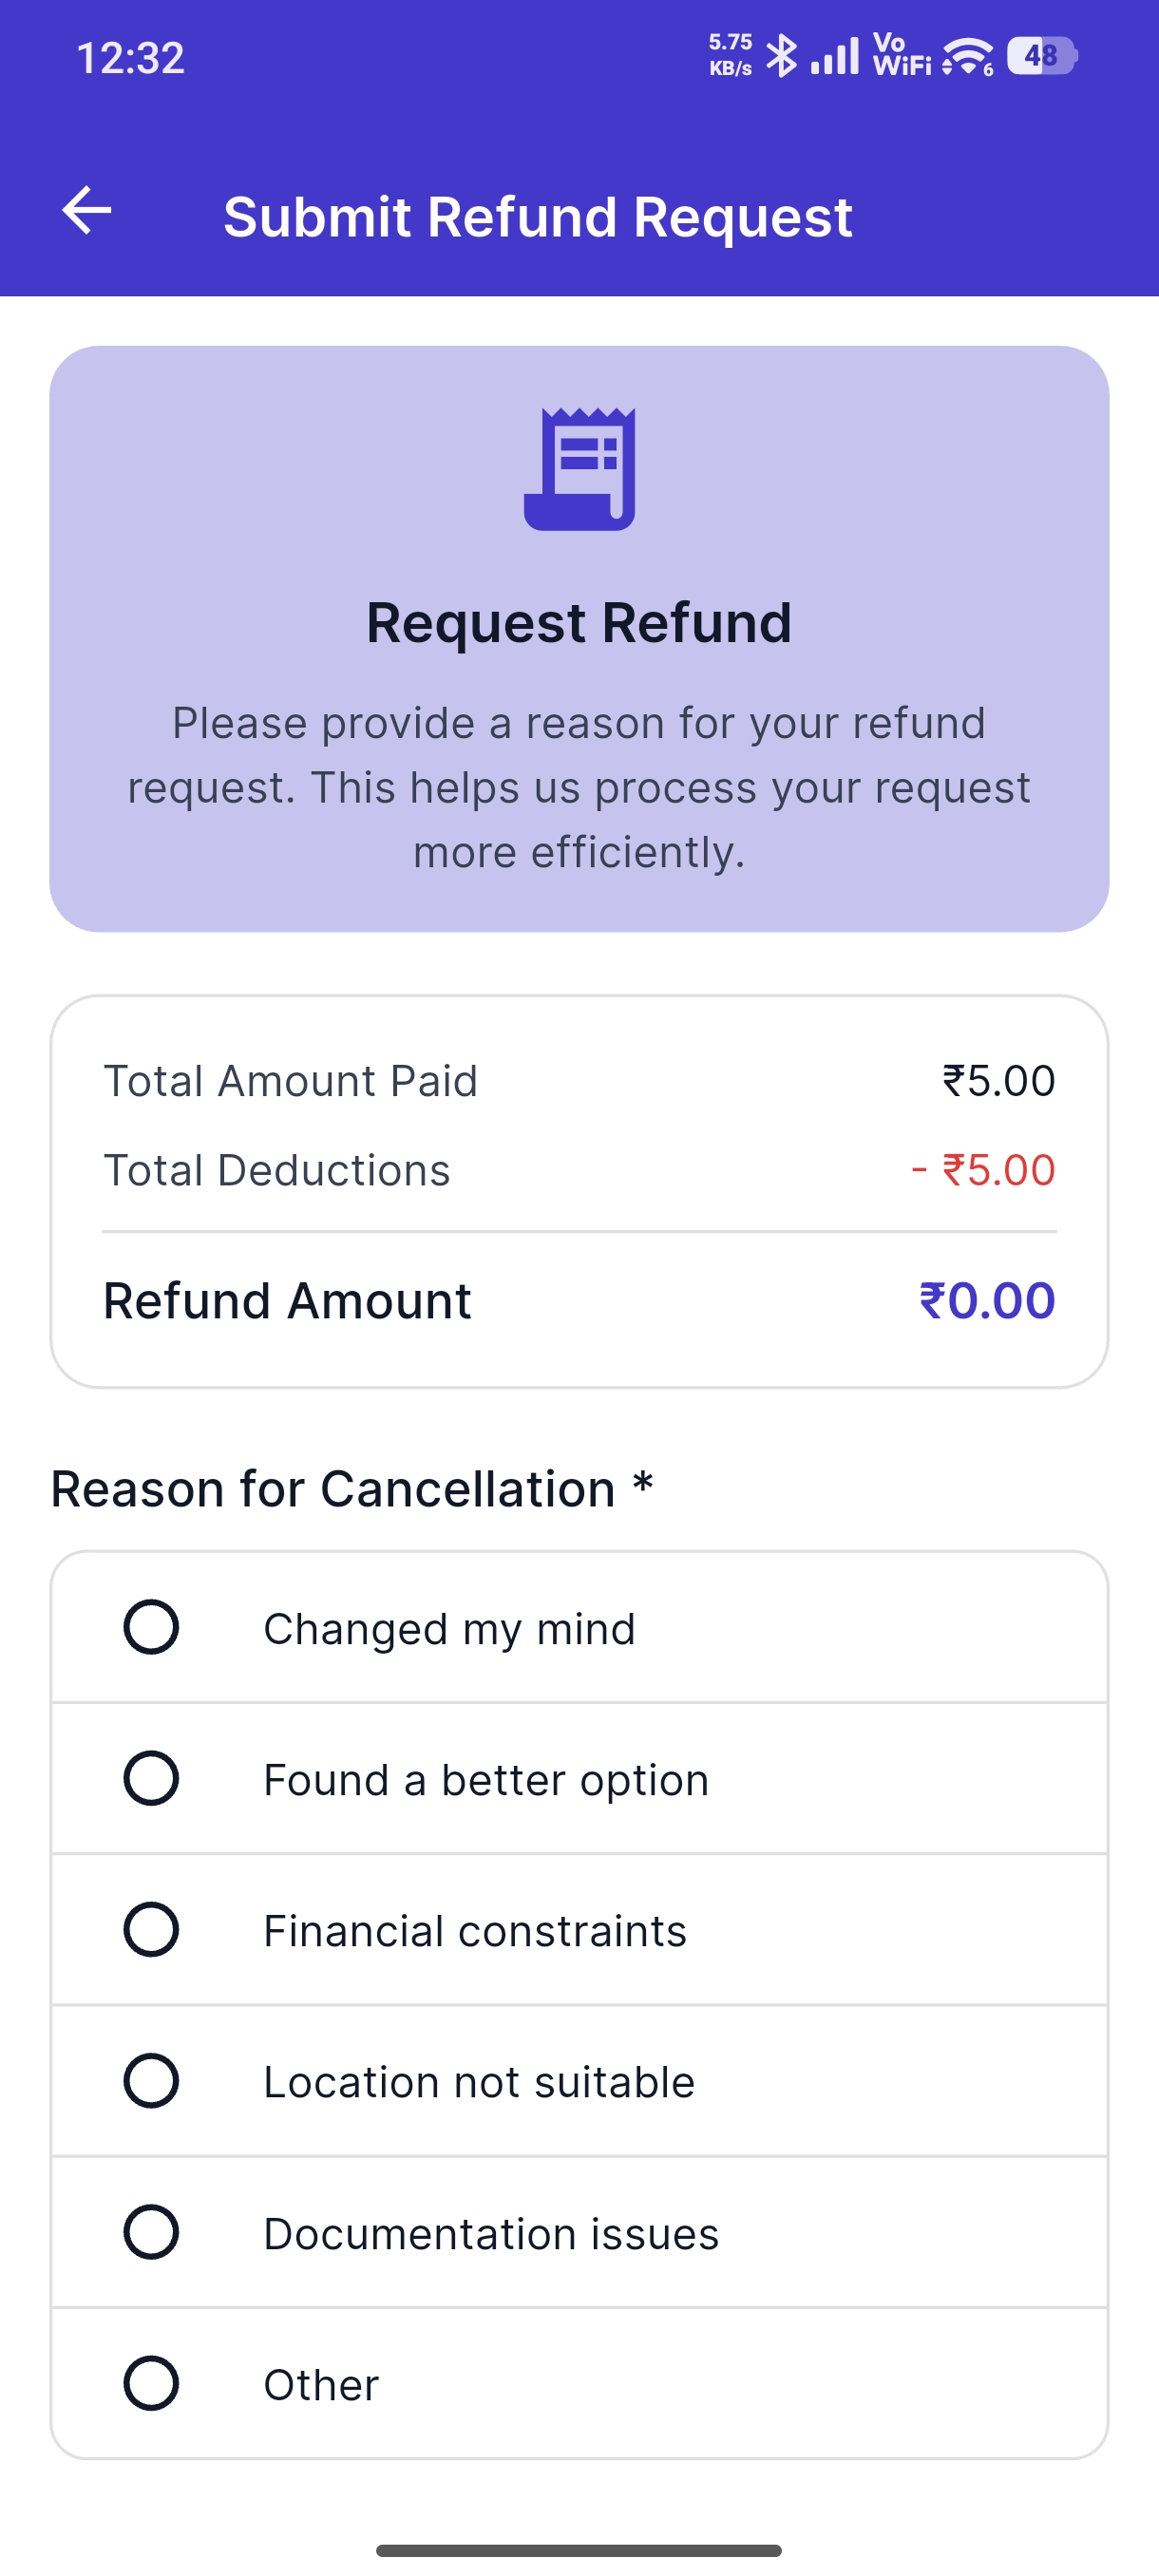
Submitting a Refund Request
If eligible:
- Review the refund breakdown:
- Original booking amount
- Applicable fees and deductions
- Net refund amount
- Select a cancellation reason:
- Changed my mind
- Found a better option
- Financial constraints
- Location not suitable
- Documentation issues
- Other
- Add optional notes
- Tap Submit Request
Tracking Your Refund
Go to My Refunds (accessible from Bookings or Profile):
| Status | Meaning |
|---|---|
| Pending | Request submitted, under review |
| Processing | Refund approved, being processed |
| Completed | Refund credited to your account |
| Denied | Request rejected (check reason) |
Revoking a Refund Request
Changed your mind? If the refund is still within the buffer period, you can revoke it:
- Go to My Refunds
- Tap the pending refund
- Tap Revoke Request
- Confirm revocation
A countdown timer shows how long you have to revoke.
Notifications & Inbox
Inbox
The app keeps you informed about everything happening with your account:
- Booking confirmations and status changes
- Payment receipts and reminders
- KYC verification results
- Membership approvals or rejections
- Society announcements
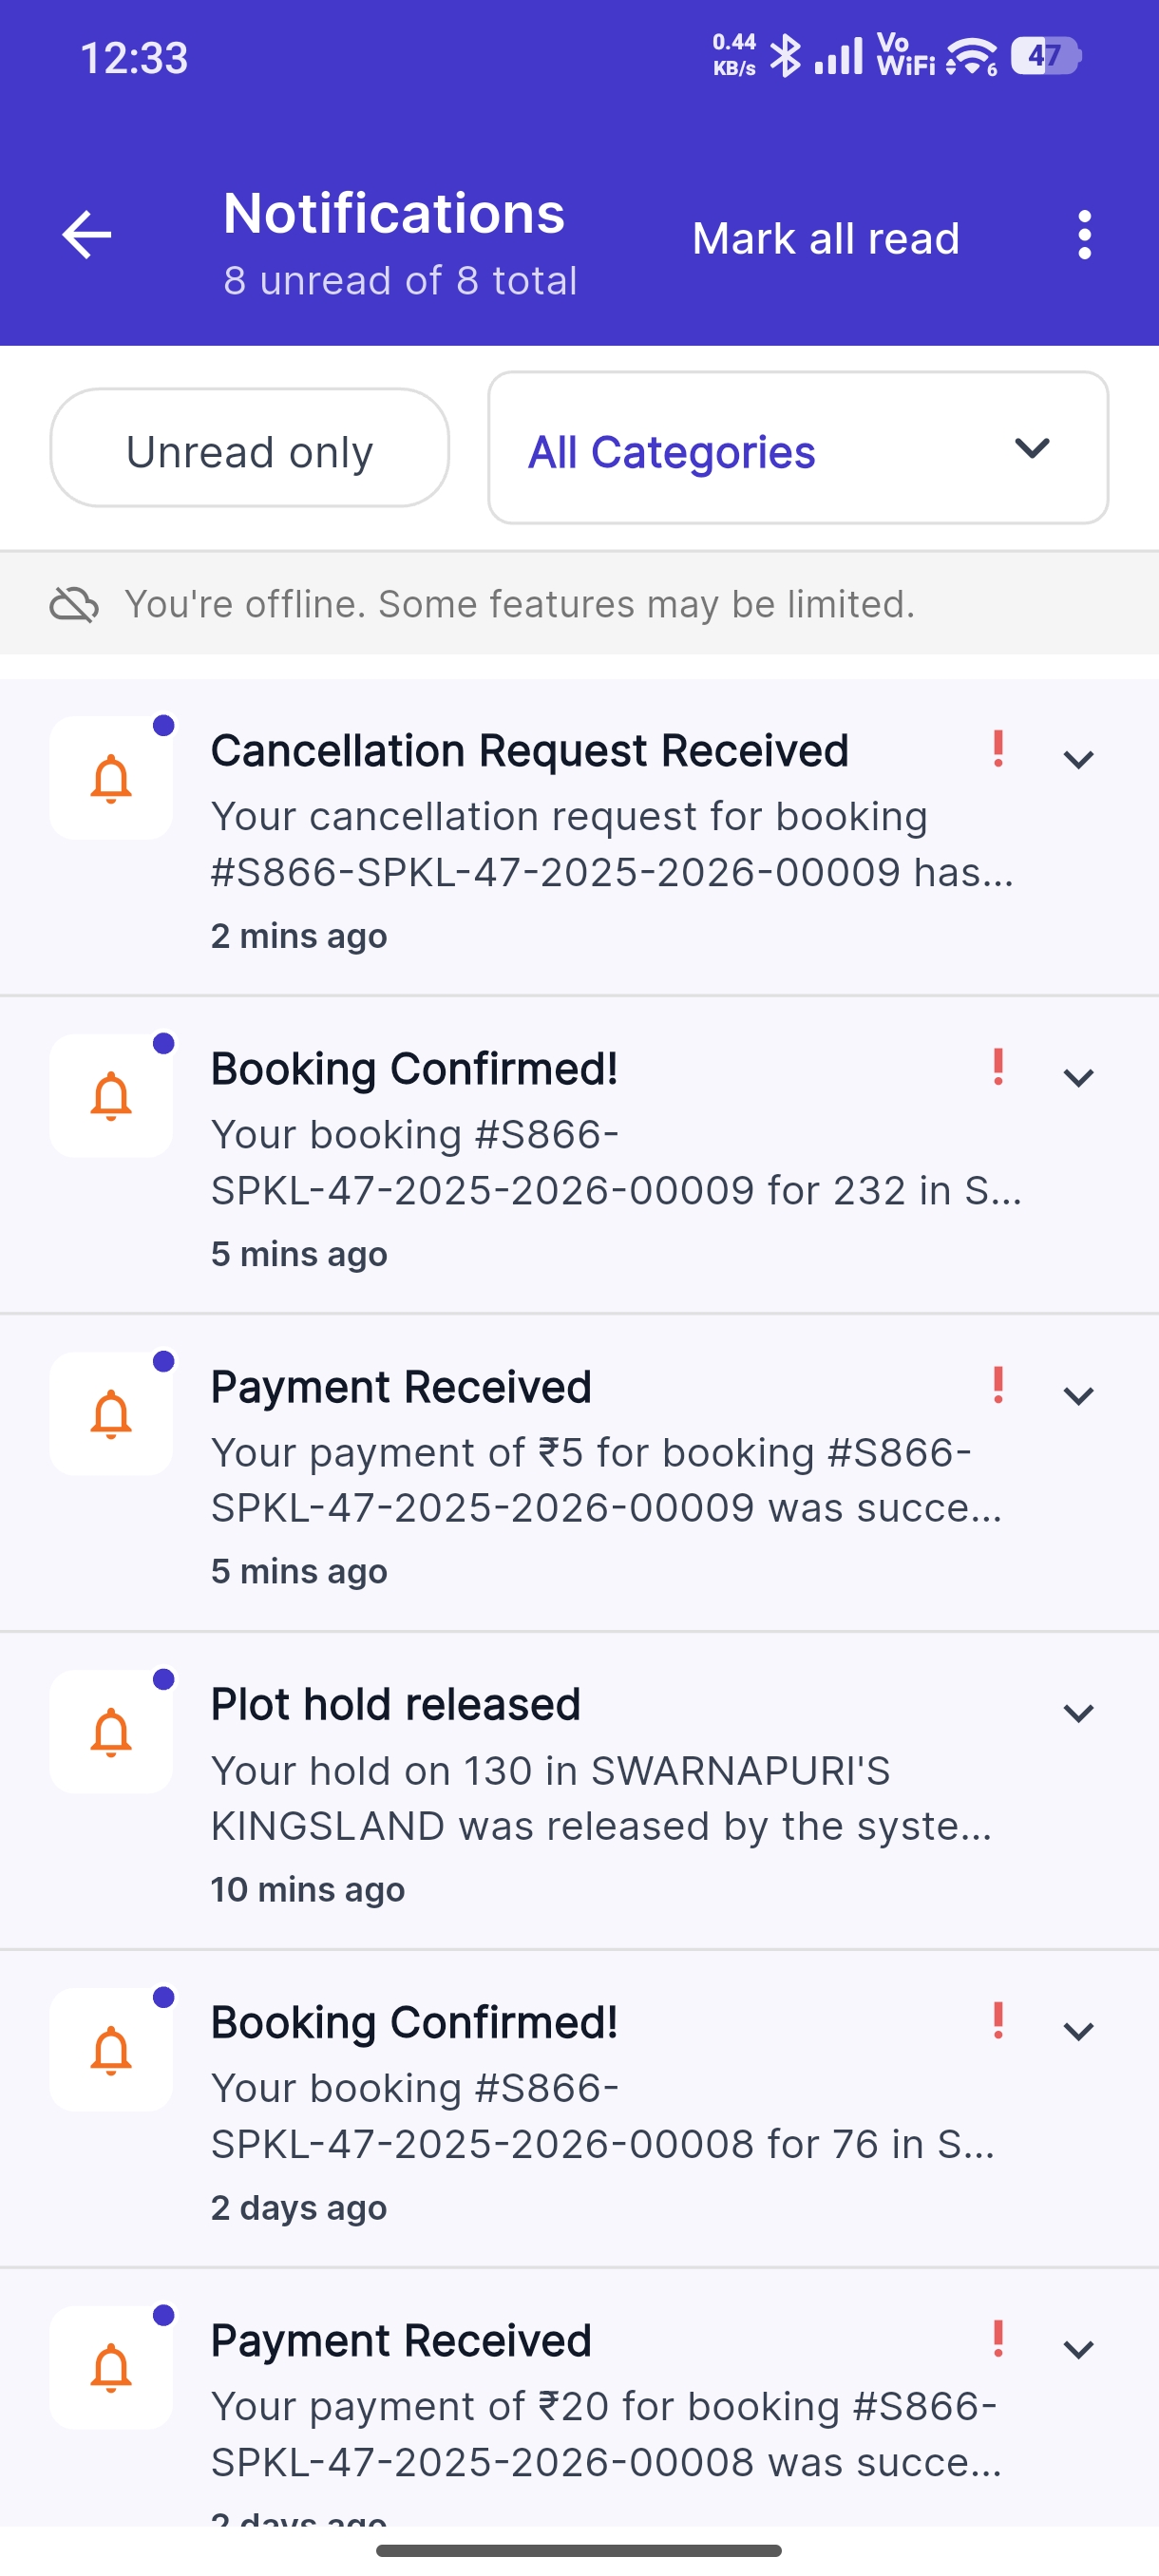
Unread notifications are highlighted. Tap any notification to view details and navigate to the relevant screen. Use Mark All as Read to clear unread badges.
Push Notifications
The app sends push notifications to your phone even when the app is closed. You'll get alerts for:
- Payment confirmations
- Booking status changes
- KYC updates
- Membership decisions
- Upcoming payment reminders
Notification Settings
Customize what you receive:
- Go to Profile → Notification Settings
- Toggle categories on or off:
- Booking updates
- Membership alerts
- KYC notifications
- Payment reminders
- Announcements
- Promotional messages
- Set quiet hours (Do Not Disturb) if needed
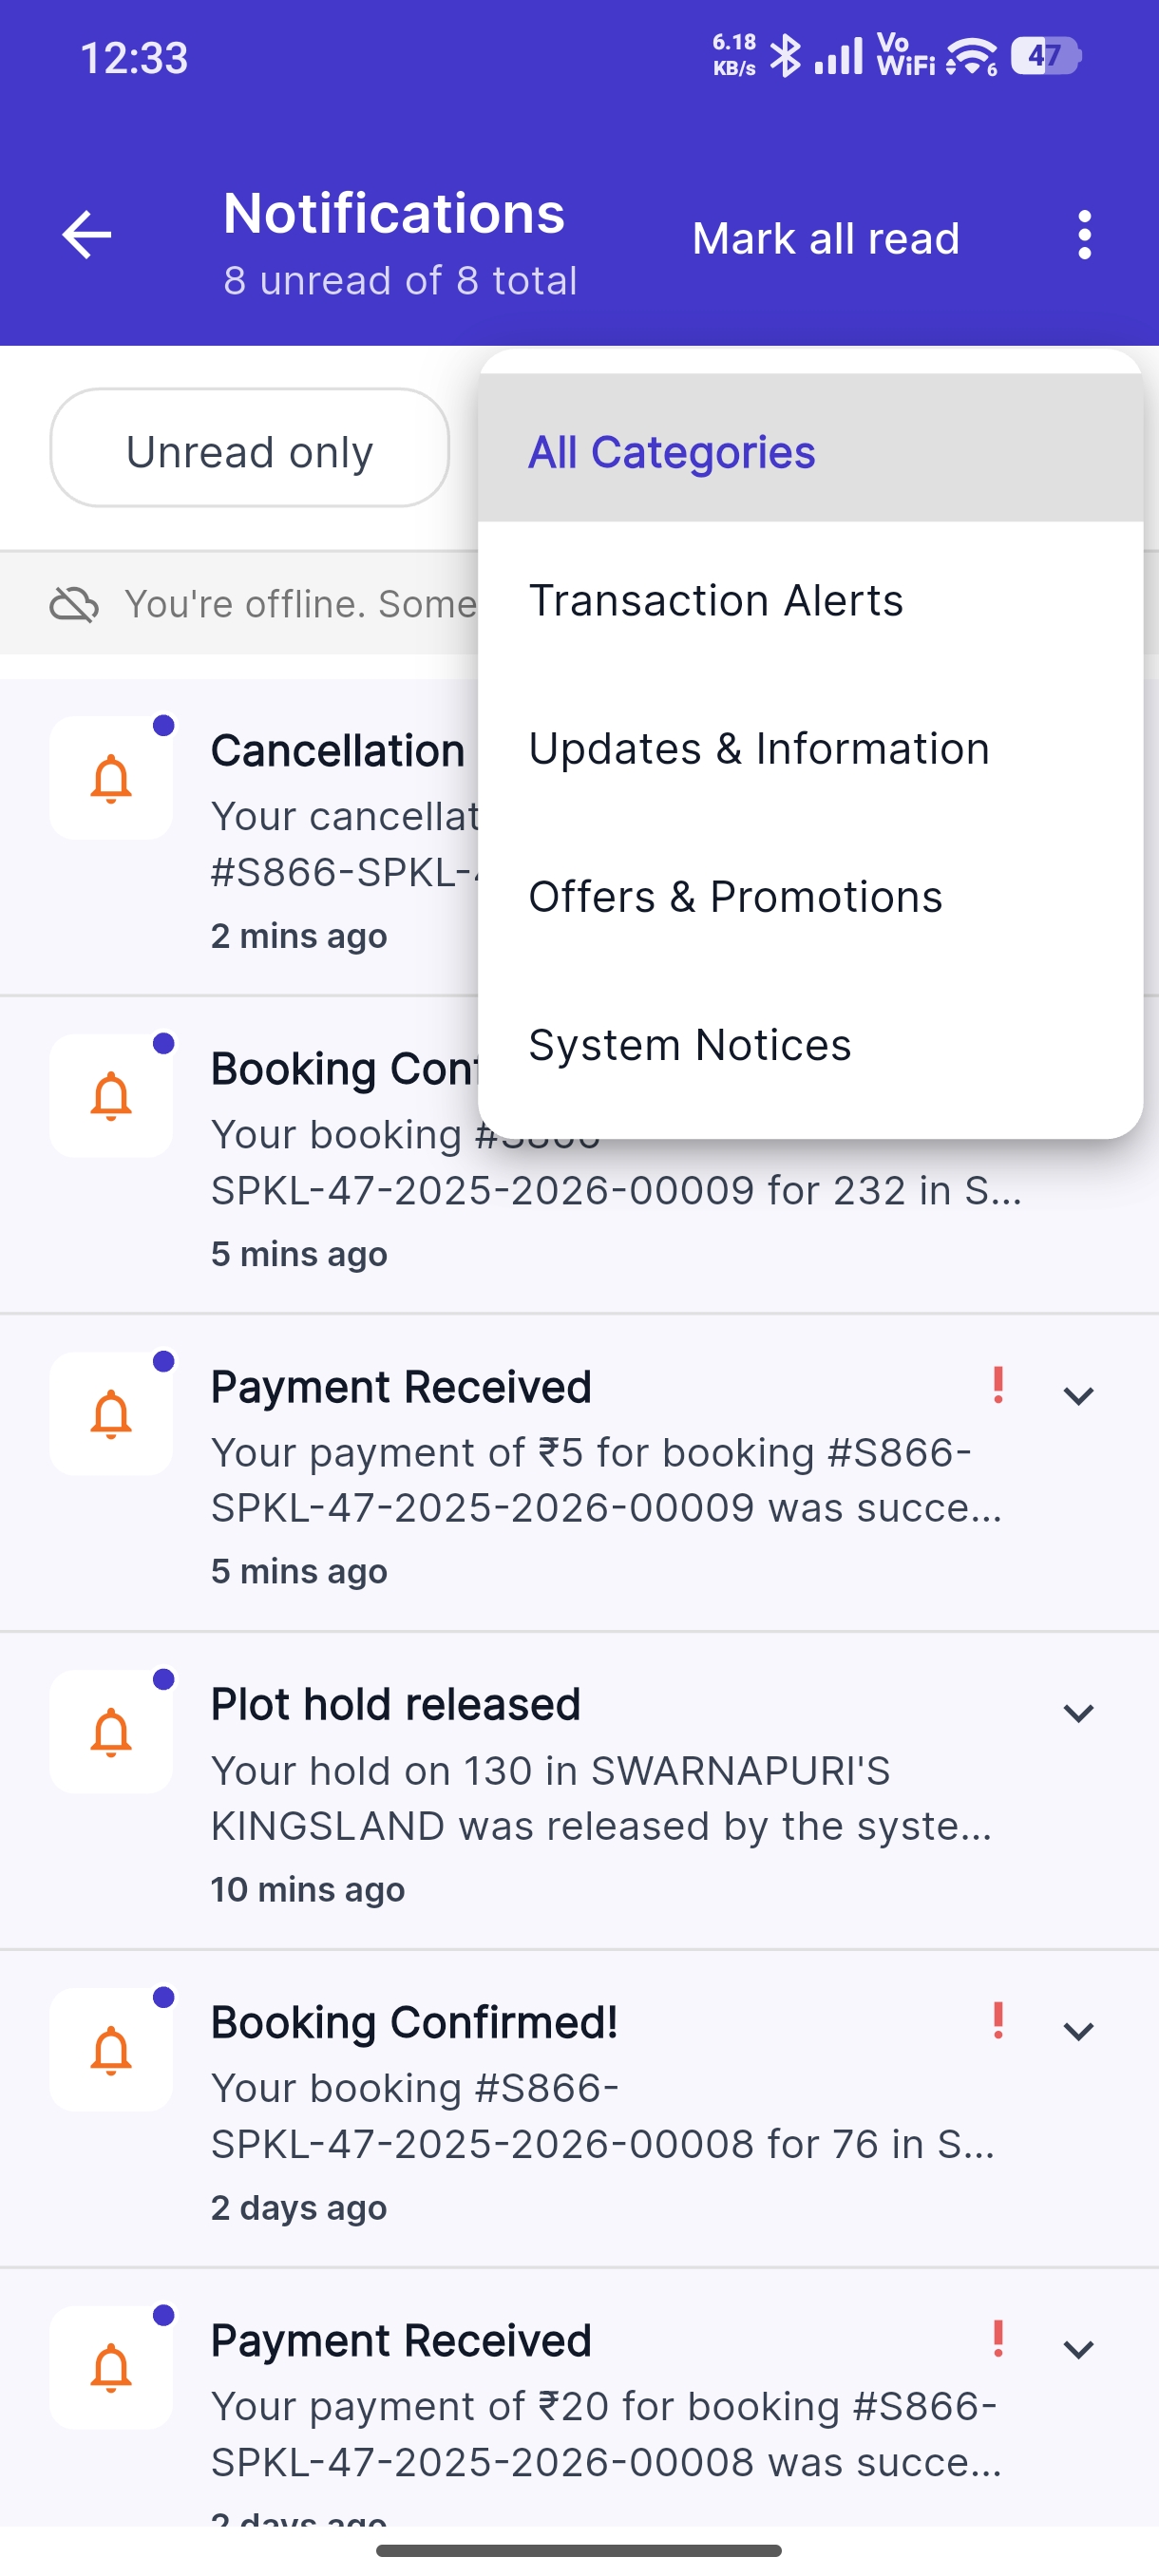
Transactional notifications (OTPs, payment confirmations) cannot be turned off — they're essential for your account security.
Announcements
Stay updated with news and announcements from housing societies:
- View pinned announcements on the Home screen carousel
- Access all announcements from Profile → Announcements
- Browse by category using filter chips
- Tap any announcement to read the full content with images and links
Profile & Settings
Viewing Your Profile
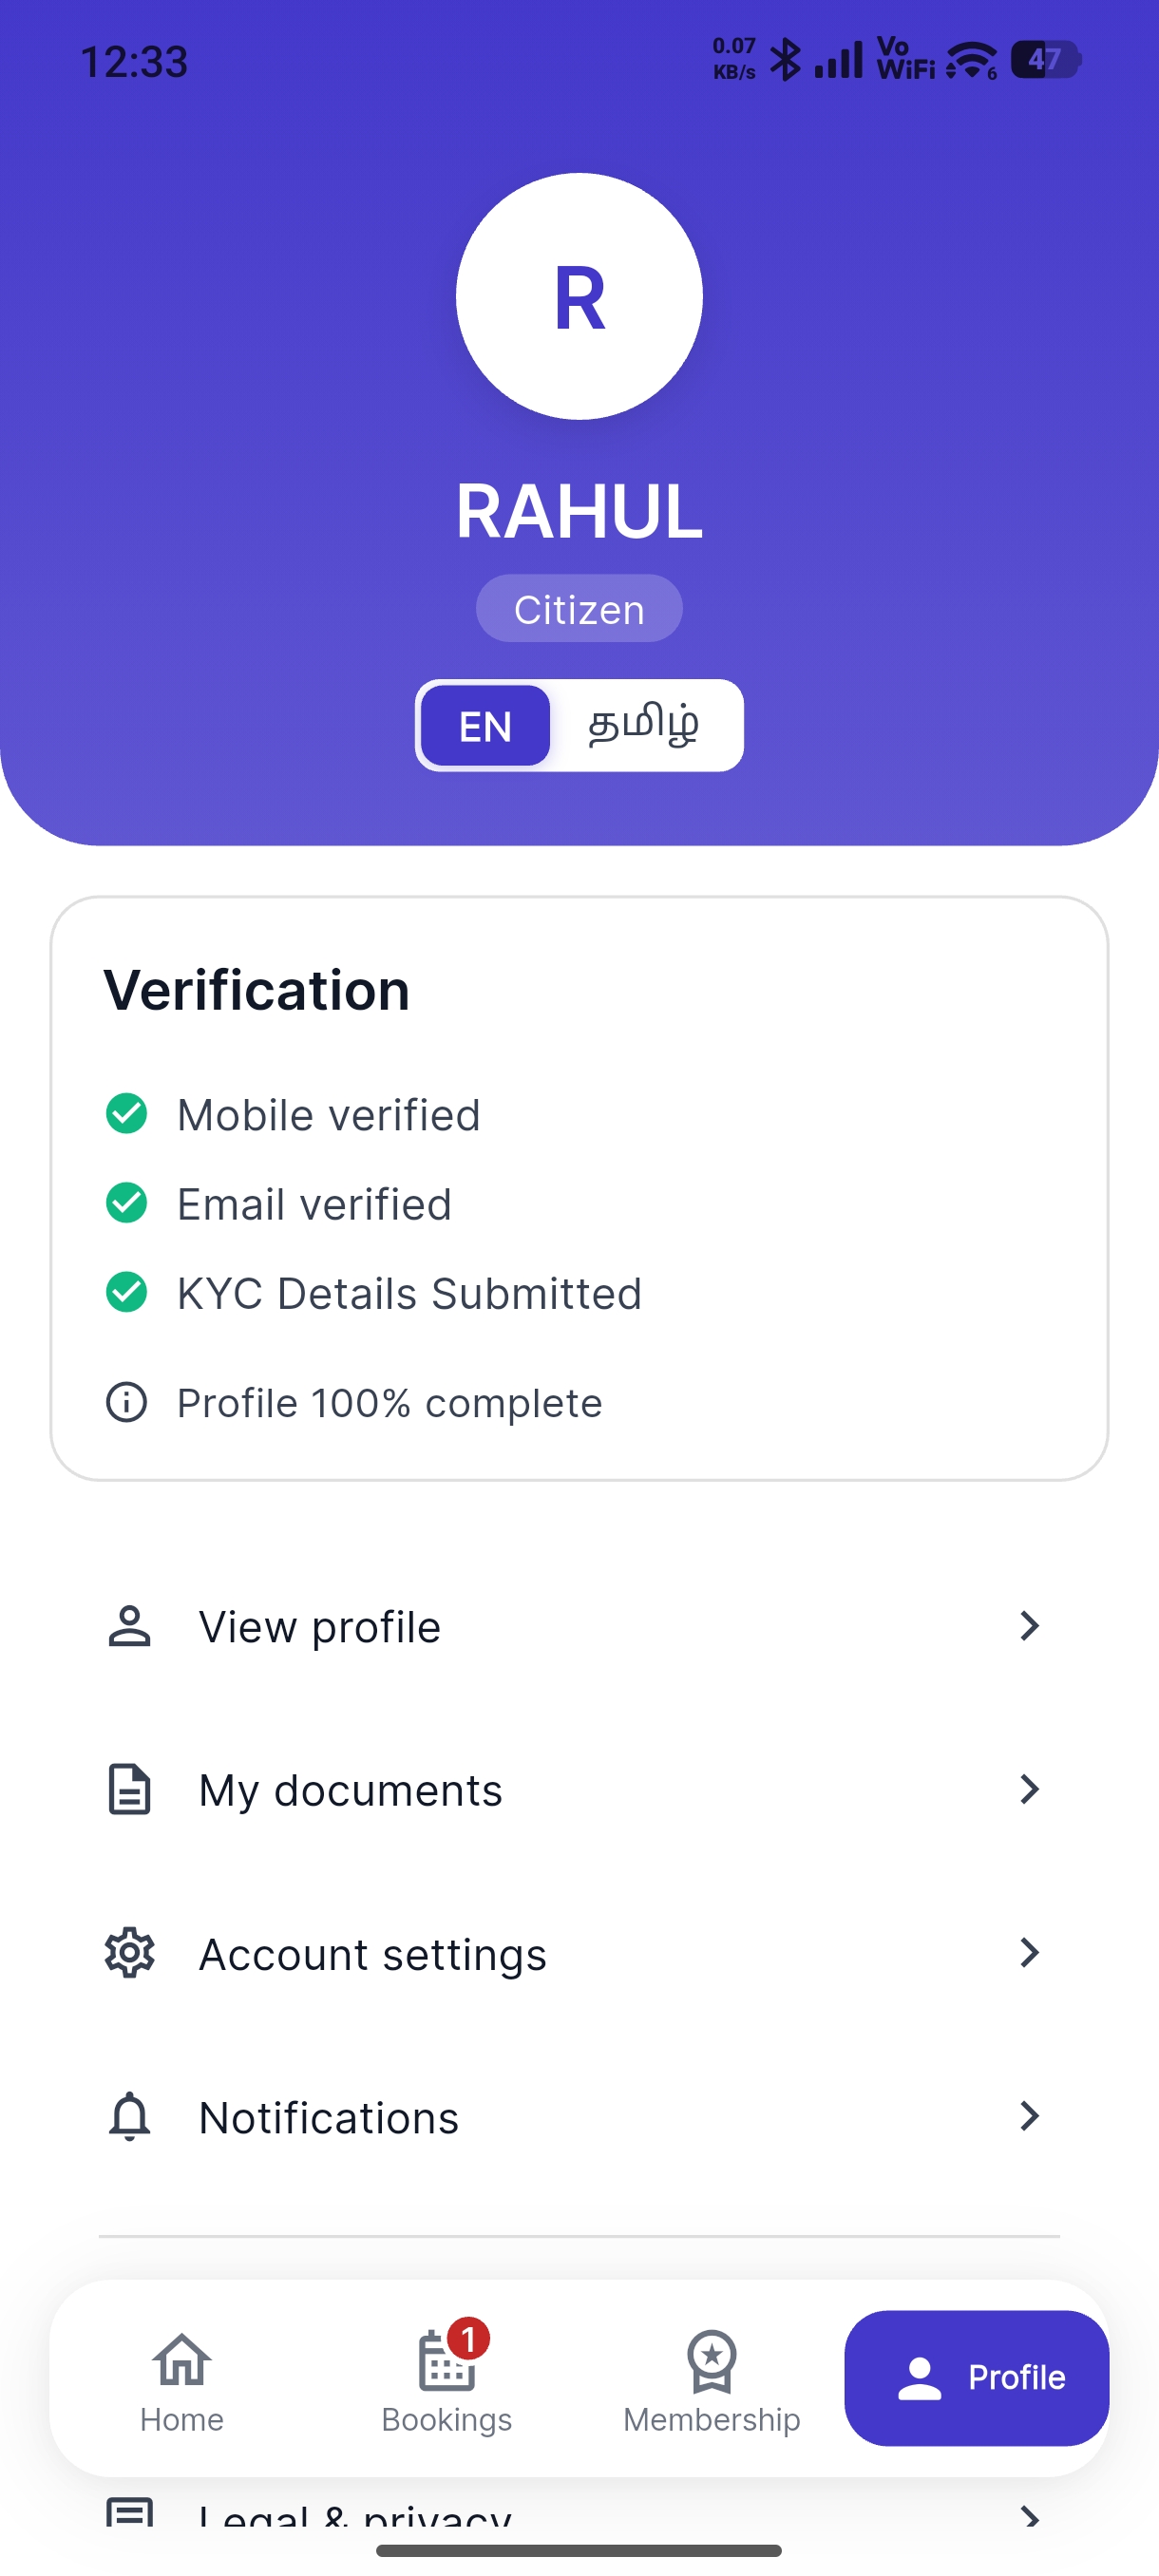
Tap the Profile tab to see your account dashboard.
Available Options
| Option | What It Does |
|---|---|
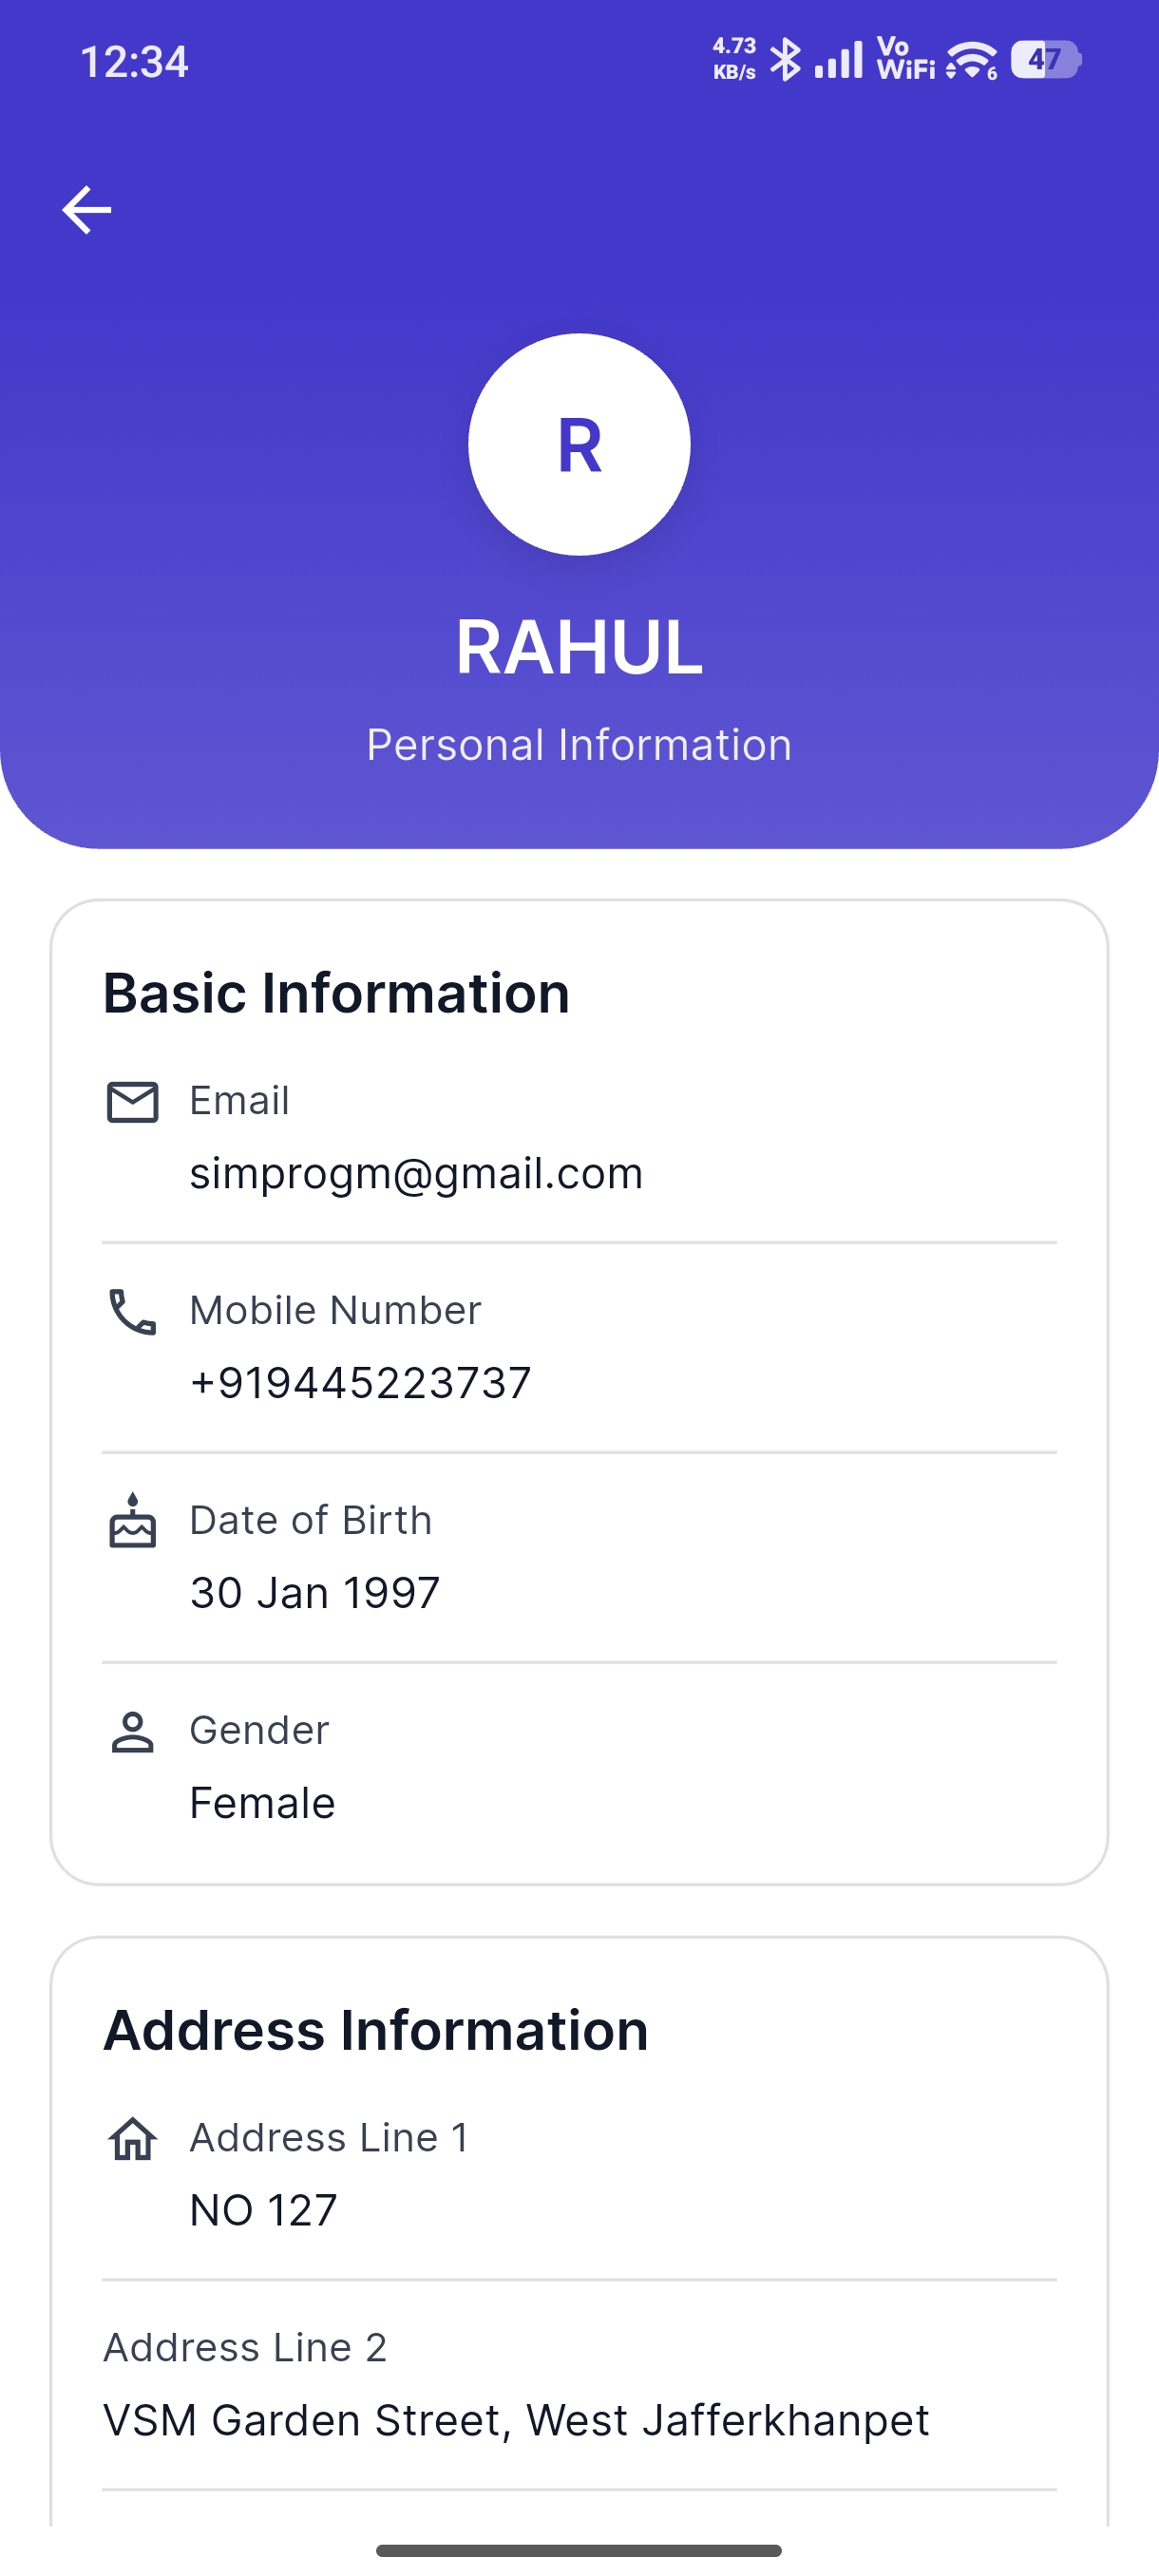
| Personal Information | View your name, email, phone, address |
| Account Settings | Theme (light/dark), language selection |
| Notification Settings | Control notification preferences |
| Change Password | Update your account password |
| Privacy Policy | Read the platform's privacy policy |
| Announcements | View society announcements |
| My Bookings | Quick access to bookings |
| Logout | Sign out of your account |
Changing Your Password
- Tap Change Password
- Enter your current password
- Enter and confirm a new password
- Tap Update
Deleting Your Account
If you wish to permanently delete your account:
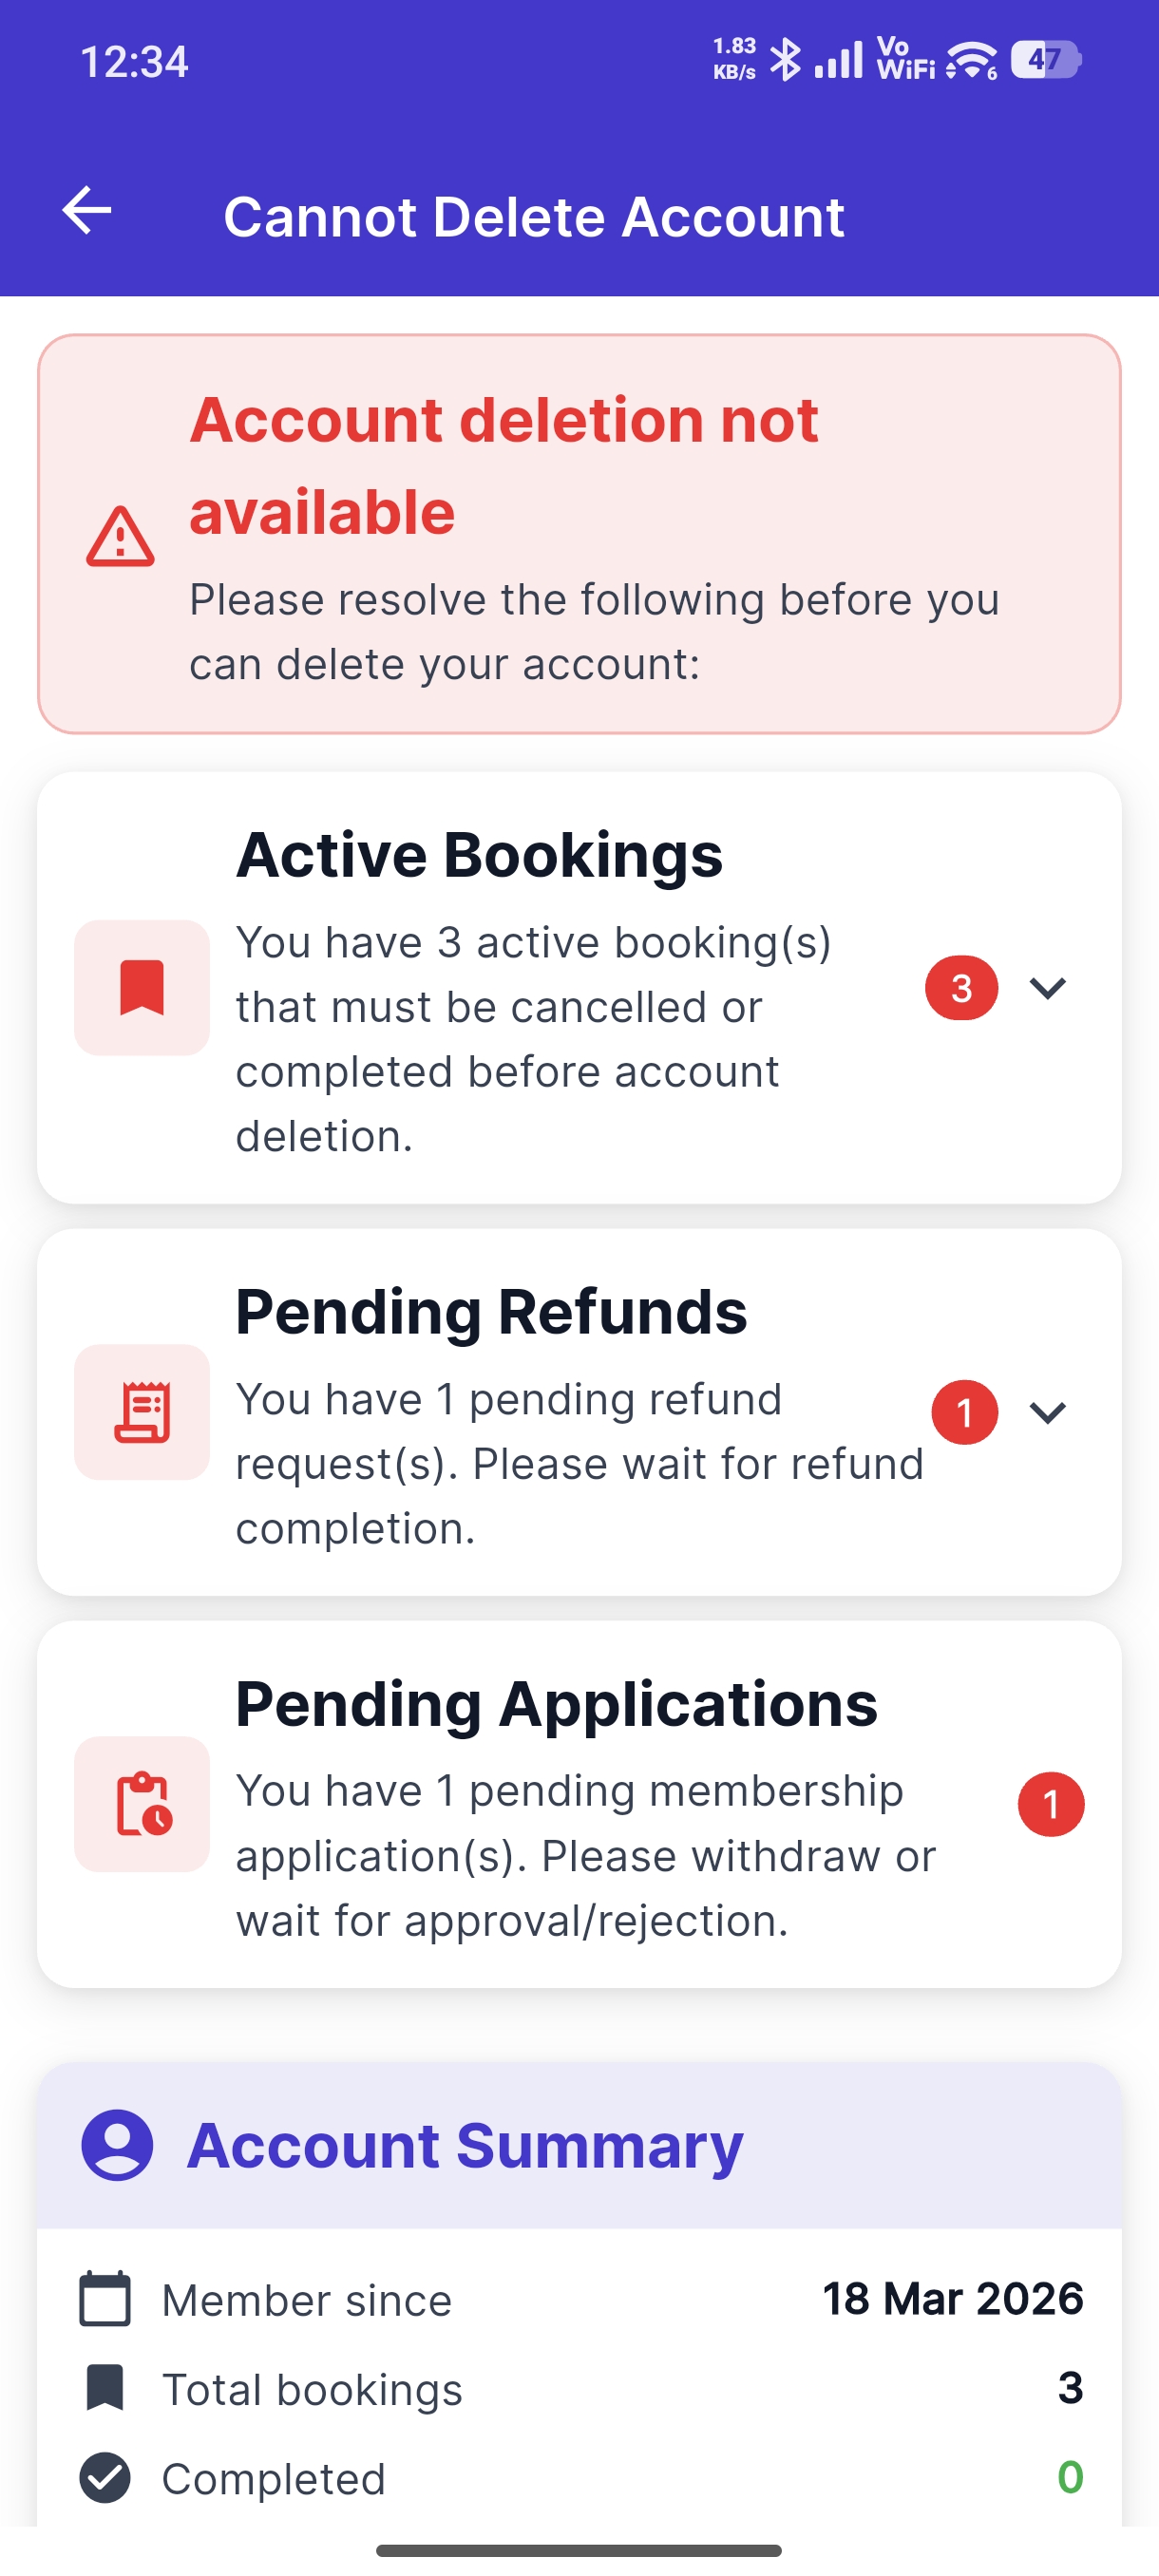
Important: Before You Delete
- All active bookings must be settled or cancelled
- All pending refunds must be resolved
- All pending payments must be cleared
- This action is irreversible — your data will be permanently removed
Steps to Delete
- Go to Profile → Account Deletion
- Eligibility Check — the app verifies you have no active holds, pending payments, or incomplete bookings
- Account Summary — review what will be deleted (memberships, bookings, forms)
- Select Reason — choose why you're leaving
- OTP Verification — confirm you own the account by entering the OTP
- Confirmation — your deletion is scheduled
What Happens After Deletion
| Outcome | Details |
|---|---|
| Immediate | If no active processes — deleted right away |
| Deferred | If cleanup needed — deleted after a 7-day buffer period |
| Queued | If ongoing processes — deleted after they complete |
During the buffer period, you can revoke the deletion by logging back in and tapping Cancel Deletion.
After the buffer period expires, account deletion cannot be undone. All data, bookings, memberships, and documents will be permanently removed.
Troubleshooting
App Won't Open or Crashes
- Force close the app and reopen it
- Check for app updates in the Play Store / App Store
- Restart your phone
- Clear app cache: Settings → Apps → HOCO RCS (H) → Clear Cache
- Reinstall the app if the issue persists (your data is safe — it's stored on our servers)
Login Issues
| Problem | Solution |
|---|---|
| Forgot password | Use Login with OTP for passwordless access, then change your password from Profile |
| OTP not received | Wait 2–3 minutes, check SMS spam filters, tap Resend OTP |
| "Invalid credentials" | Double-check your email/phone and password, ensure no extra spaces |
| Account locked | Wait 15 minutes after multiple failed attempts, then try again |
KYC Issues
| Problem | Solution |
|---|---|
| Upload fails | Use JPEG or PNG format, under 5 MB, with a clear image |
| OCR reads wrong data | Manually correct fields on the review screen before submitting |
| KYC rejected | Check the rejection reason, re-upload clearer documents |
| Stuck on upload | Check your internet connection, try on WiFi |
Payment Issues
| Problem | Solution |
|---|---|
| Payment failed | Wait 5 minutes, check booking status, then retry |
| Money debited but shows failed | Wait 30 minutes — auto-refund in 5–7 days if truly failed |
| Gateway not loading | Check internet, try a different payment method |
| "Transaction timeout" | Use a stable connection, avoid peak hours (9–10 AM, 6–8 PM) |
Other Issues
| Problem | Solution |
|---|---|
| Plots not loading | Pull down to refresh, check internet connection |
| Location not detected | Enable GPS, grant location permission in phone Settings |
| Notifications not arriving | Check notification settings in the app and your phone's Settings |
| App running slow | Clear cache, update to the latest version, close background apps |
Contact support at support@orangenest.in with your registered email and a description of the issue.
Quick Reference
Complete User Journey
Install App → Register → Login
    ↓
Complete KYC Verification
    ↓
Join a Housing Society (Membership)
    ↓
Fill Membership Forms (Form 16 & 17)
    ↓
Browse Layouts → Search & Filter → View Details
    ↓
Select Plot → Hold → Review → Pay
    ↓
Booking Confirmed → Track in My Bookings
    ↓
Make Milestone Payments as Scheduled
Keyboard Shortcuts
| Action | Where |
|---|---|
| Pull down | Refresh any list screen |
| Swipe left | Remove a favorite |
| Tap & hold | Preview plot details on map |
| Back gesture/button | Navigate to previous screen |
Next Steps
- Browse available layouts on the web portal
- Understand the full payment process
- Review FAQs for quick answers
- Having trouble? Check Common Issues